Installing the Raspberry Pi 7″ LCD Display
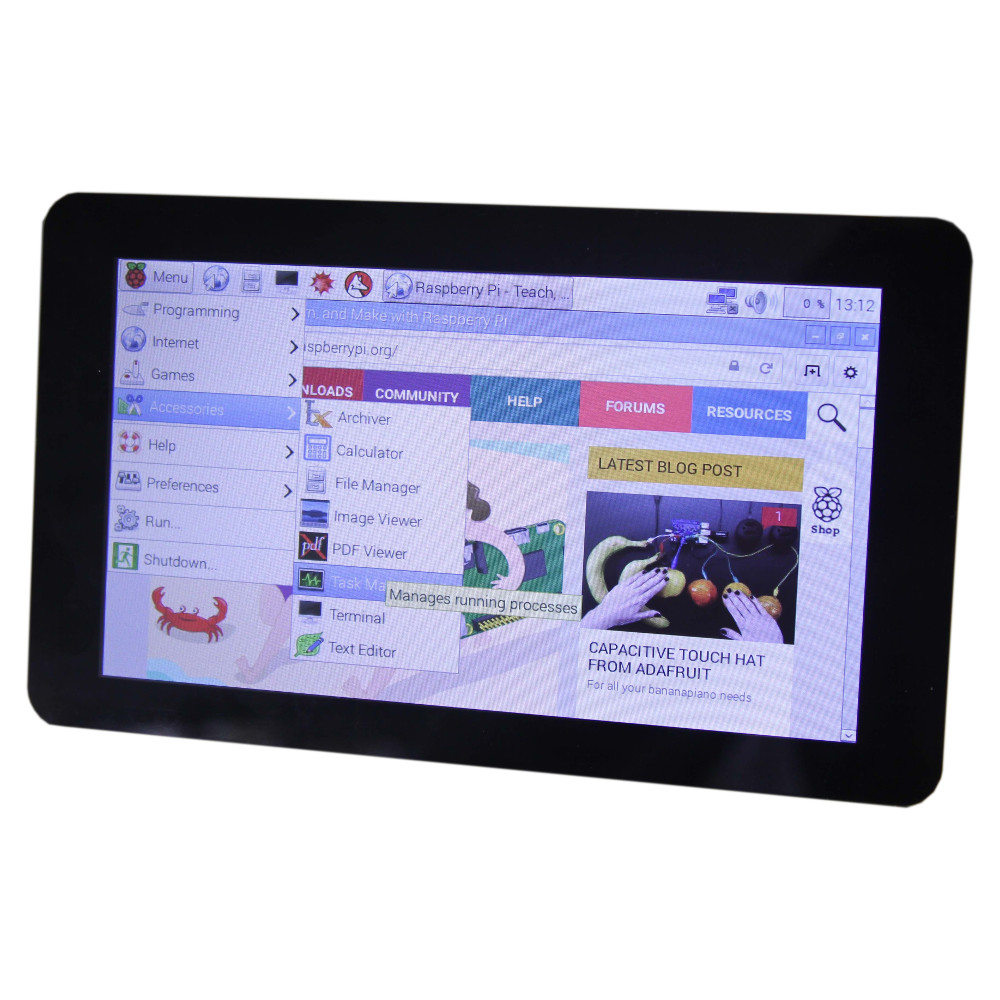
Circuit Specialists is now stocking the 7 Inch LCD Touchscreen Display for the Raspberry Pi. This display offers a 800 x 480 display with 10 point touchscreen input.
To install this onto the Raspberry Pi you will need to follow the steps from listed below.
Required components:
- Raspberry Pi board
- MicroSD card with the Raspbian operating system installed
- Raspberry Pi 7″ LCD Display Board
- Minimum 2 Amp 5 Volt power supply with a MicroUSB cable
The LCD Display board ships with the display controller board installed onto the back of the LCD panel and has 4 standoffs attached for the Raspberry Pi to mount to.
Step 1
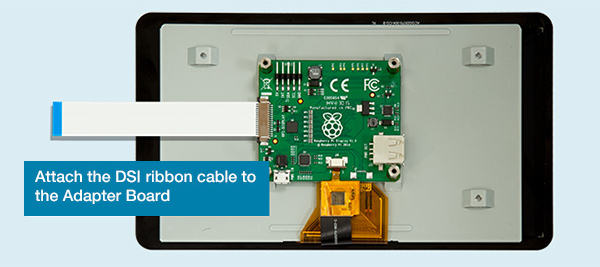
With the LCD laying flat with the Controller board facing up and the brown ribbon cable assembly facing you, locate the DSI ribbon cable connector on the left side of the controller board. The connector has a release latch that needs to be gently slid slightly out to the left. Once the latch is released, insert the DSI ribbon cable into the slot with the writing facing down and gently slide the release latch back to the right.
Step 2
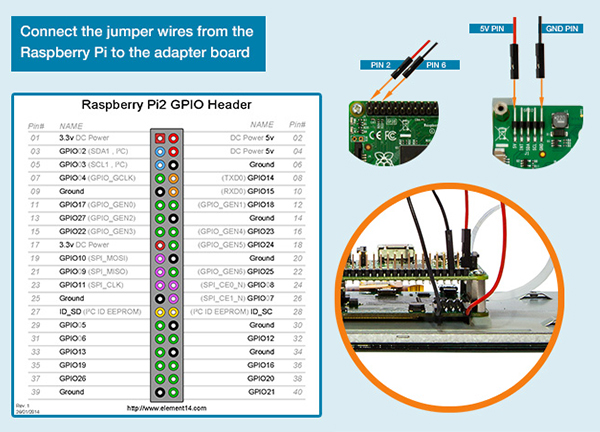
There are 4 jumper wires (Red, Black, Yelow & Green) that connect to the following pins on the LCD controller board:
- Red wire to pin marked 5V
- Green wire to pin marked SDA
- Yellow wire to pined marked SCL
- Black wire to pin marked GND
The other end of the wires will connect to the following pins on the Raspberry Pi computer board:
- Red wire to pin 2
- Green wire to pin 3
- Yellow wire to pin 4
- Black wire to pin 6
(Please take care to double check the pin wiring as reversing the power connection or incorrect pin placement could damage both boards if power is applied.)
Step 3
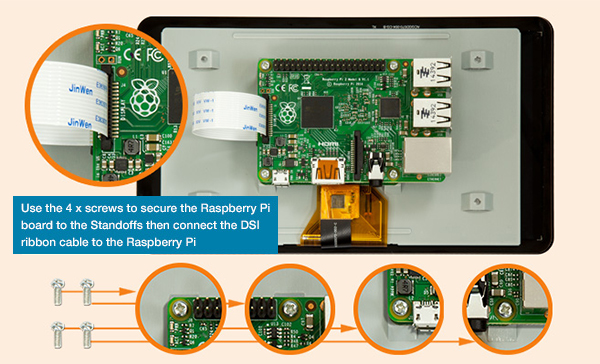
Using the 4 small screws provided with the LCD board attach the Raspberry Pi computer board to the standoffs on the controller card. The computer board should be attached with the ethernet and USB ports facing to the right and the DSI ribbon connector to the left. Next connect the DSI ribbon cable to the computer board by gently releasing the latch on the DSI connector by gently lifting up to release the latch. Slide the DSI ribbon cable into the slot with the writing facing up and to the right. Once the cable is inserted into the slot gently push the latch back down locking the cable into place.
Step 4
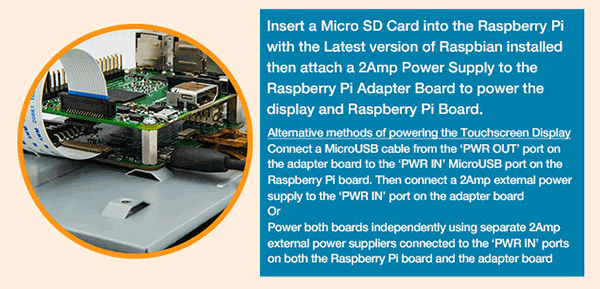
Insert your MicroSD card into the Raspberry Pi computer board and attach the 2 Amp power supply connector to the MicroUSB connector on the LCD controller board (Not to the Raspberry Pi computer board)
The Raspberry Pi computer board’s DSI lines are disabled by default. To enable detection, add the following line to /boot/config.txt:
ignore_lcd=0
It is easier to set this up by connecting a HDMI monitor and USB keyboard/mouse prior to installing the LCD module.
It is also recommended that a `Right Click’ function is enabled to emulate a right mouse click on the touchscreen.
You can emulate a right click with a setting change. Just:
sudo nano /etc/X11/xorg.confPaste in:
Section "InputClass"
   Identifier "calibration"
   Driver "evdev"
   MatchProduct "FT5406 memory based driver"

   Option "EmulateThirdButton" "1"
   Option "EmulateThirdButtonTimeout" "750"
   Option "EmulateThirdButtonMoveThreshold" "30"
EndSection
Hit CTRL+X and y to save. Then:
sudo rebootOnce enabled, right click works by pressing and holding the touchscreen and will be activated after a short delay.
There are two different onscreen keyboards available for the Raspberry Pi, pick ONE of the two to install:
FLORENCE VIRTUAL KEYBOARD
Install with:
sudo apt-get install florence
MATCHBOX VIRTUAL KEYBOARD
Install with:
sudo apt-get install matchbox-keyboard
After installation, the installed keyboard can be found in Accessories > Keyboard.
To ensure that the most current drivers and modules are present on your Raspberry Pi, you should also perform the following steps:
- Connect your Raspberry Pi to the Internet and then open LX Terminal.
- Type ‘sudo apt-get update’ to download the latest version of the OS.
- Once that’s complete, type ‘sudo apt-get upgrade’ to apply the download to your Raspberry Pi.
- Type `sudo reboot’ to restart the computer enabling the newer drivers and touchscreen functions.
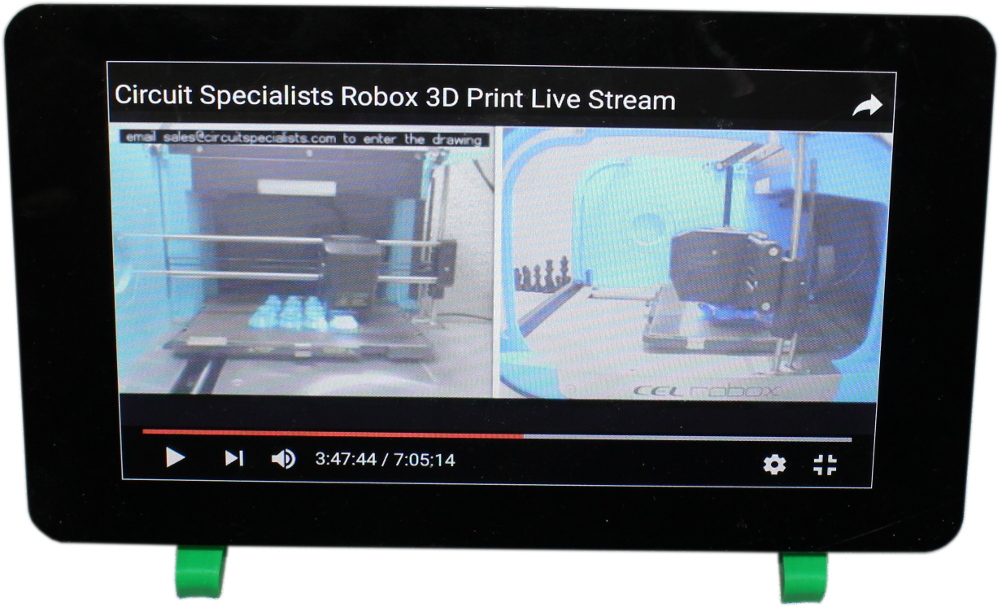
If you happen to have a 3D printer, check out Thingiverse.com items 1021025, 1044720, & 1007785 for some interesting stands to hold the Raspberry Pi and LCD display.
We printed the 1044720 stand and it turned out perfectly for the Raspberry Pi 3 Model B.