From Prototype on PBB-272B To a Finished Product
We hope that you follow our Power Breadboard Projects series and that is why you are here to turn the prototype on PBB-272B into a finished product. This article will provide everything you need to know to turn any prototype into a finished product. We will use the last couple of projects the Police Siren Circuit and the Police LED Flashing Circuit for this project.
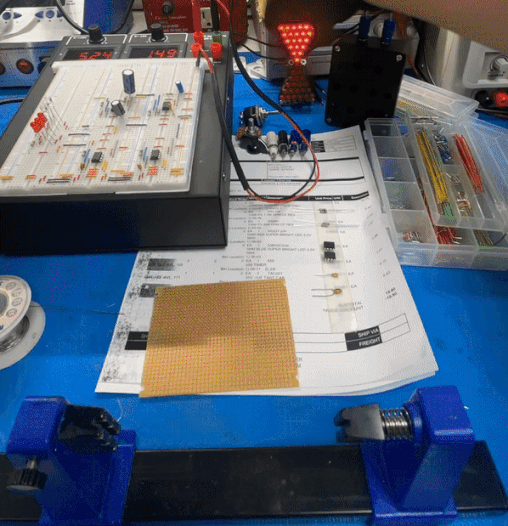
Table of Content
- Part List
- What is an Emergency! Box
- Build the Circuits onto a Solderable Board
- How to Cut the Pattern for Speaker and Light
- How to wire the Emergency! Box
- Conclusion
Part List
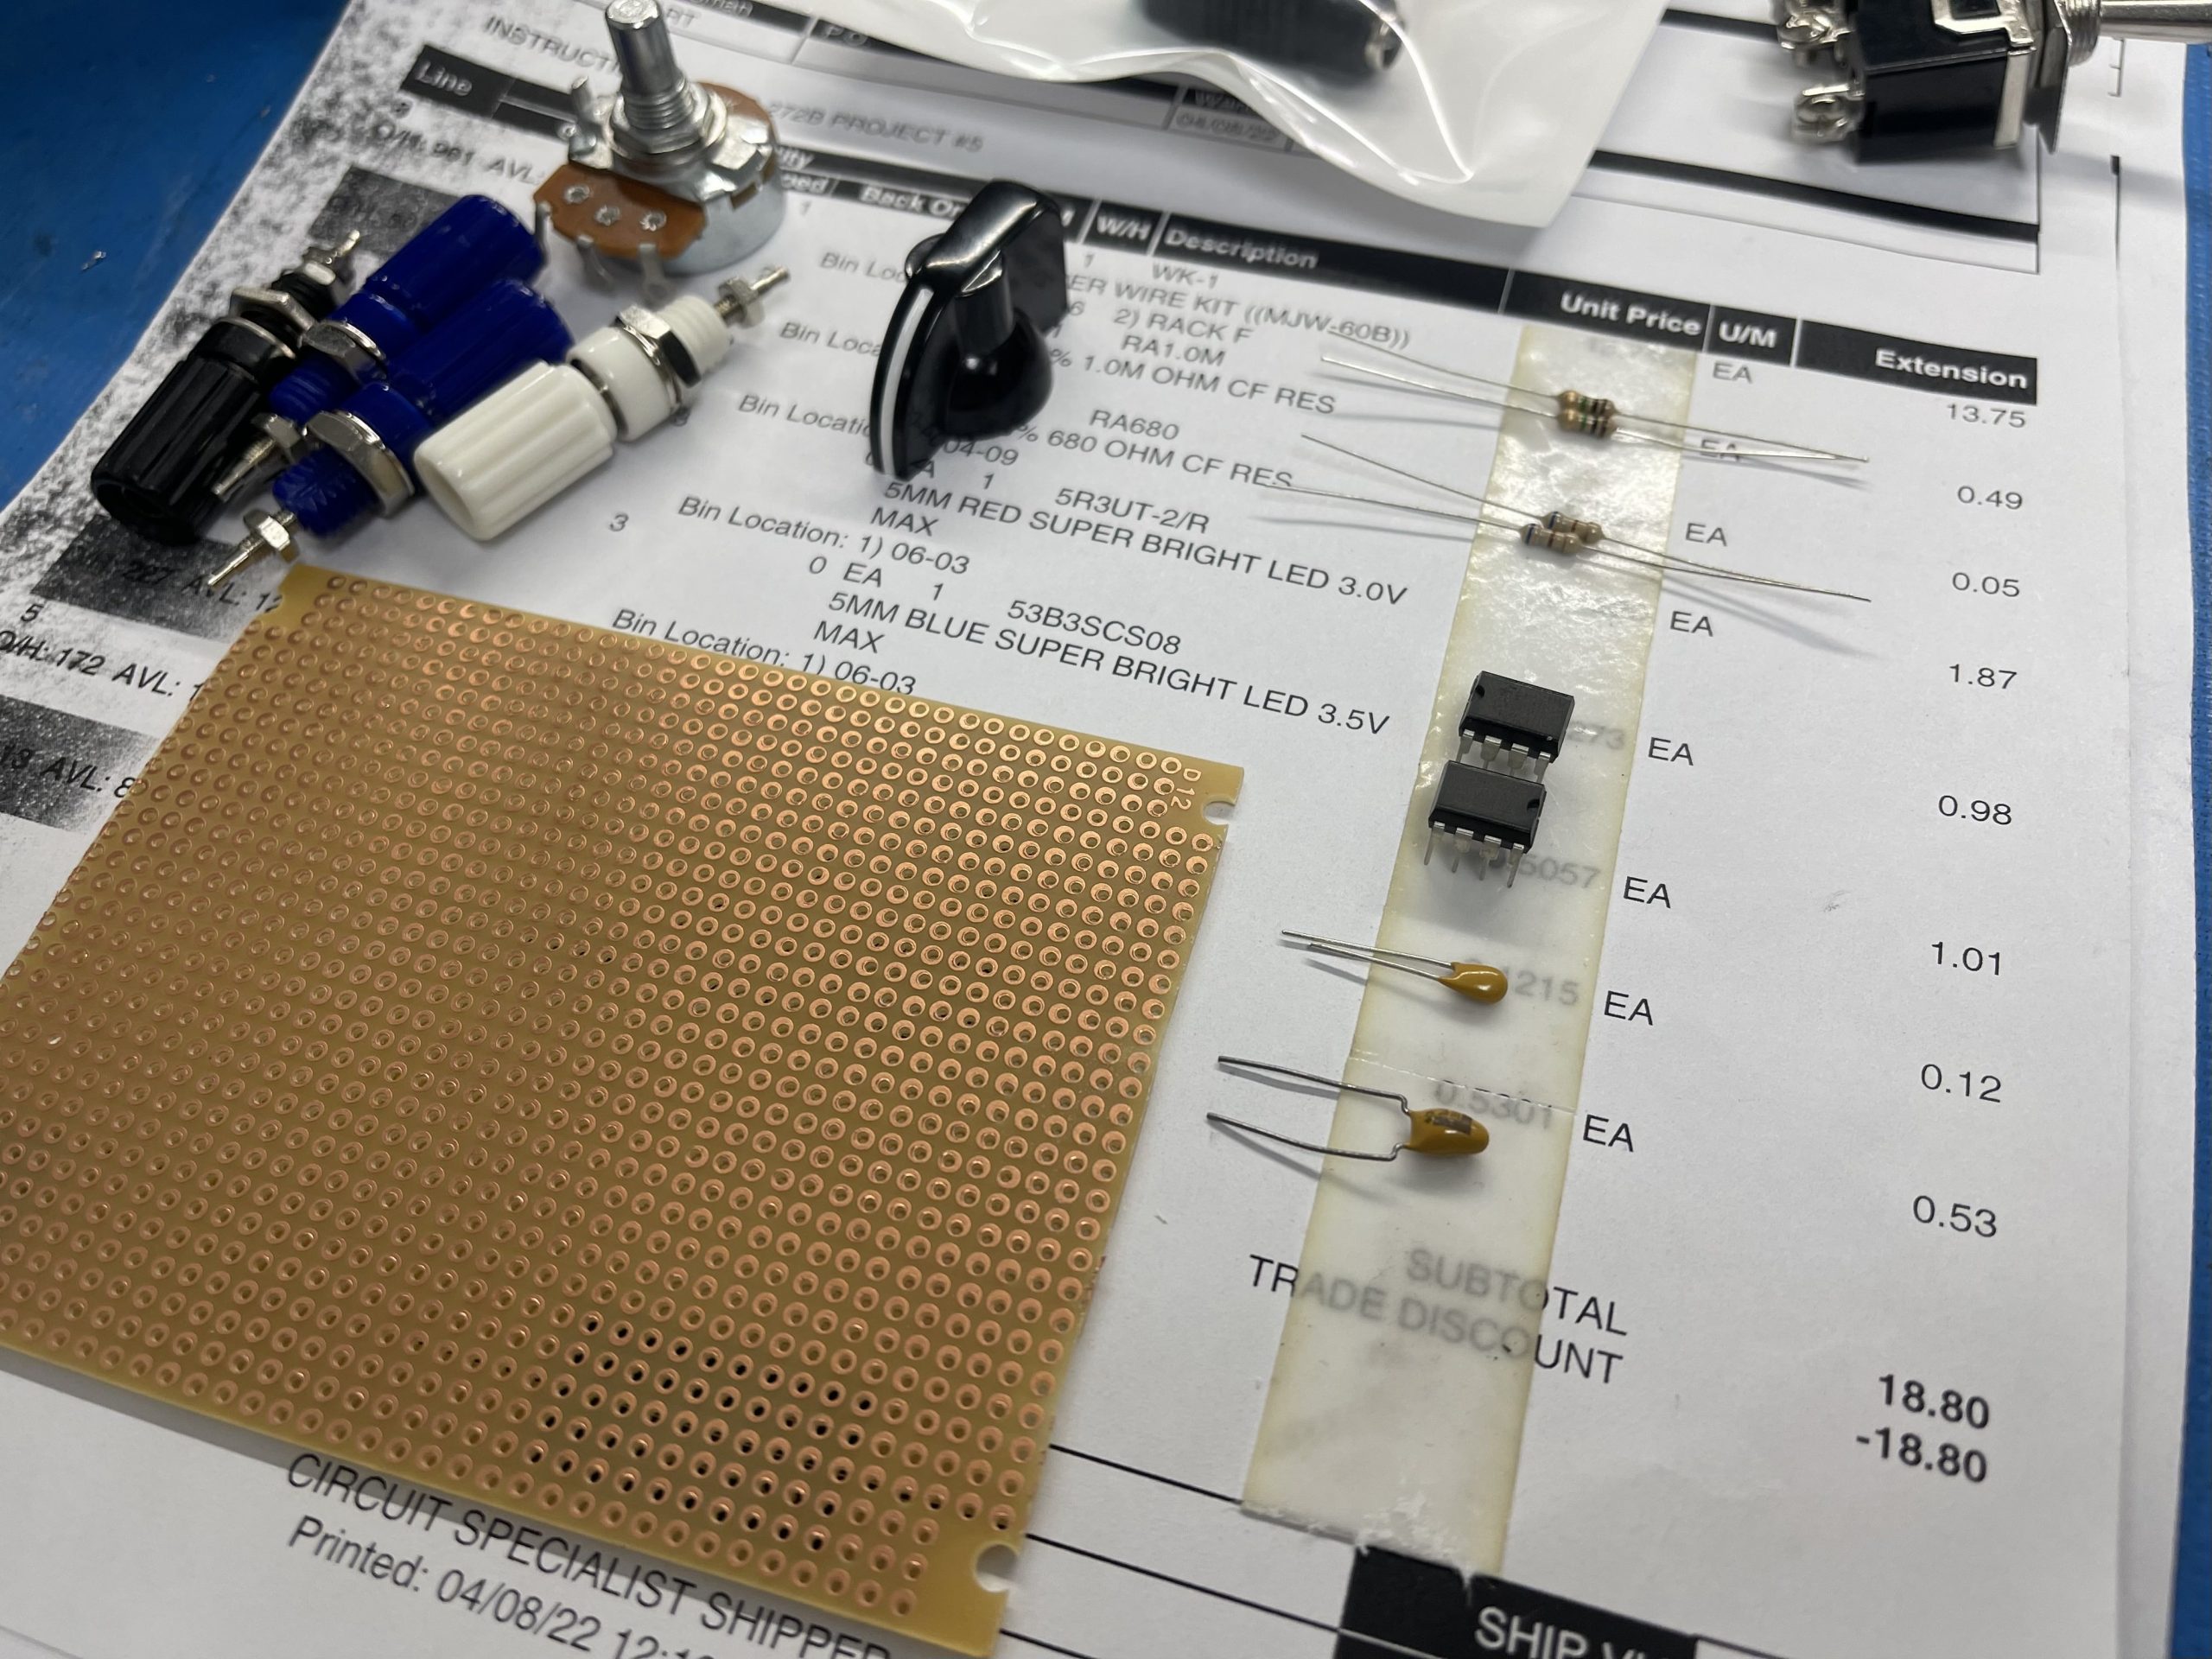
- Police LED Flashing Circuit Project
- Police Siren Circuit Project
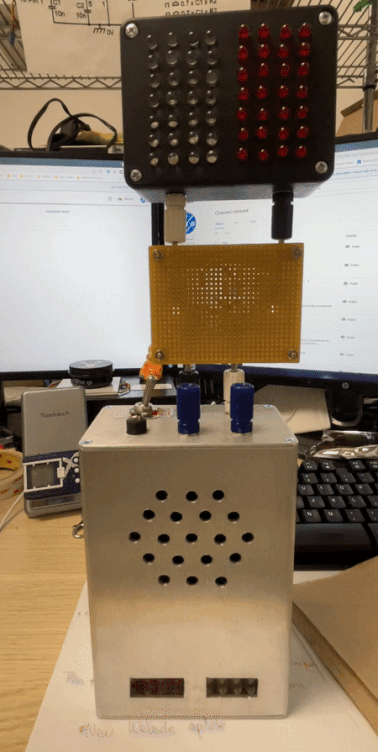
- Aluminum Enclosure
- 4 Binding Postes
- On/Off/On Switch
- 2 Solderable Boards
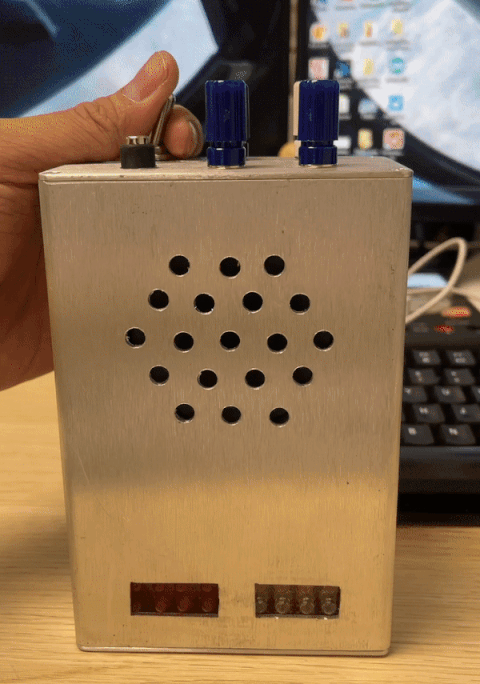
What is an Emergency! Box
By definition, a box containing the equipment, supplies, and medications needed to provide an initial assessment and manage life-threatening conditions. In this case, our box provided a sound and light beacon during emergency situations such as storms, car accidence, etc.
Build the Circuits onto a Solderable Board
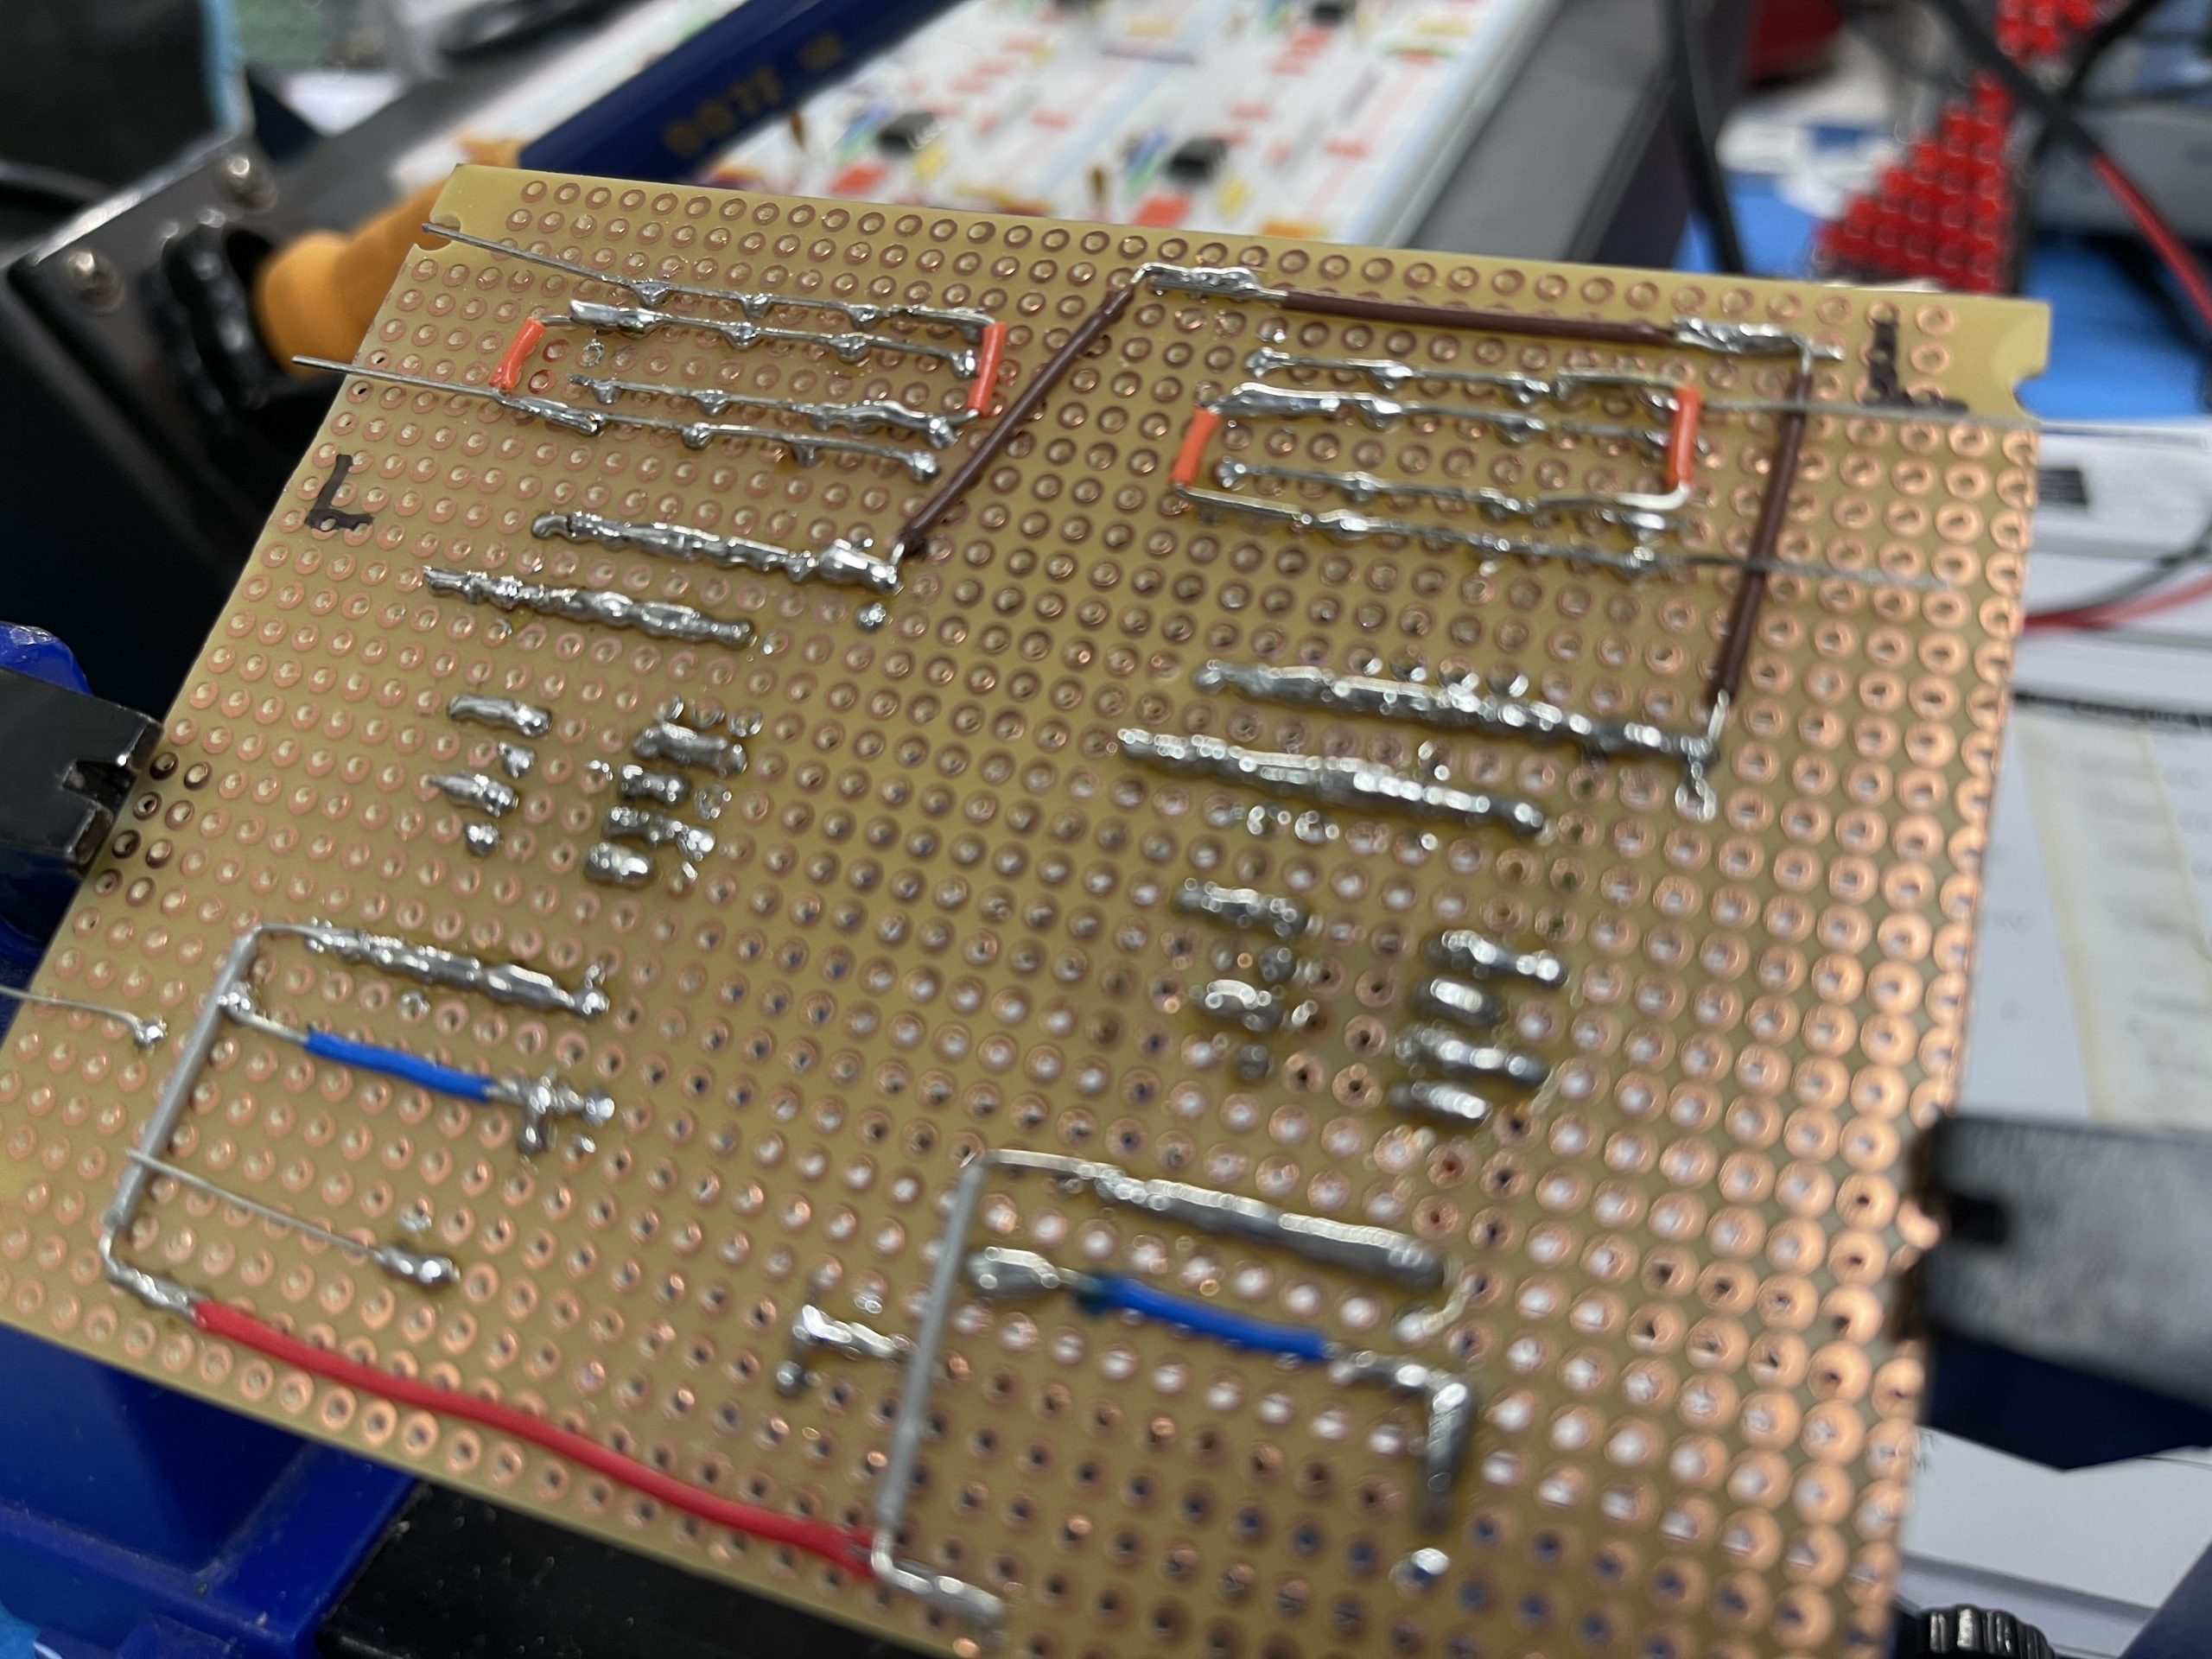
First, lay down the components.
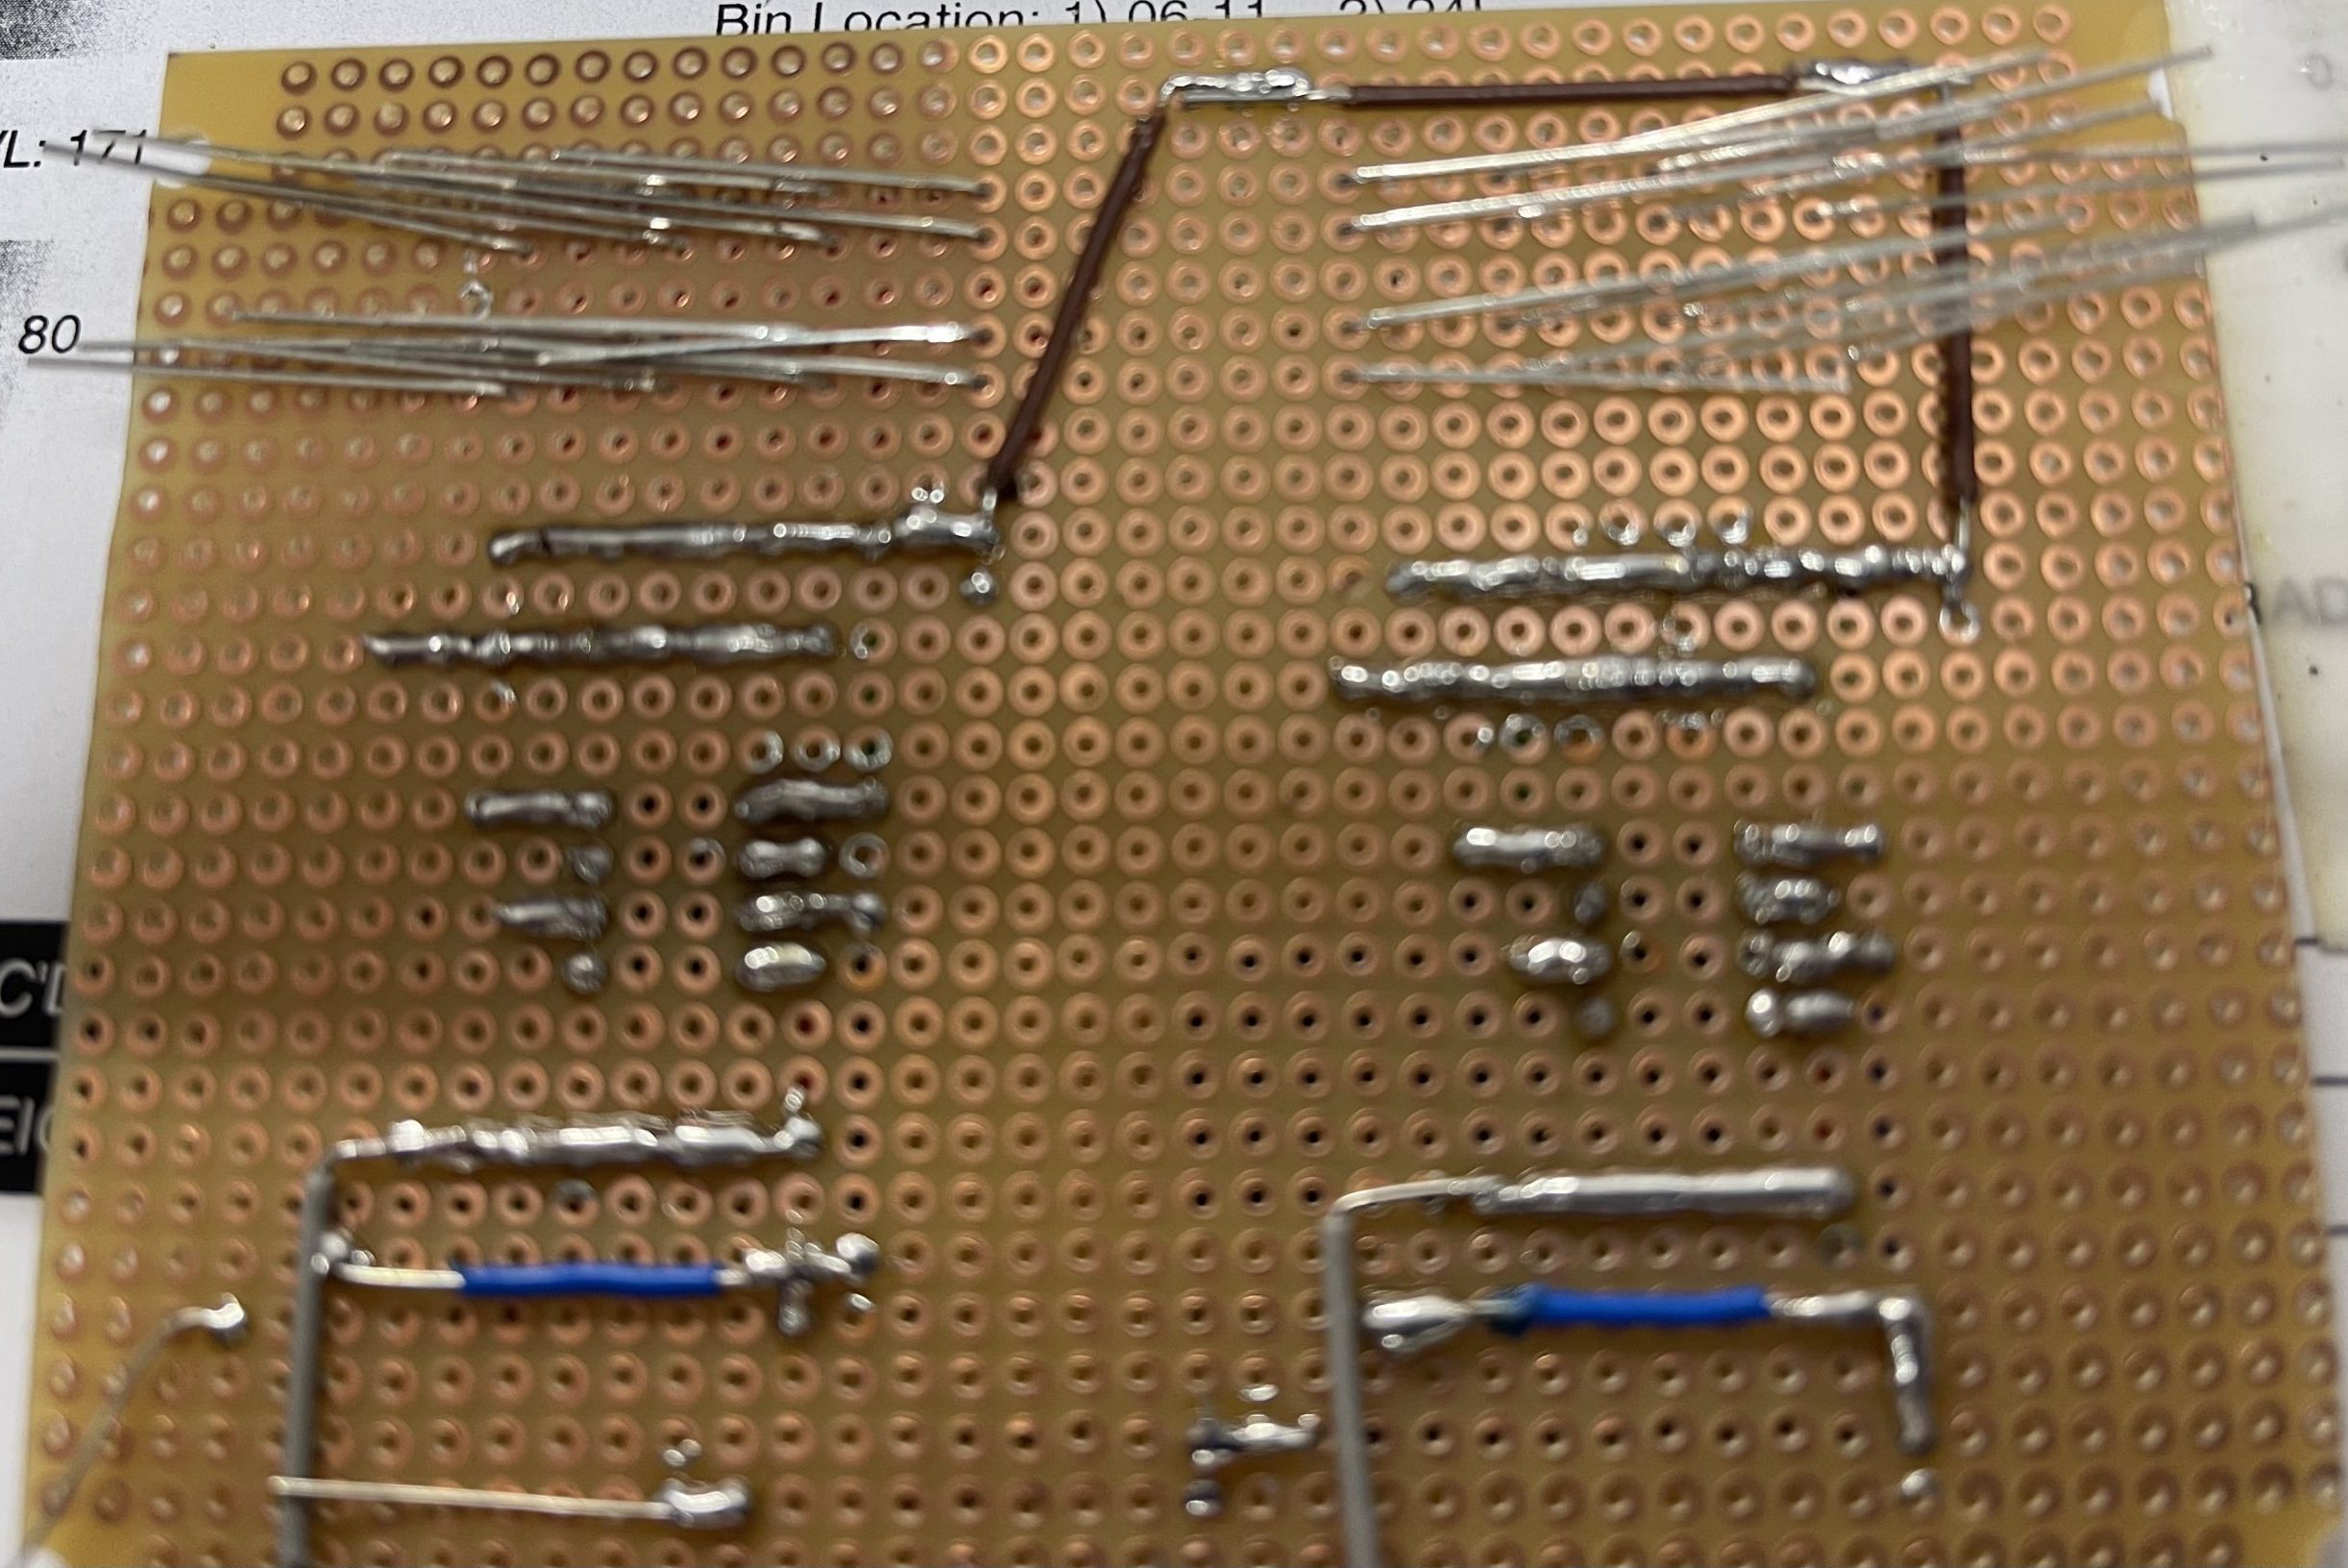
Then solder the path accordingly to the schematic.
How to Cut the Pattern for Speaker and Light
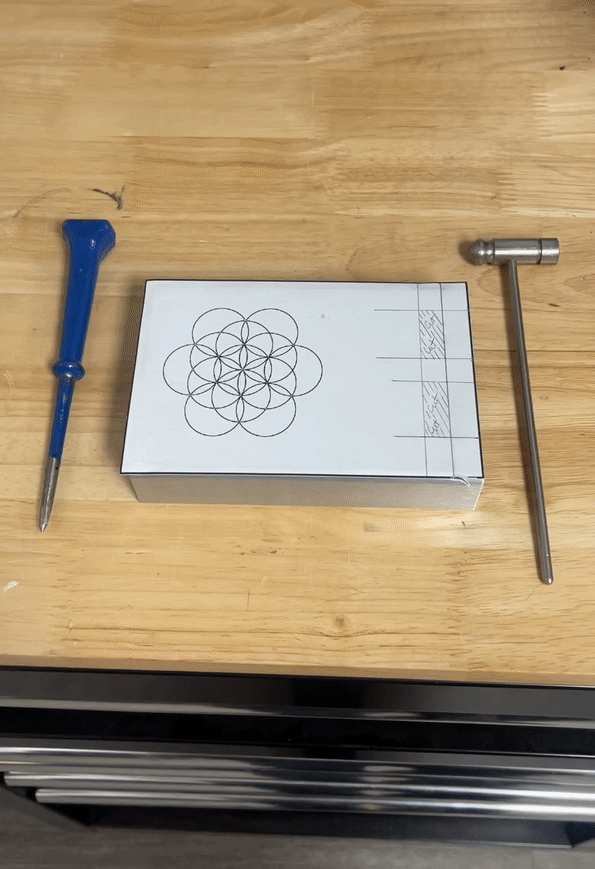
First, print the pattern.
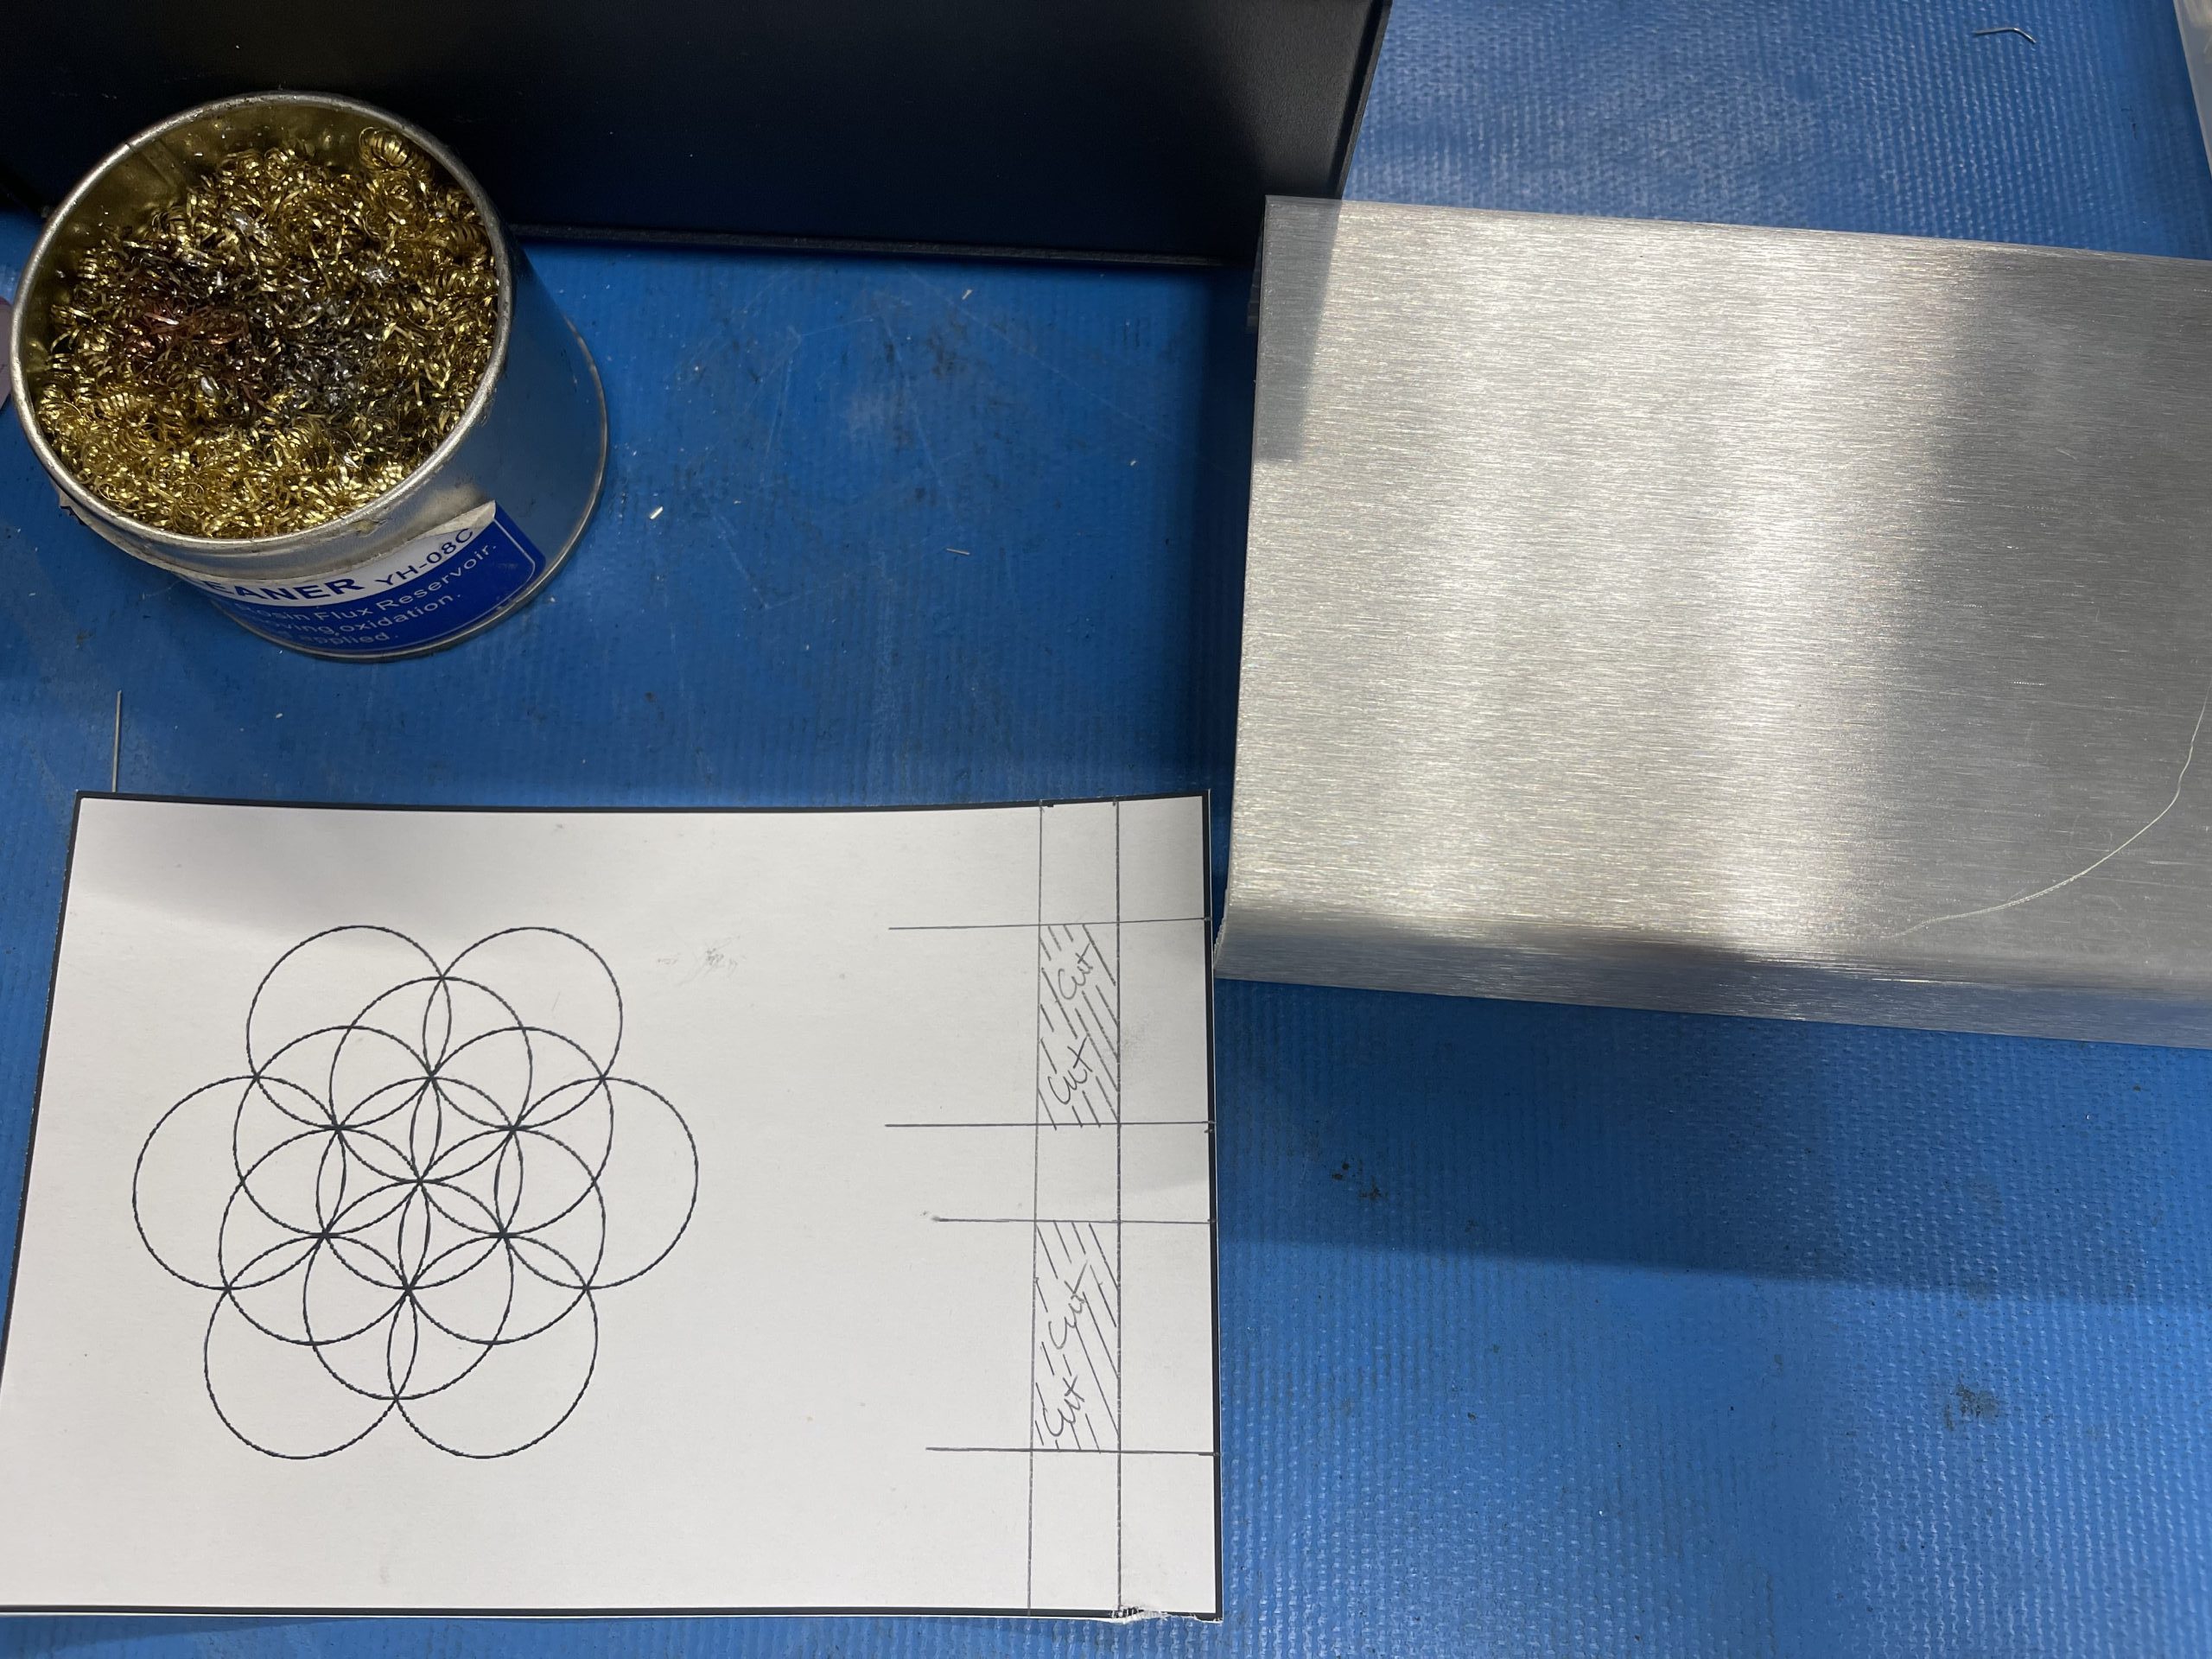
Then, snap your finger!
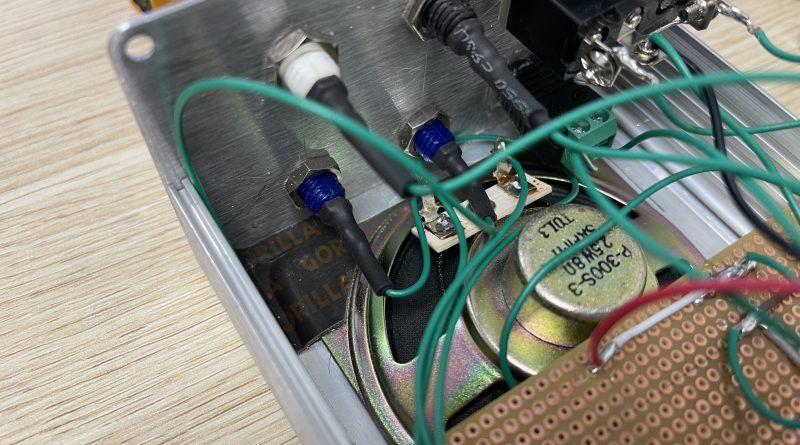
How to wire the Emergency! Box
First look at the schematic.
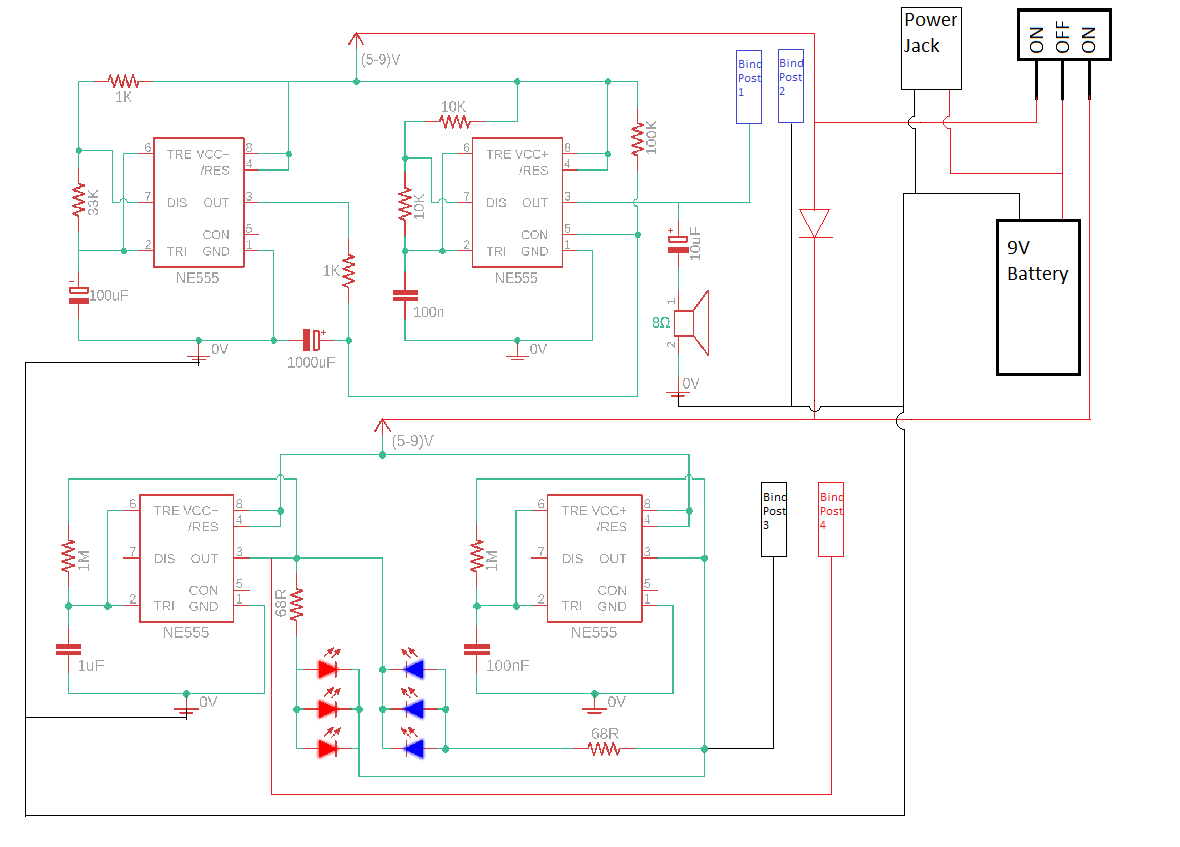
Then solder accordingly.
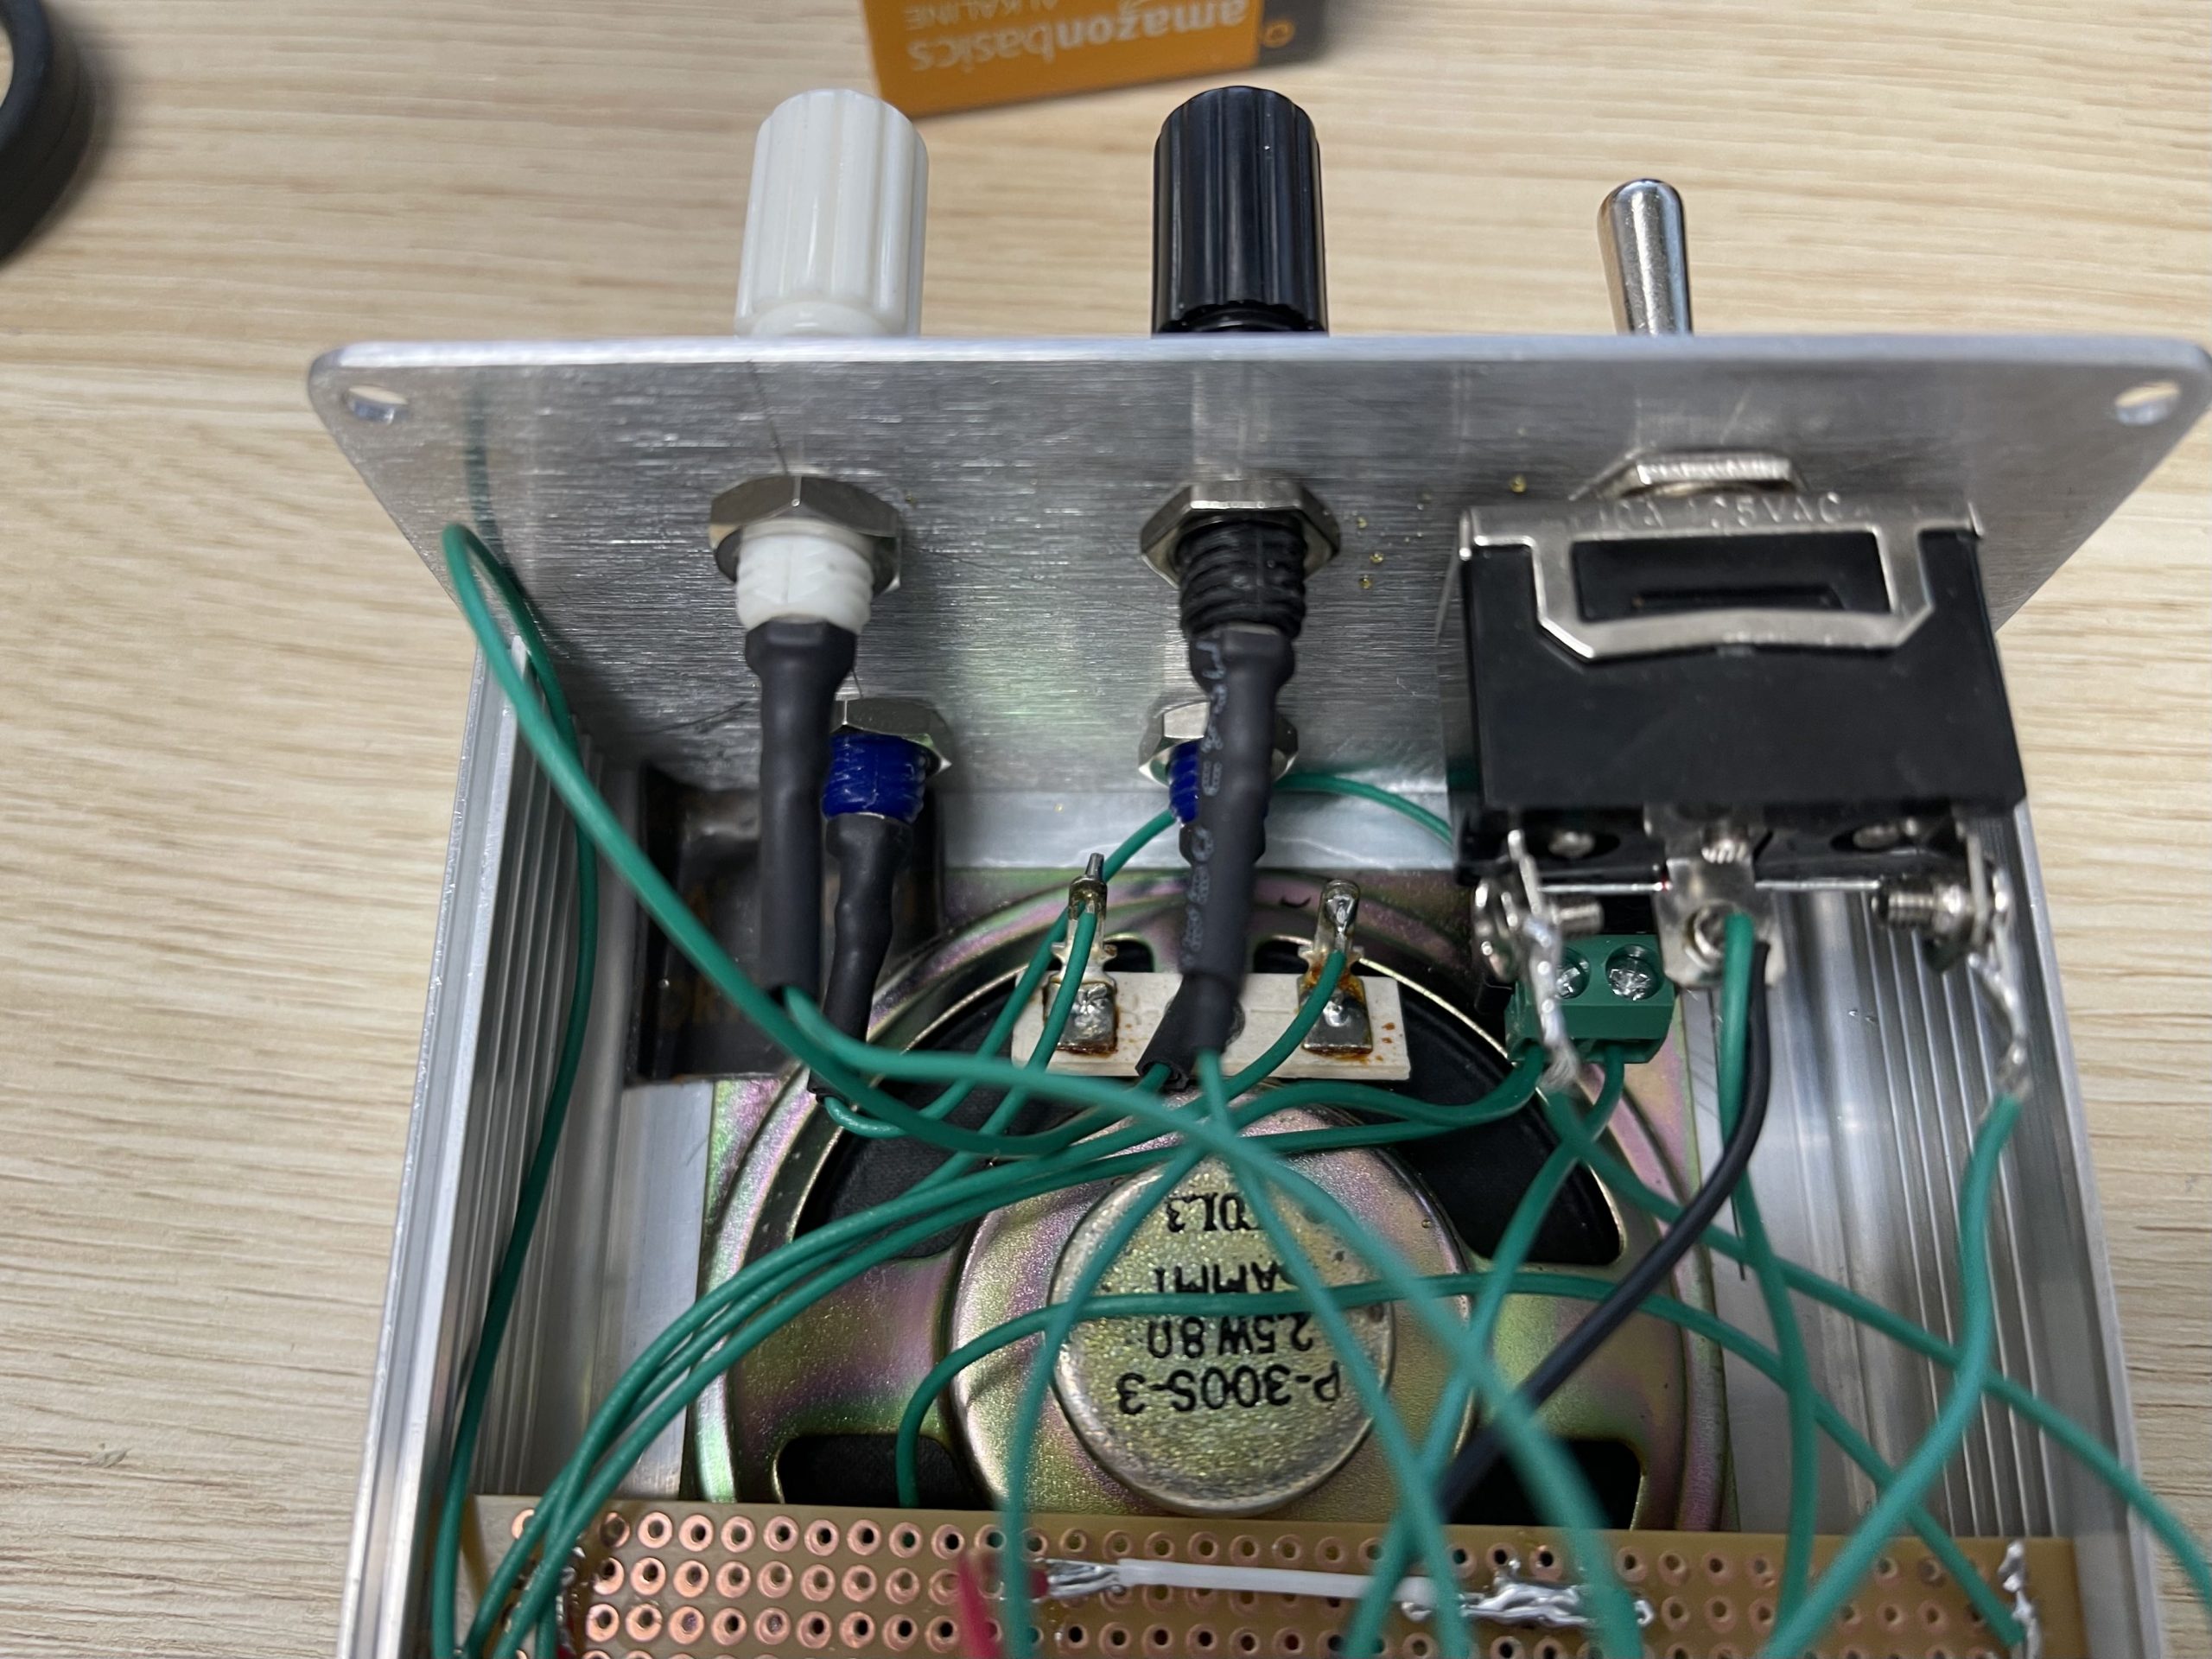
Finally, connect the battery before closing the unit up.
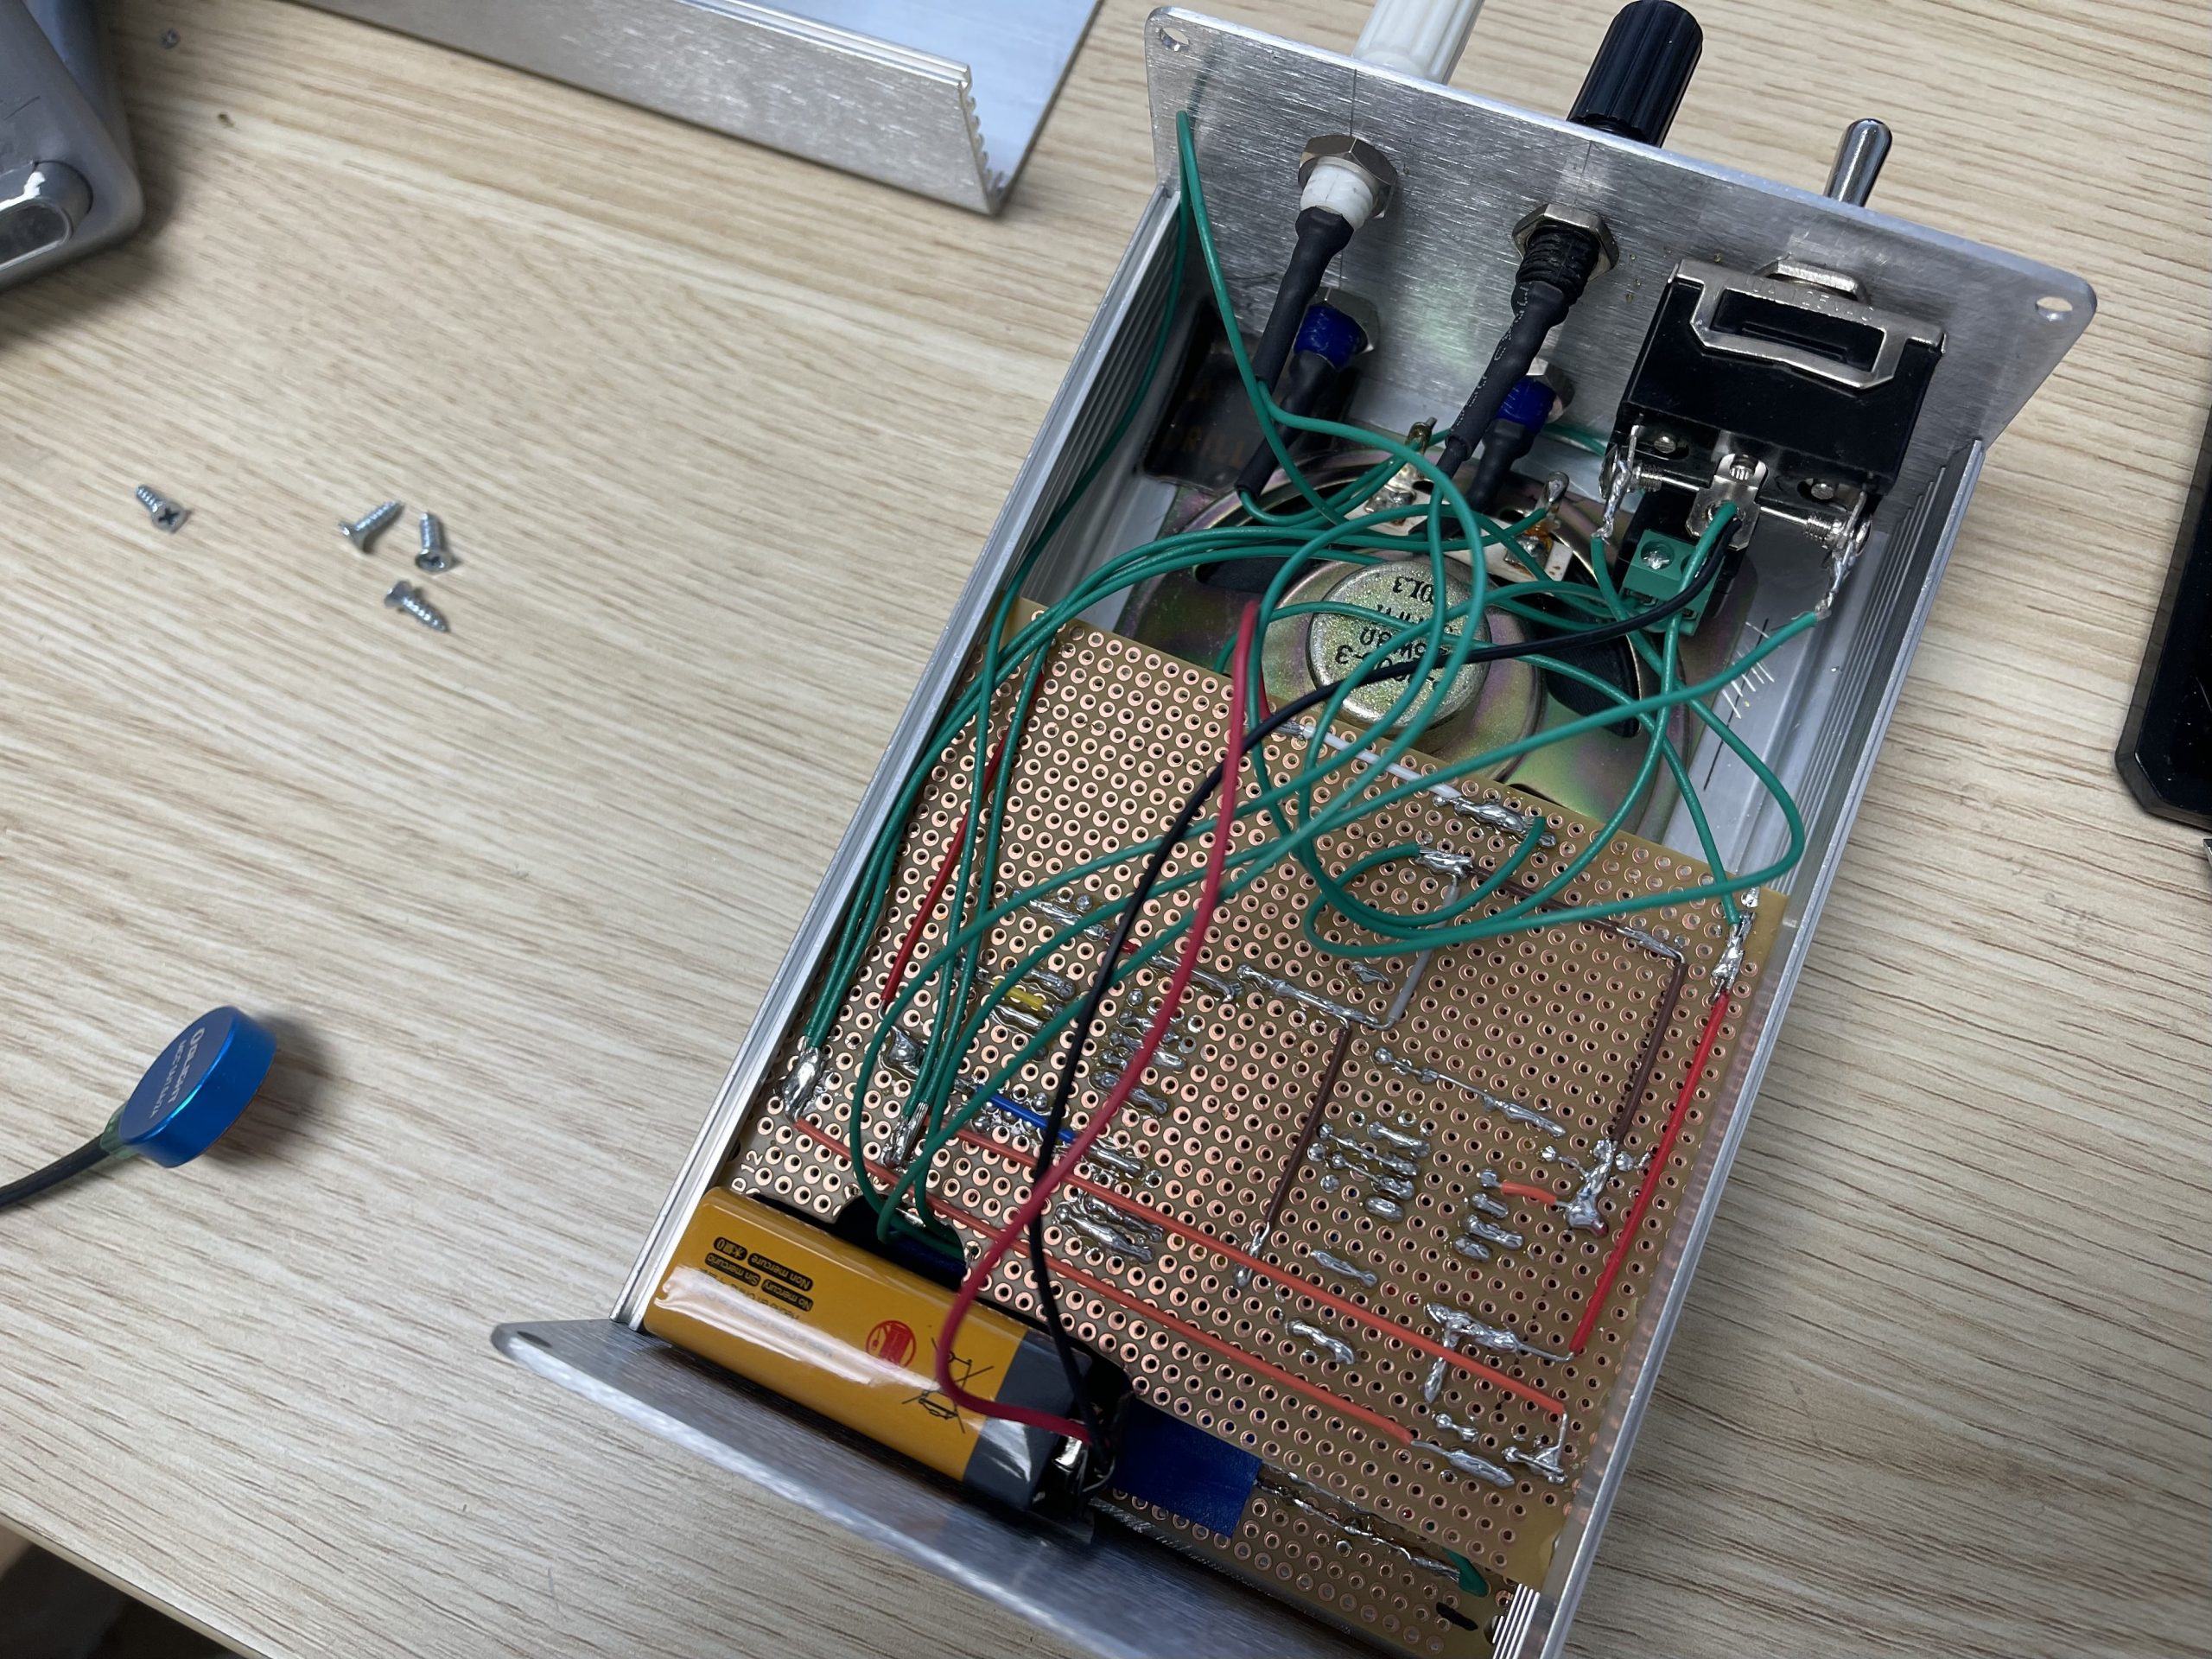
Reassemble the enclosure after testing.
For a Full Demo Video: https://youtube.com/shorts/6z5OHaNSFnI
Conclusion
We hope that this article will provide everything you need to know to turn any prototype on PBB-272B into a finished product. For this project, we use the last couple of projects the Police Siren Circuit and the Police LED Flashing Circuit for this project. The Emergency! Box is a module system in terms which more light and sound modules can be connected to the Emergency! Box to expand the area covered.