The Smart House Project – Part 4
The Smart House Project is almost at the final stage, so let’s do a recap on everything we have done so far. We have installed a LED lighting system that reacts to the outdoor light level to offer personal lighting inside. Next, we want to make sure the house has a modern security system, which means receiving live sensor data and reacting accordingly. The light sensor for the LED lighting system could also be integrated into the security system, such that the current light level would somewhat affect the security sensitivity. Last but not least, the Air Conditioning Unit System receives outdoor temperature as a factor of control. The goal is to lower the power consumption by recognizing the outdoor temperature and controlling the indoor accordingly. This system works even better when there is an option to just let the filter air in. Furthermore, the house can log this data for further analysis and ultimately integrate them into the Smart House Controlling System.
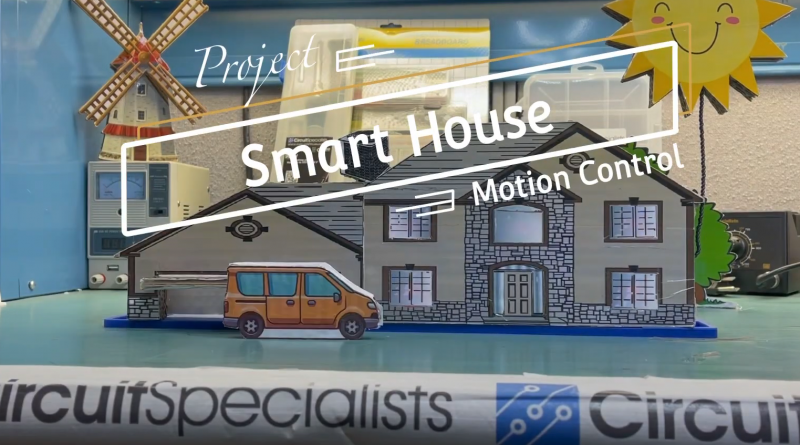
Final Chapter
In this final project, we will explore the true meaning of a 21st century smart home, where the house recognizes the occupants’ vehicle and opens the garage door. This feature will help with a family that has a lot of young children, especially after a long day of work. The Smart House Controlling System will then greet them with their preferred source of information, check on a family member, get updates on the latest news, and check up on the to-do list.
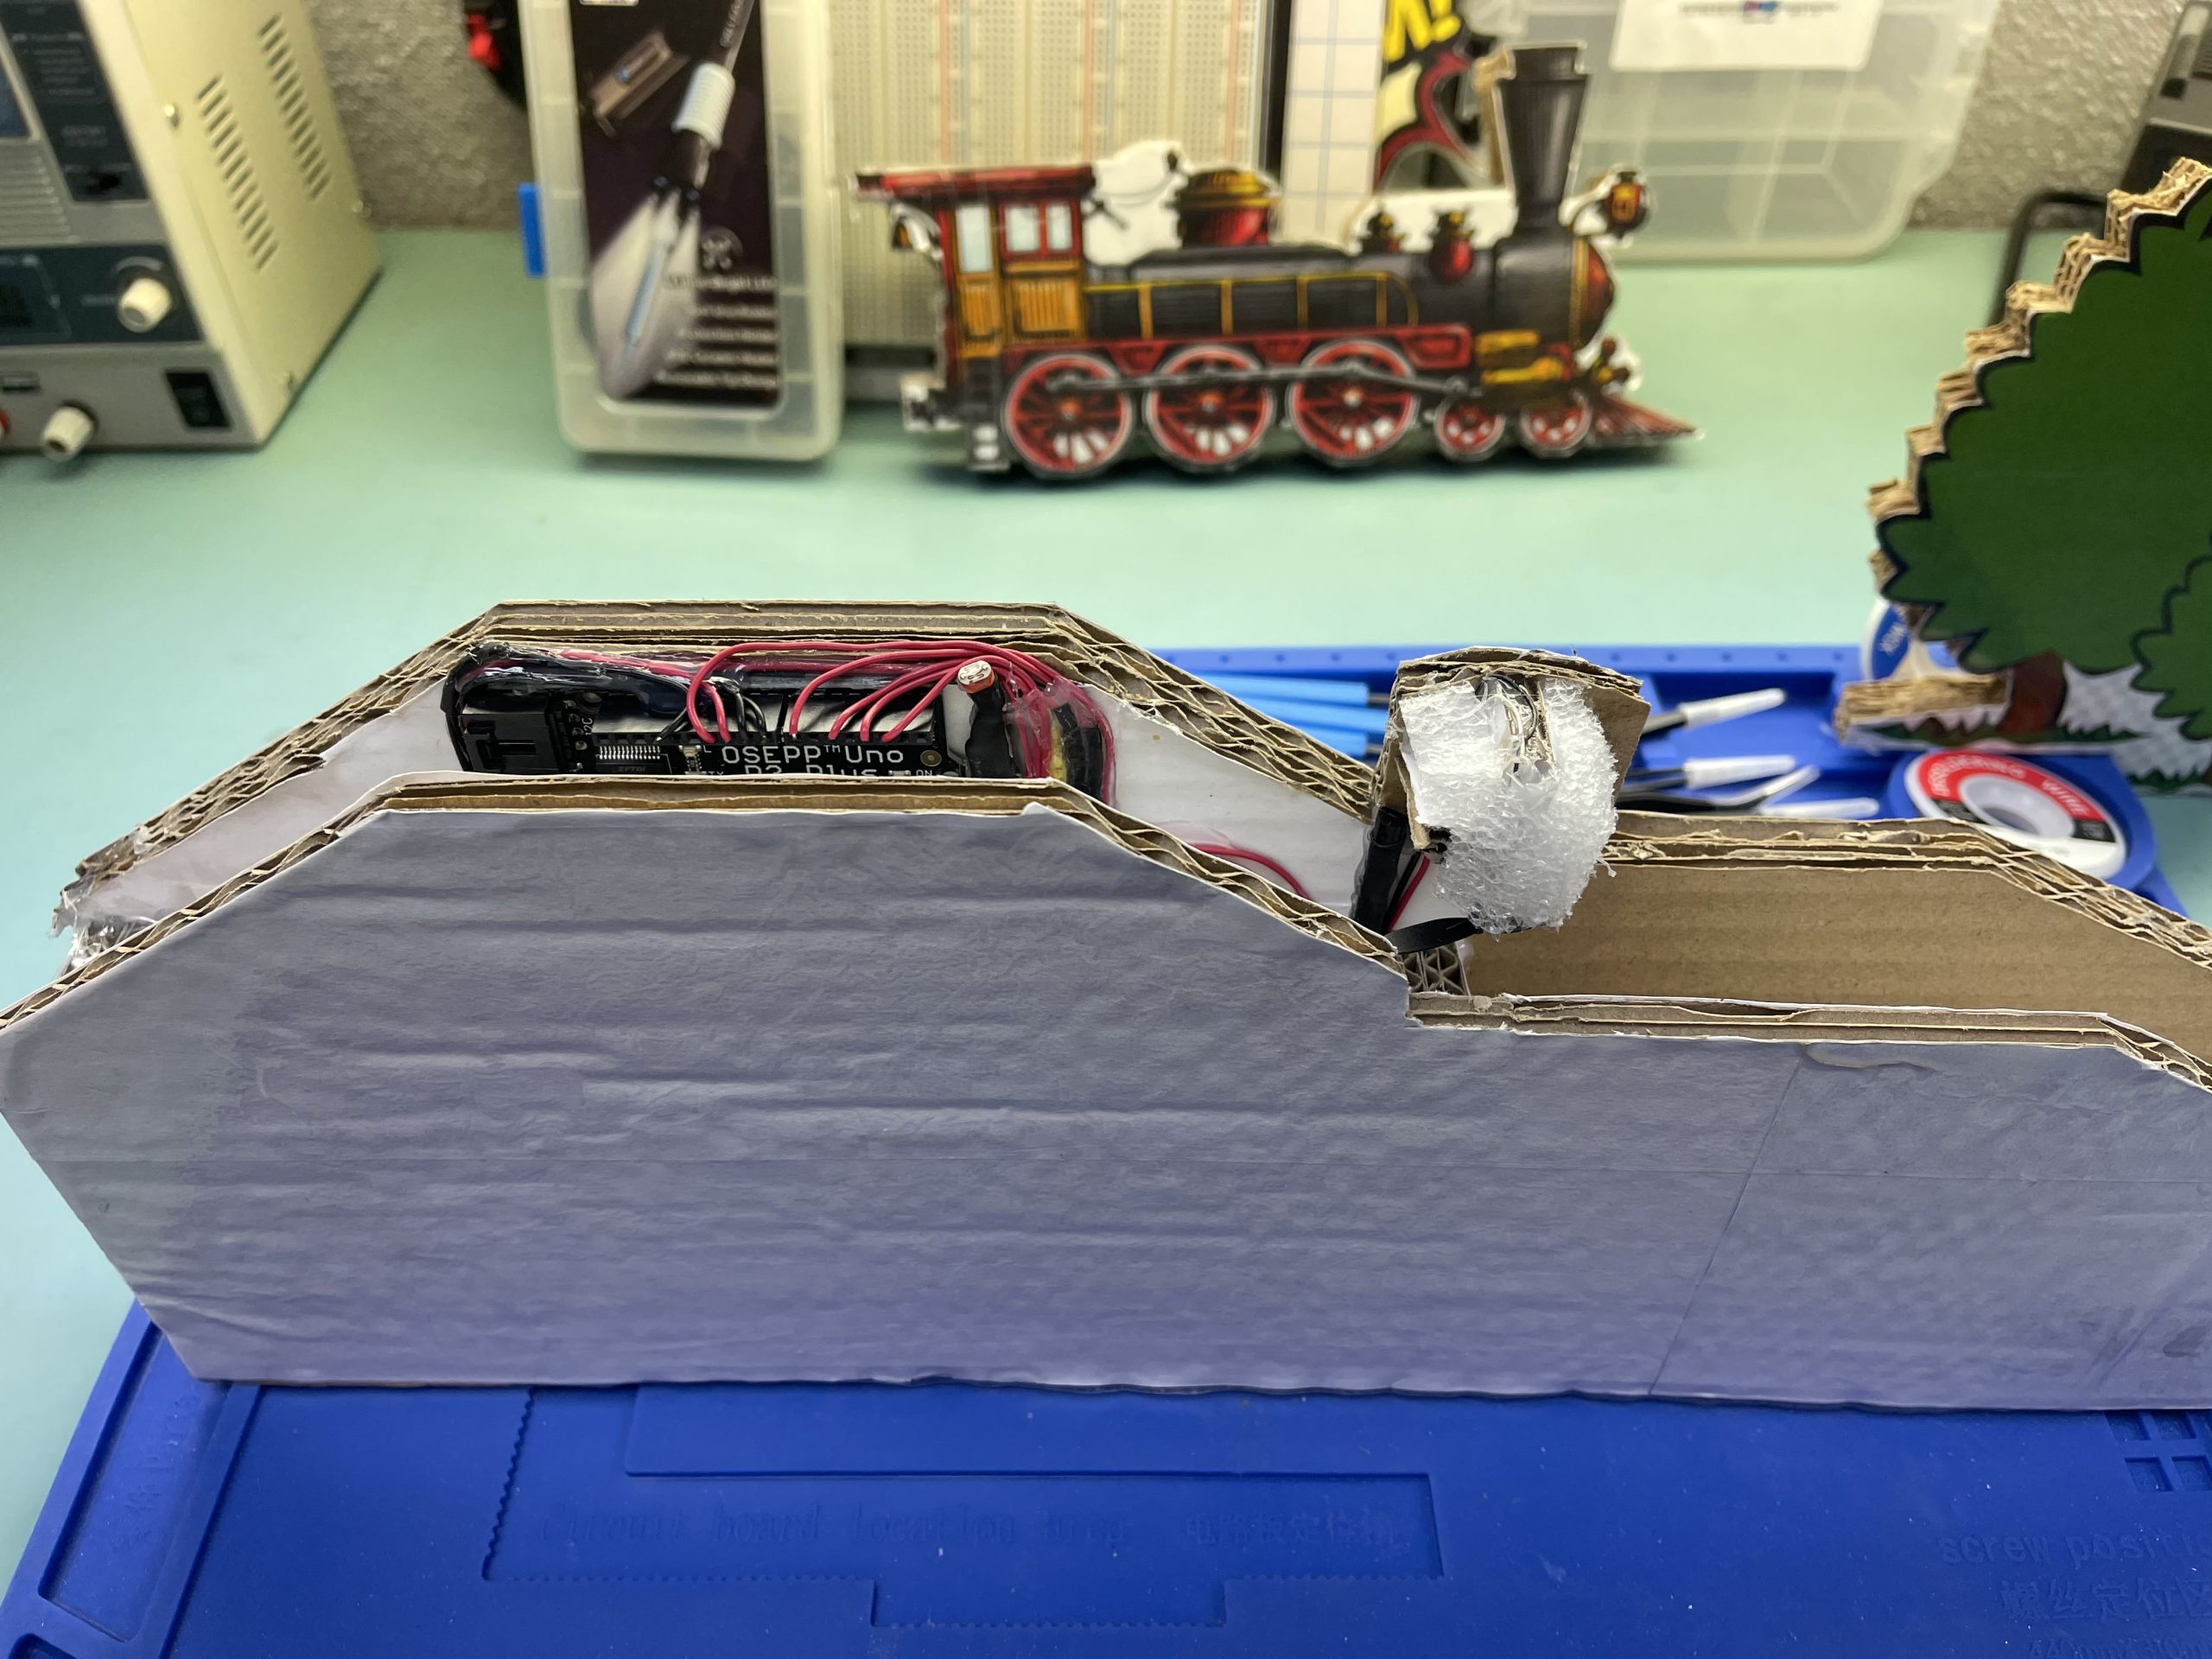
Let build the garage door
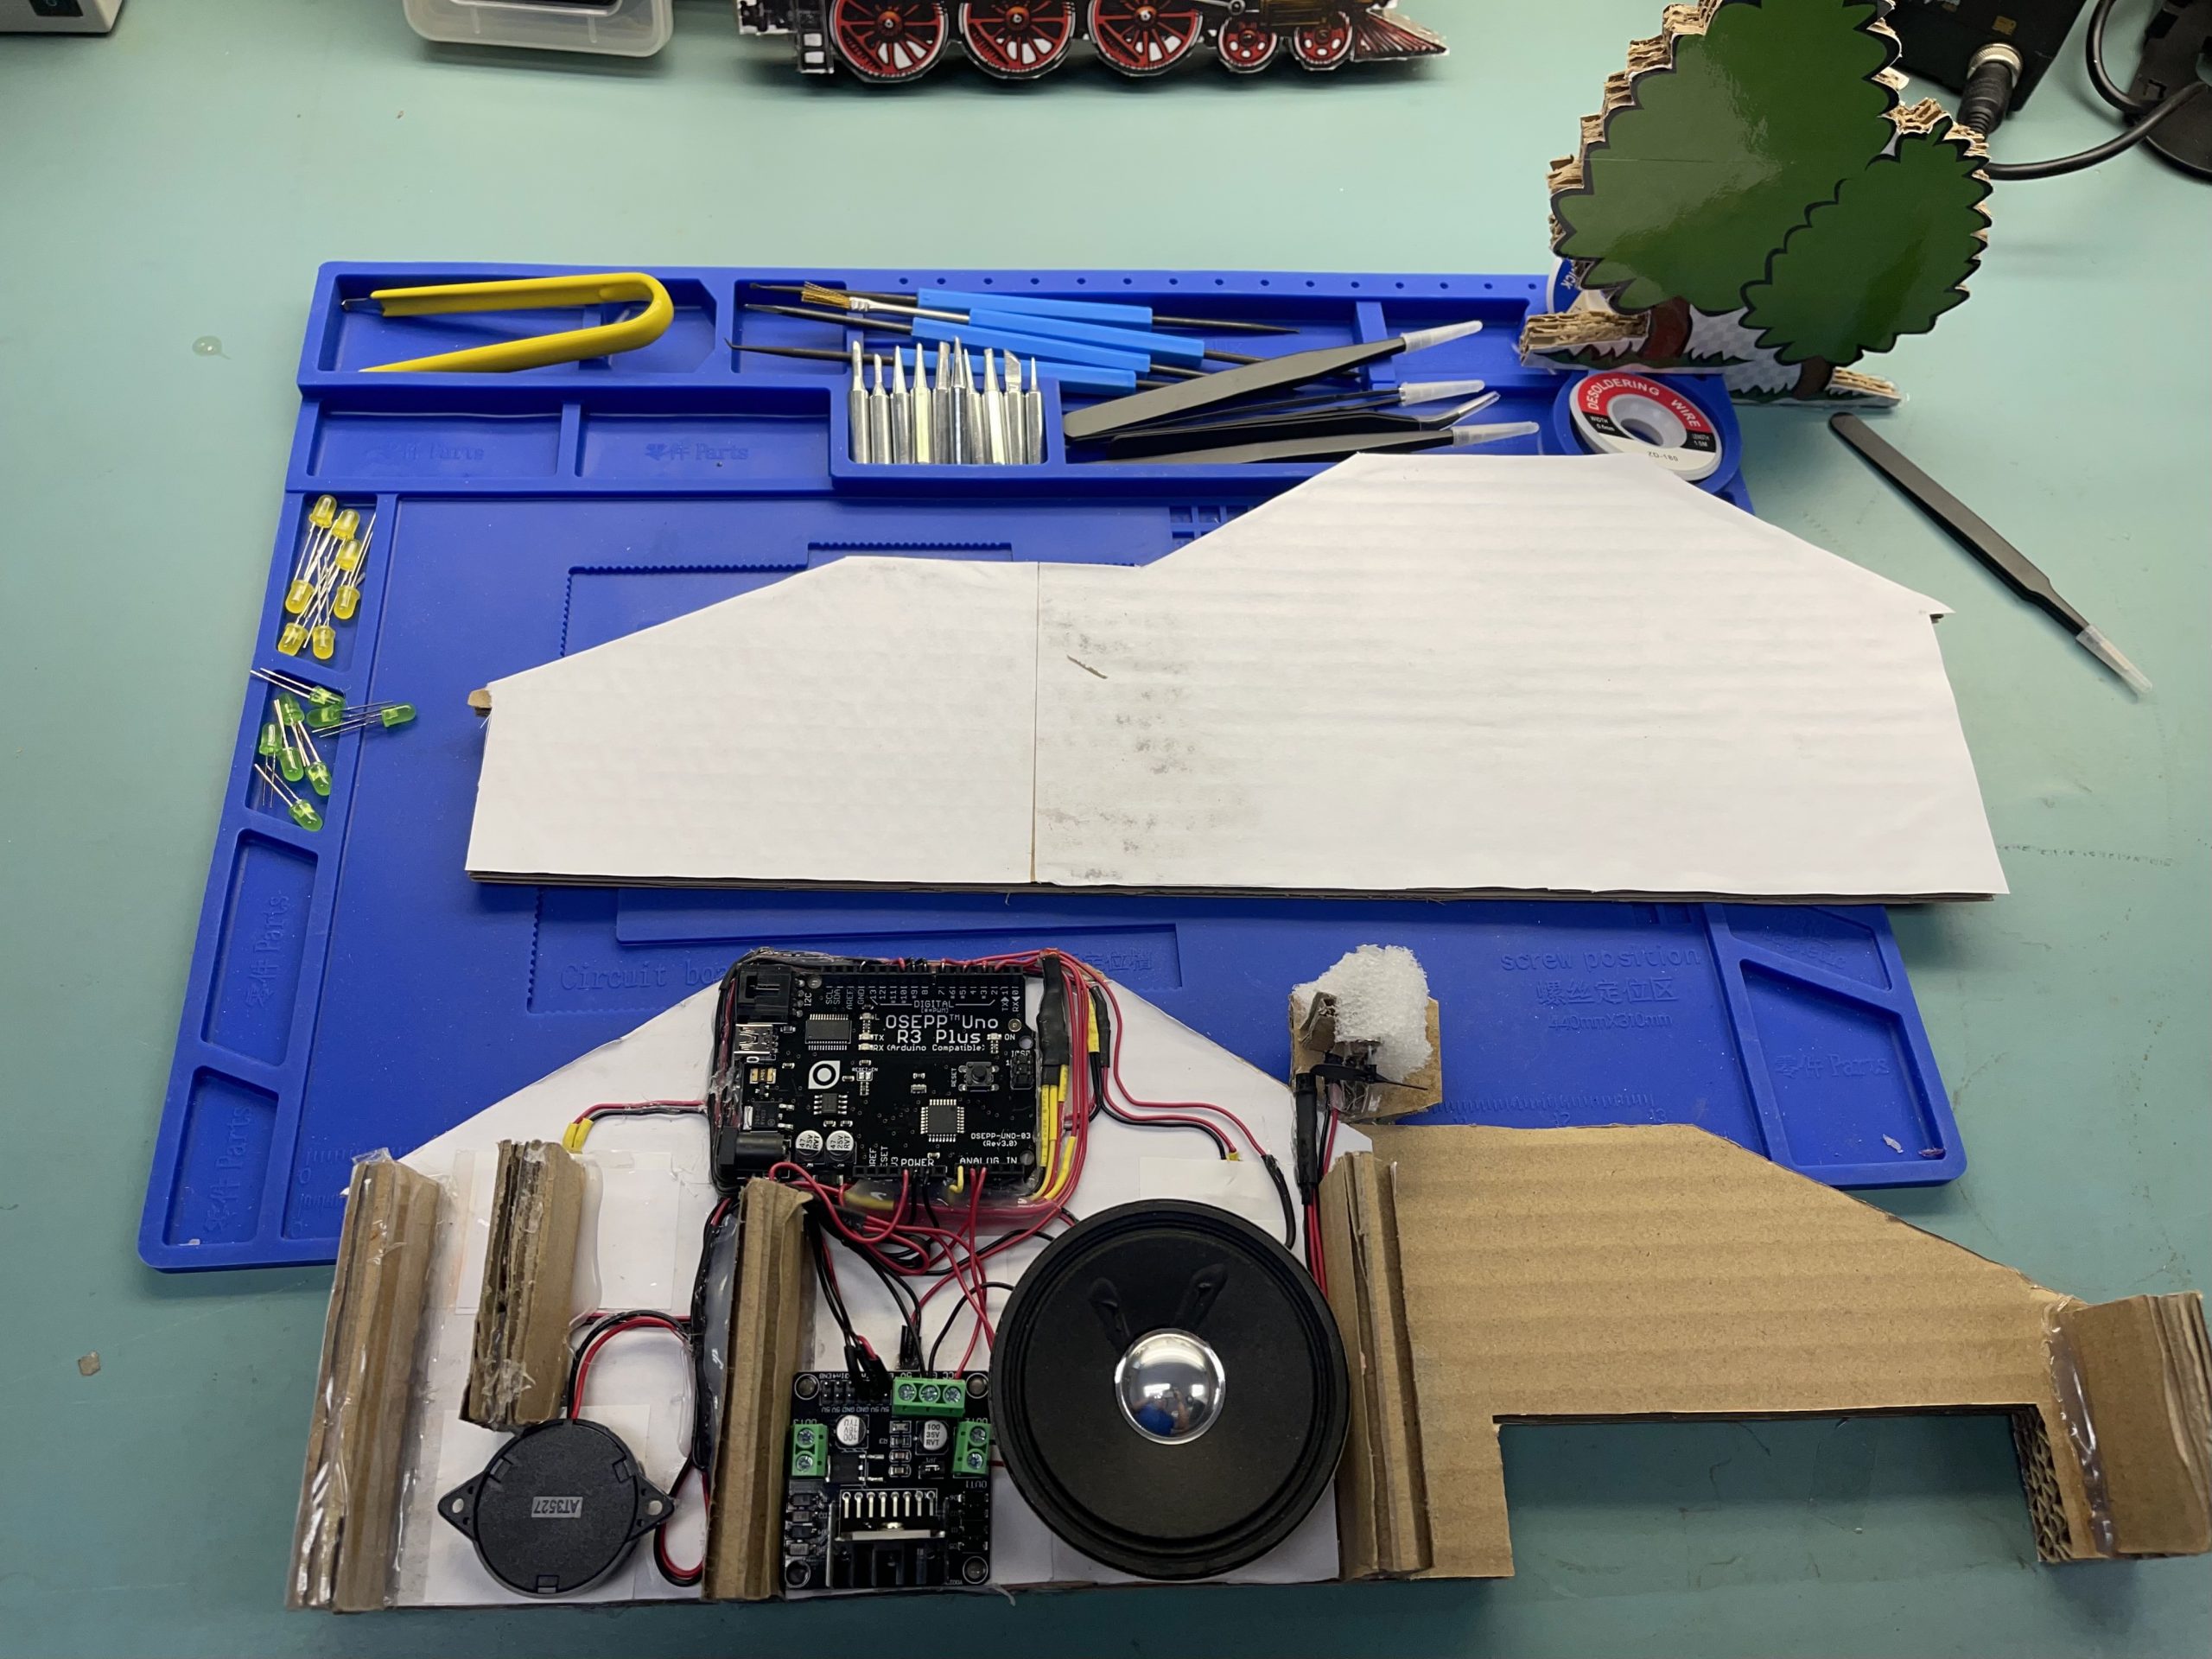
Cut out the garage door.
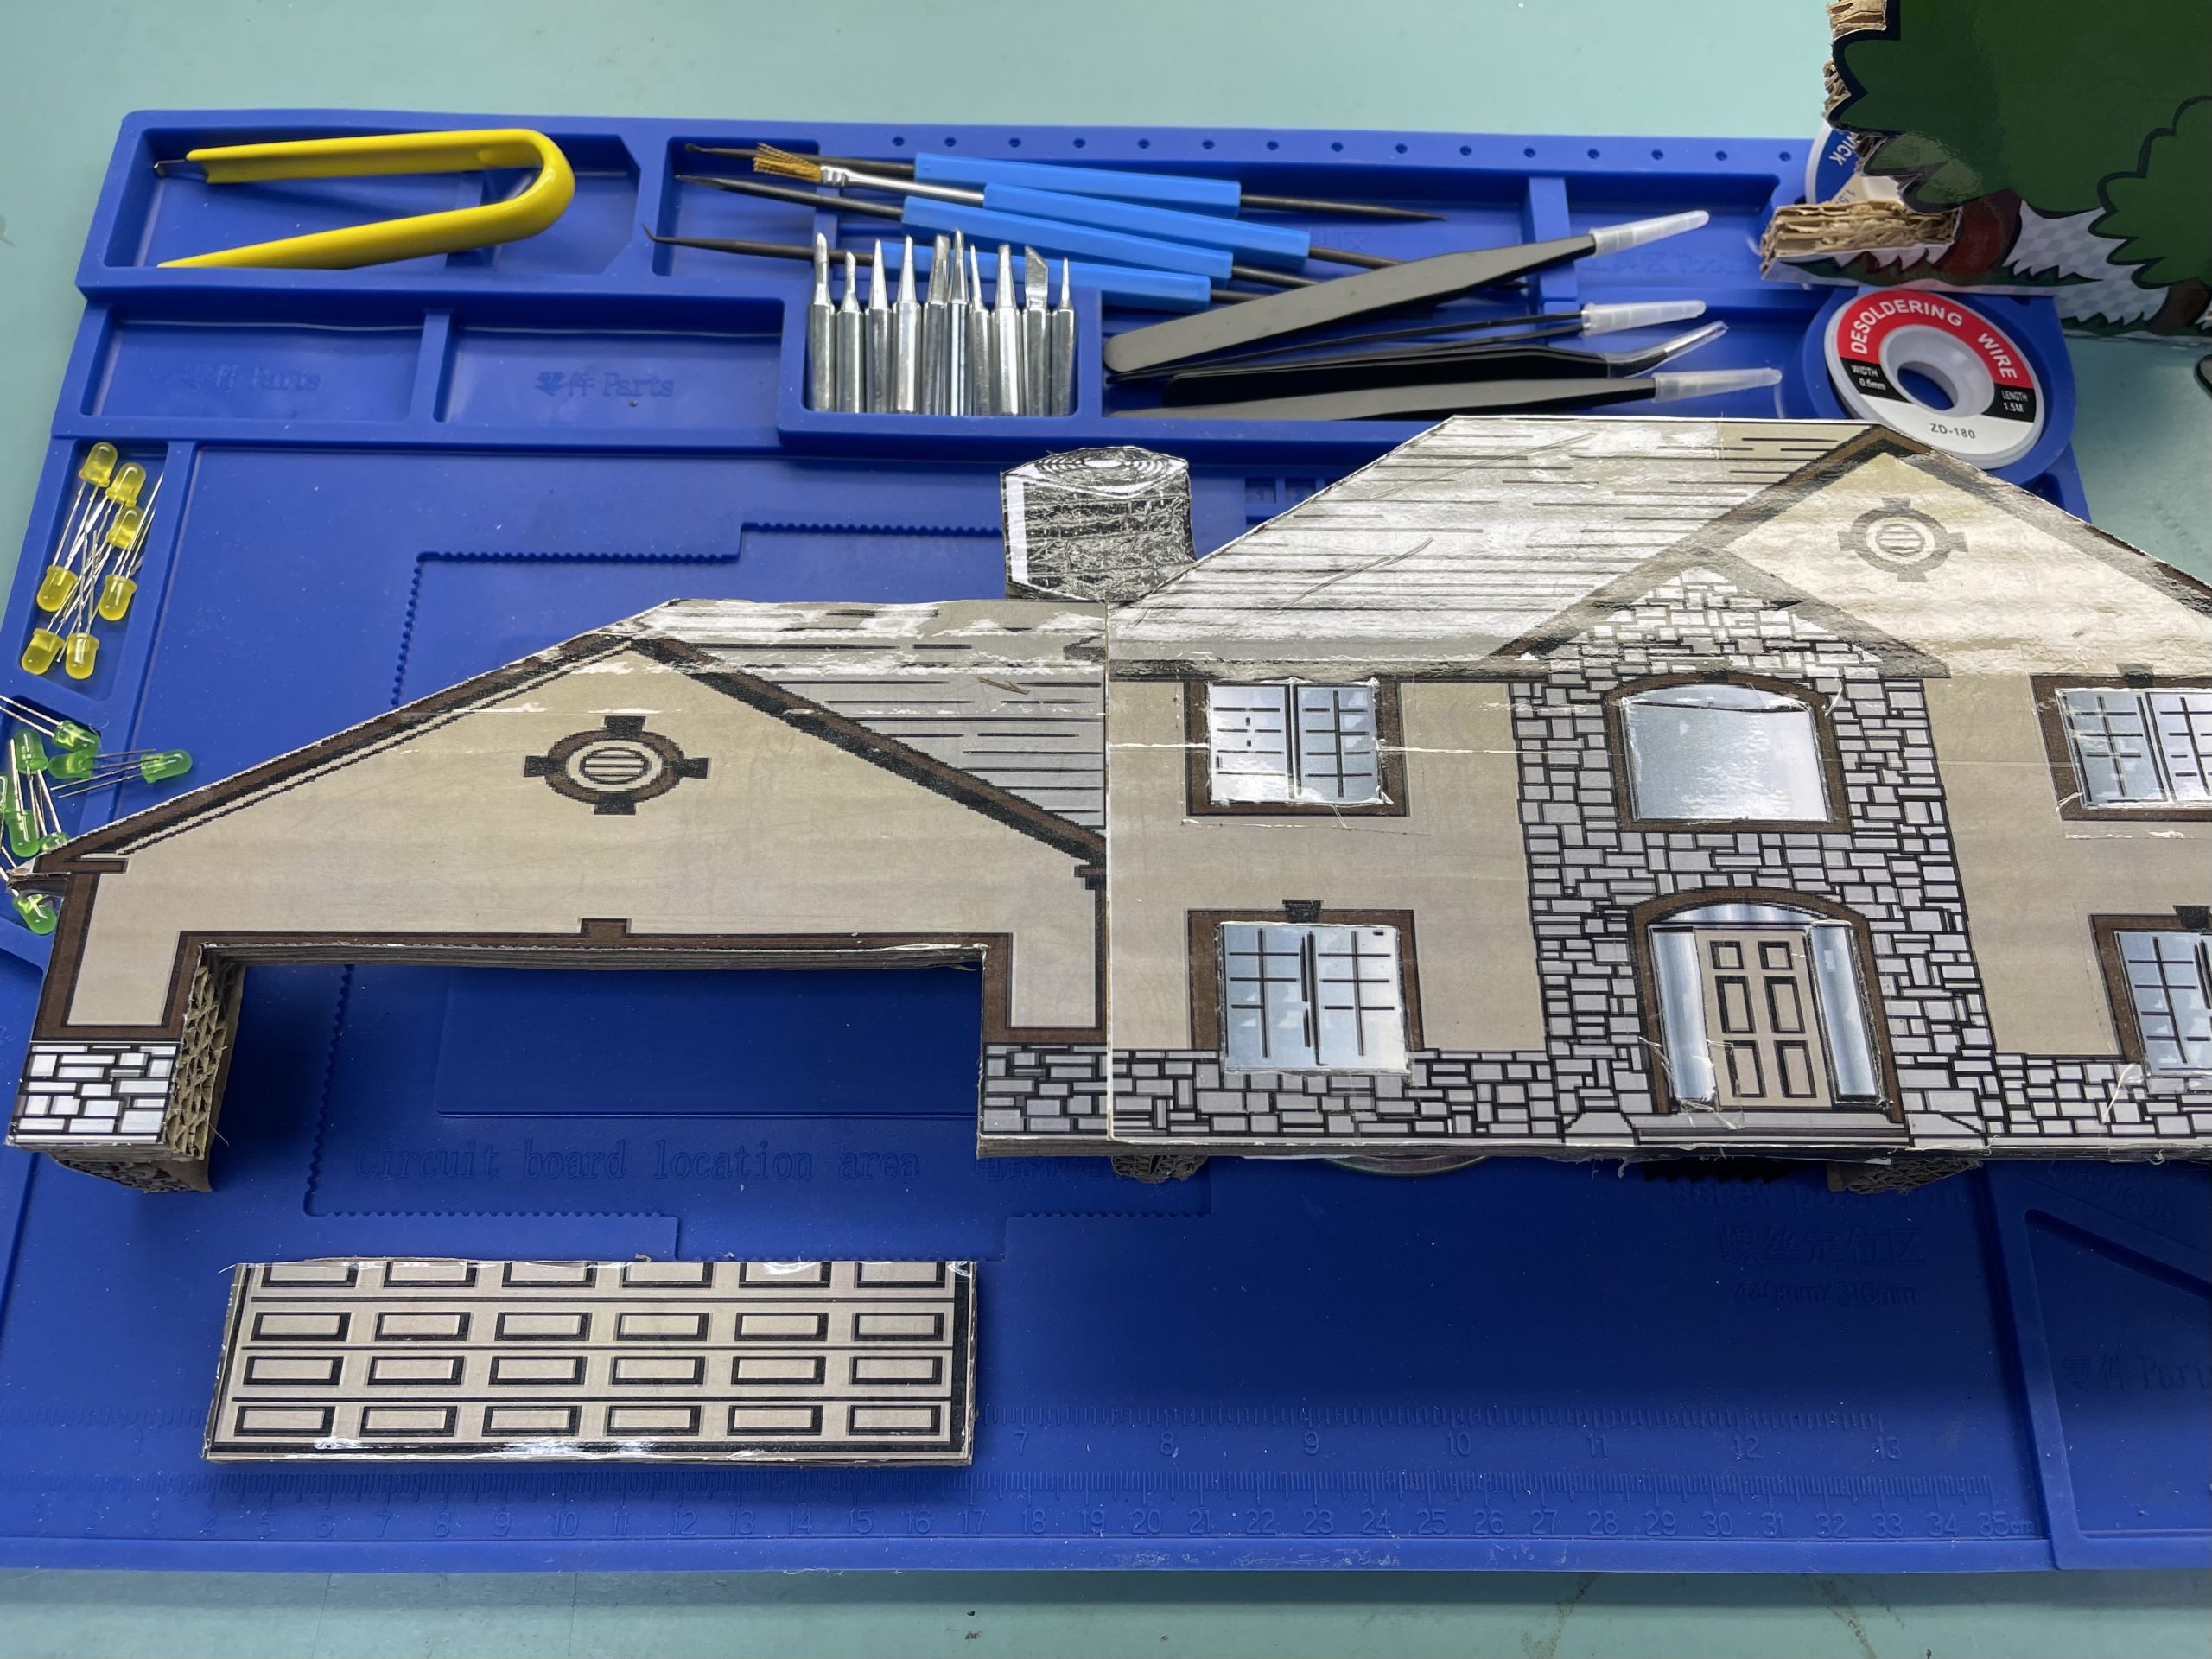
Cut out the slot for the servo.
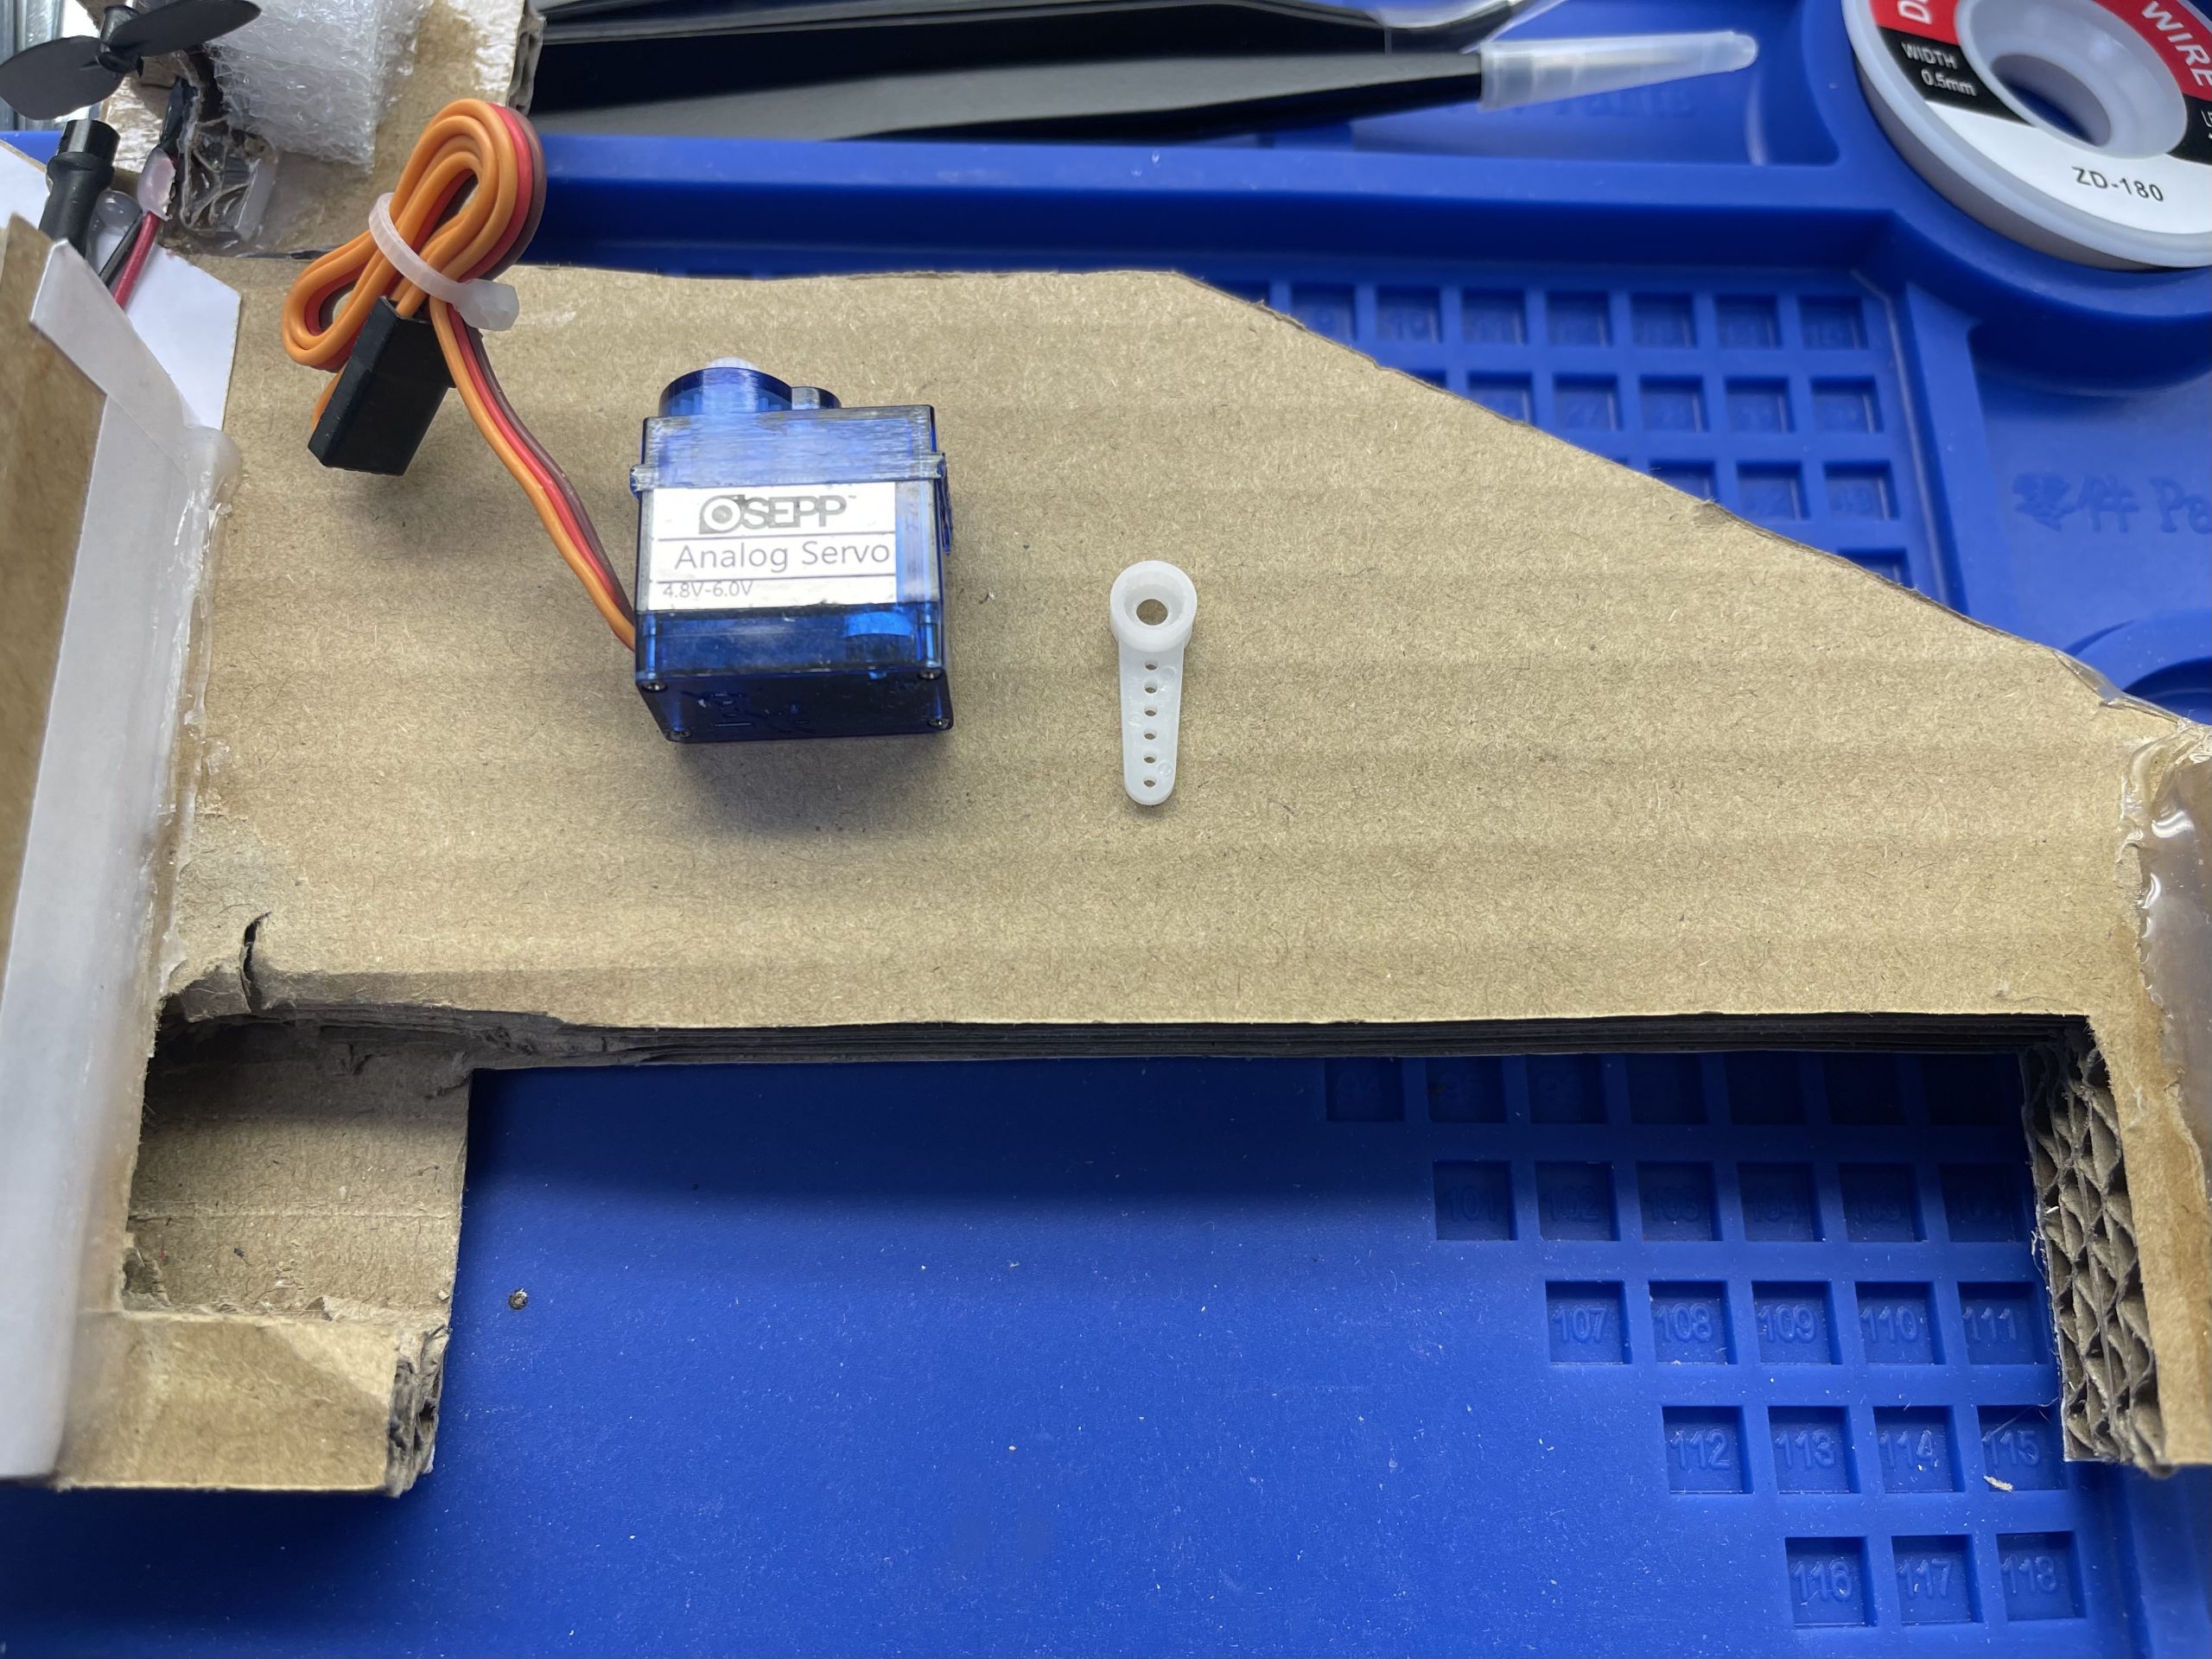
Dry fit to make sure the servo fit nicely.
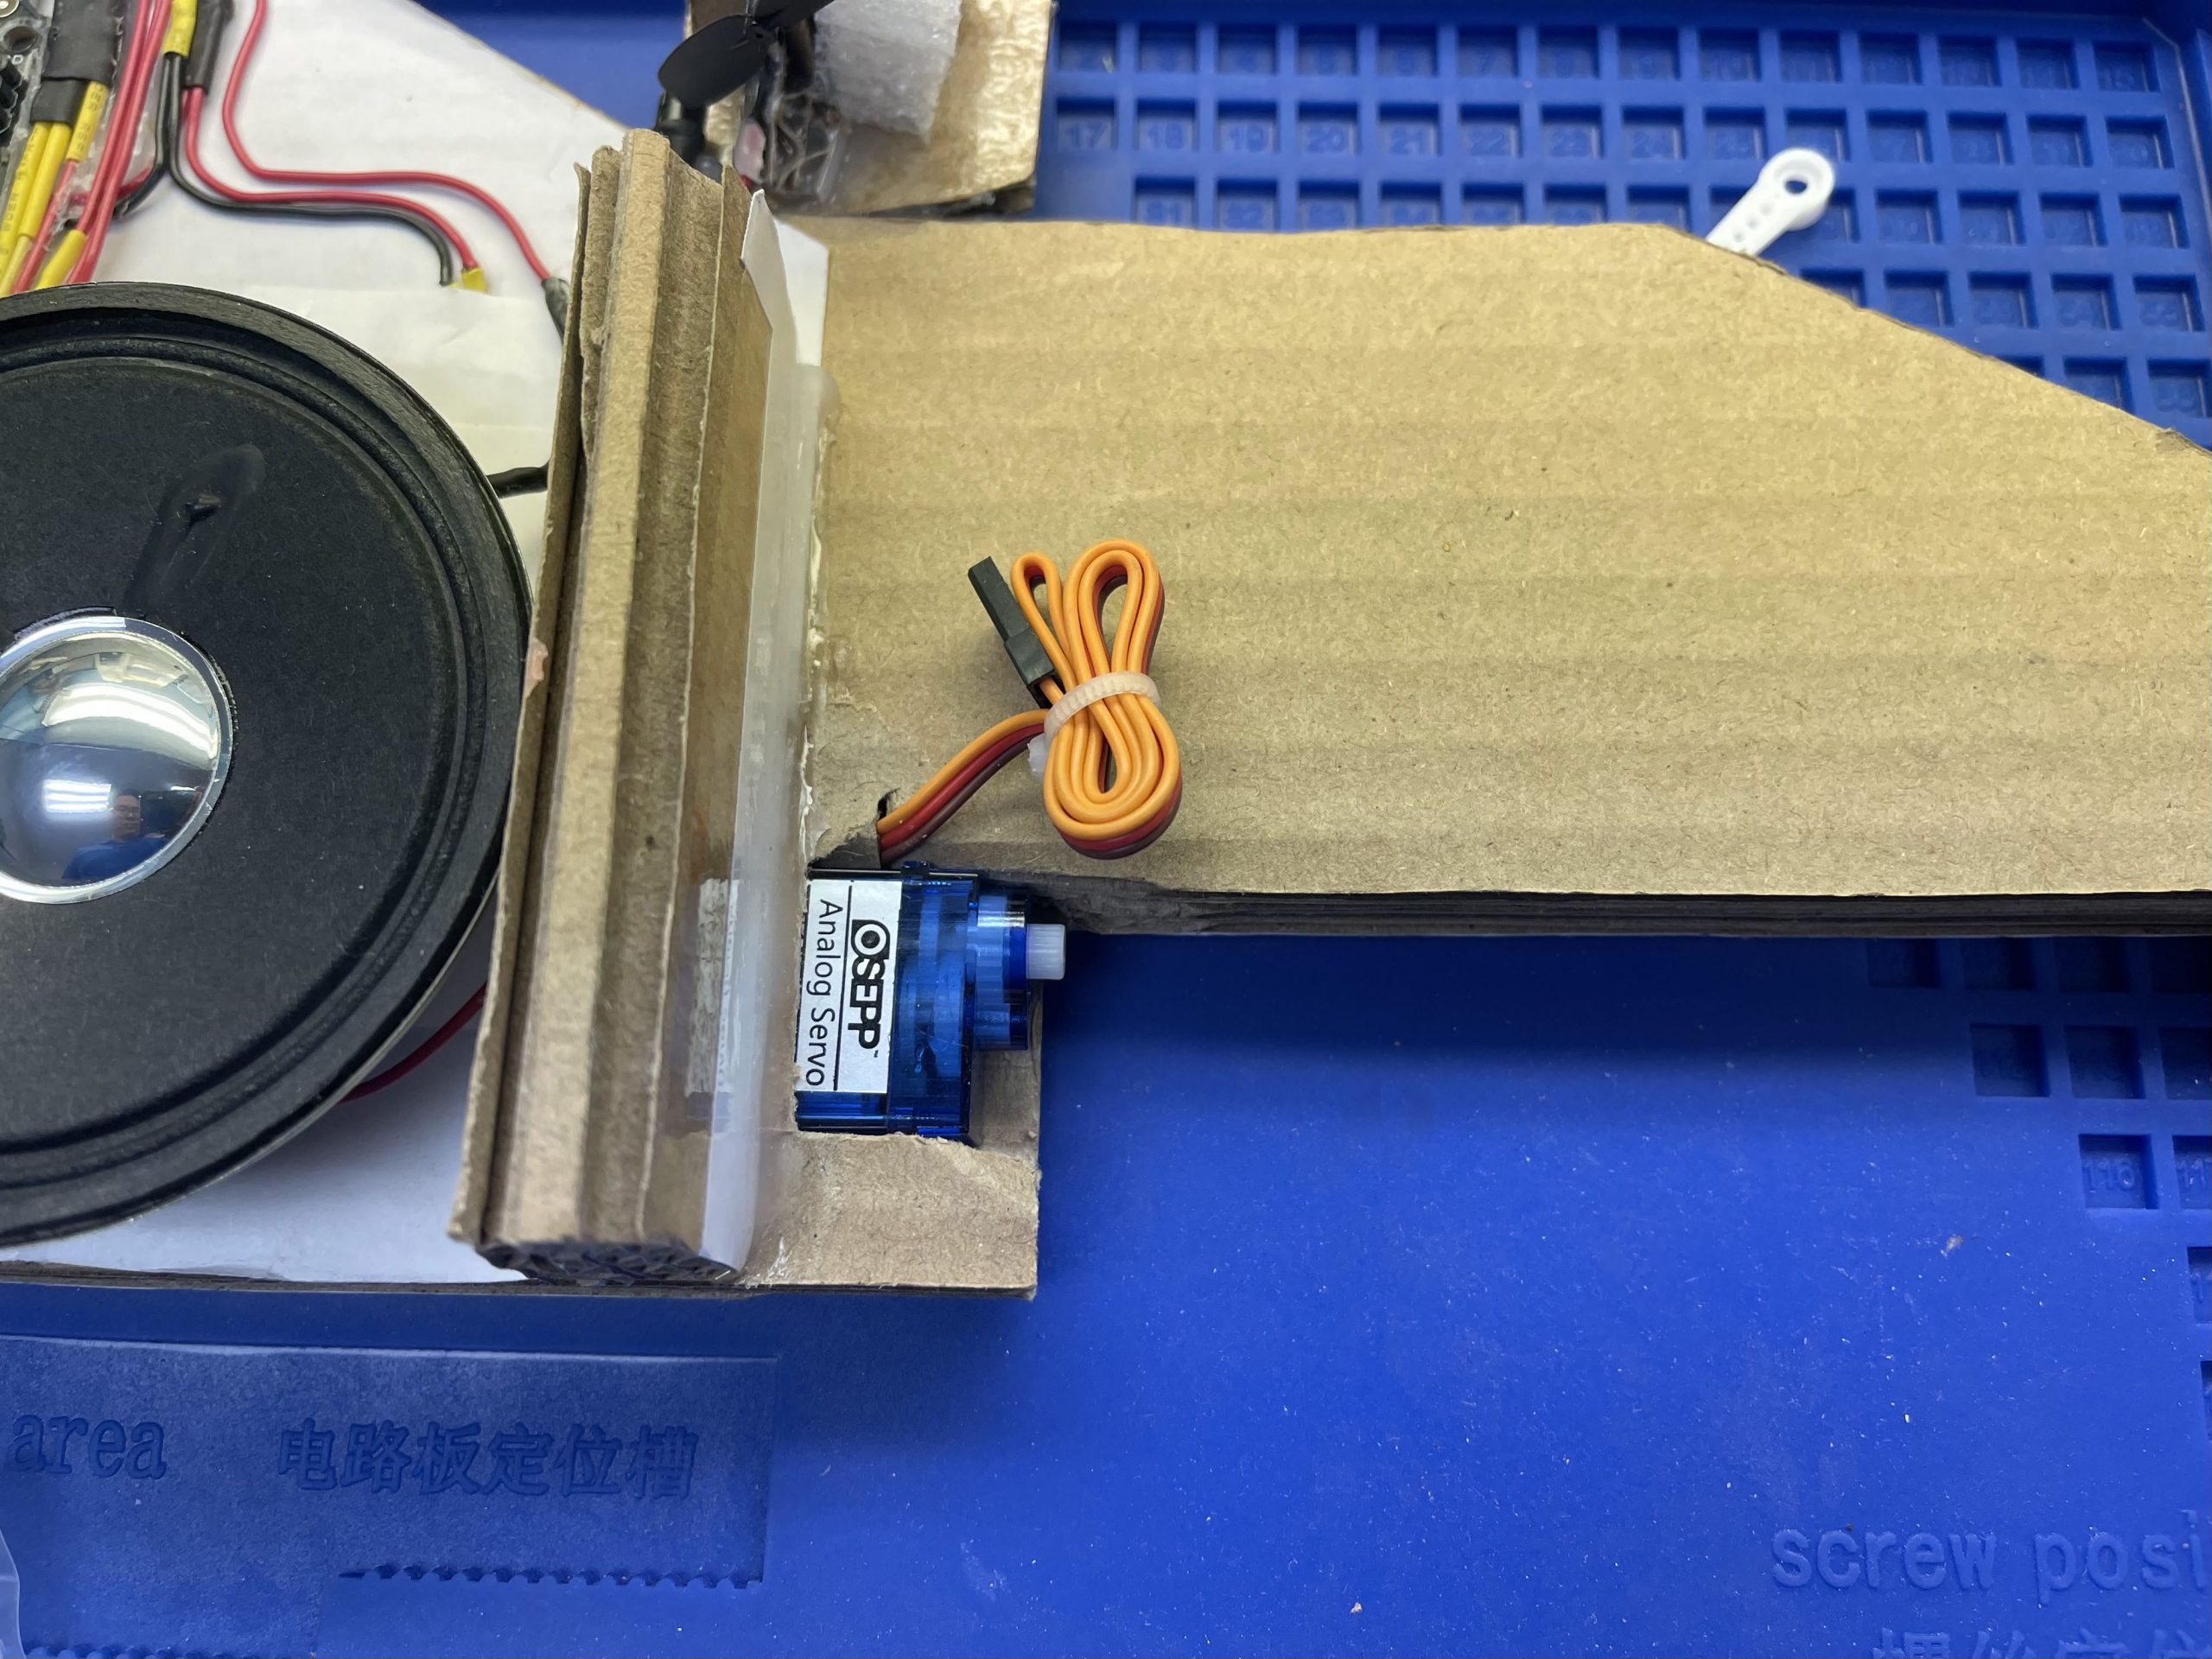
Test the servo before gluing it down to make sure the servo motor works.
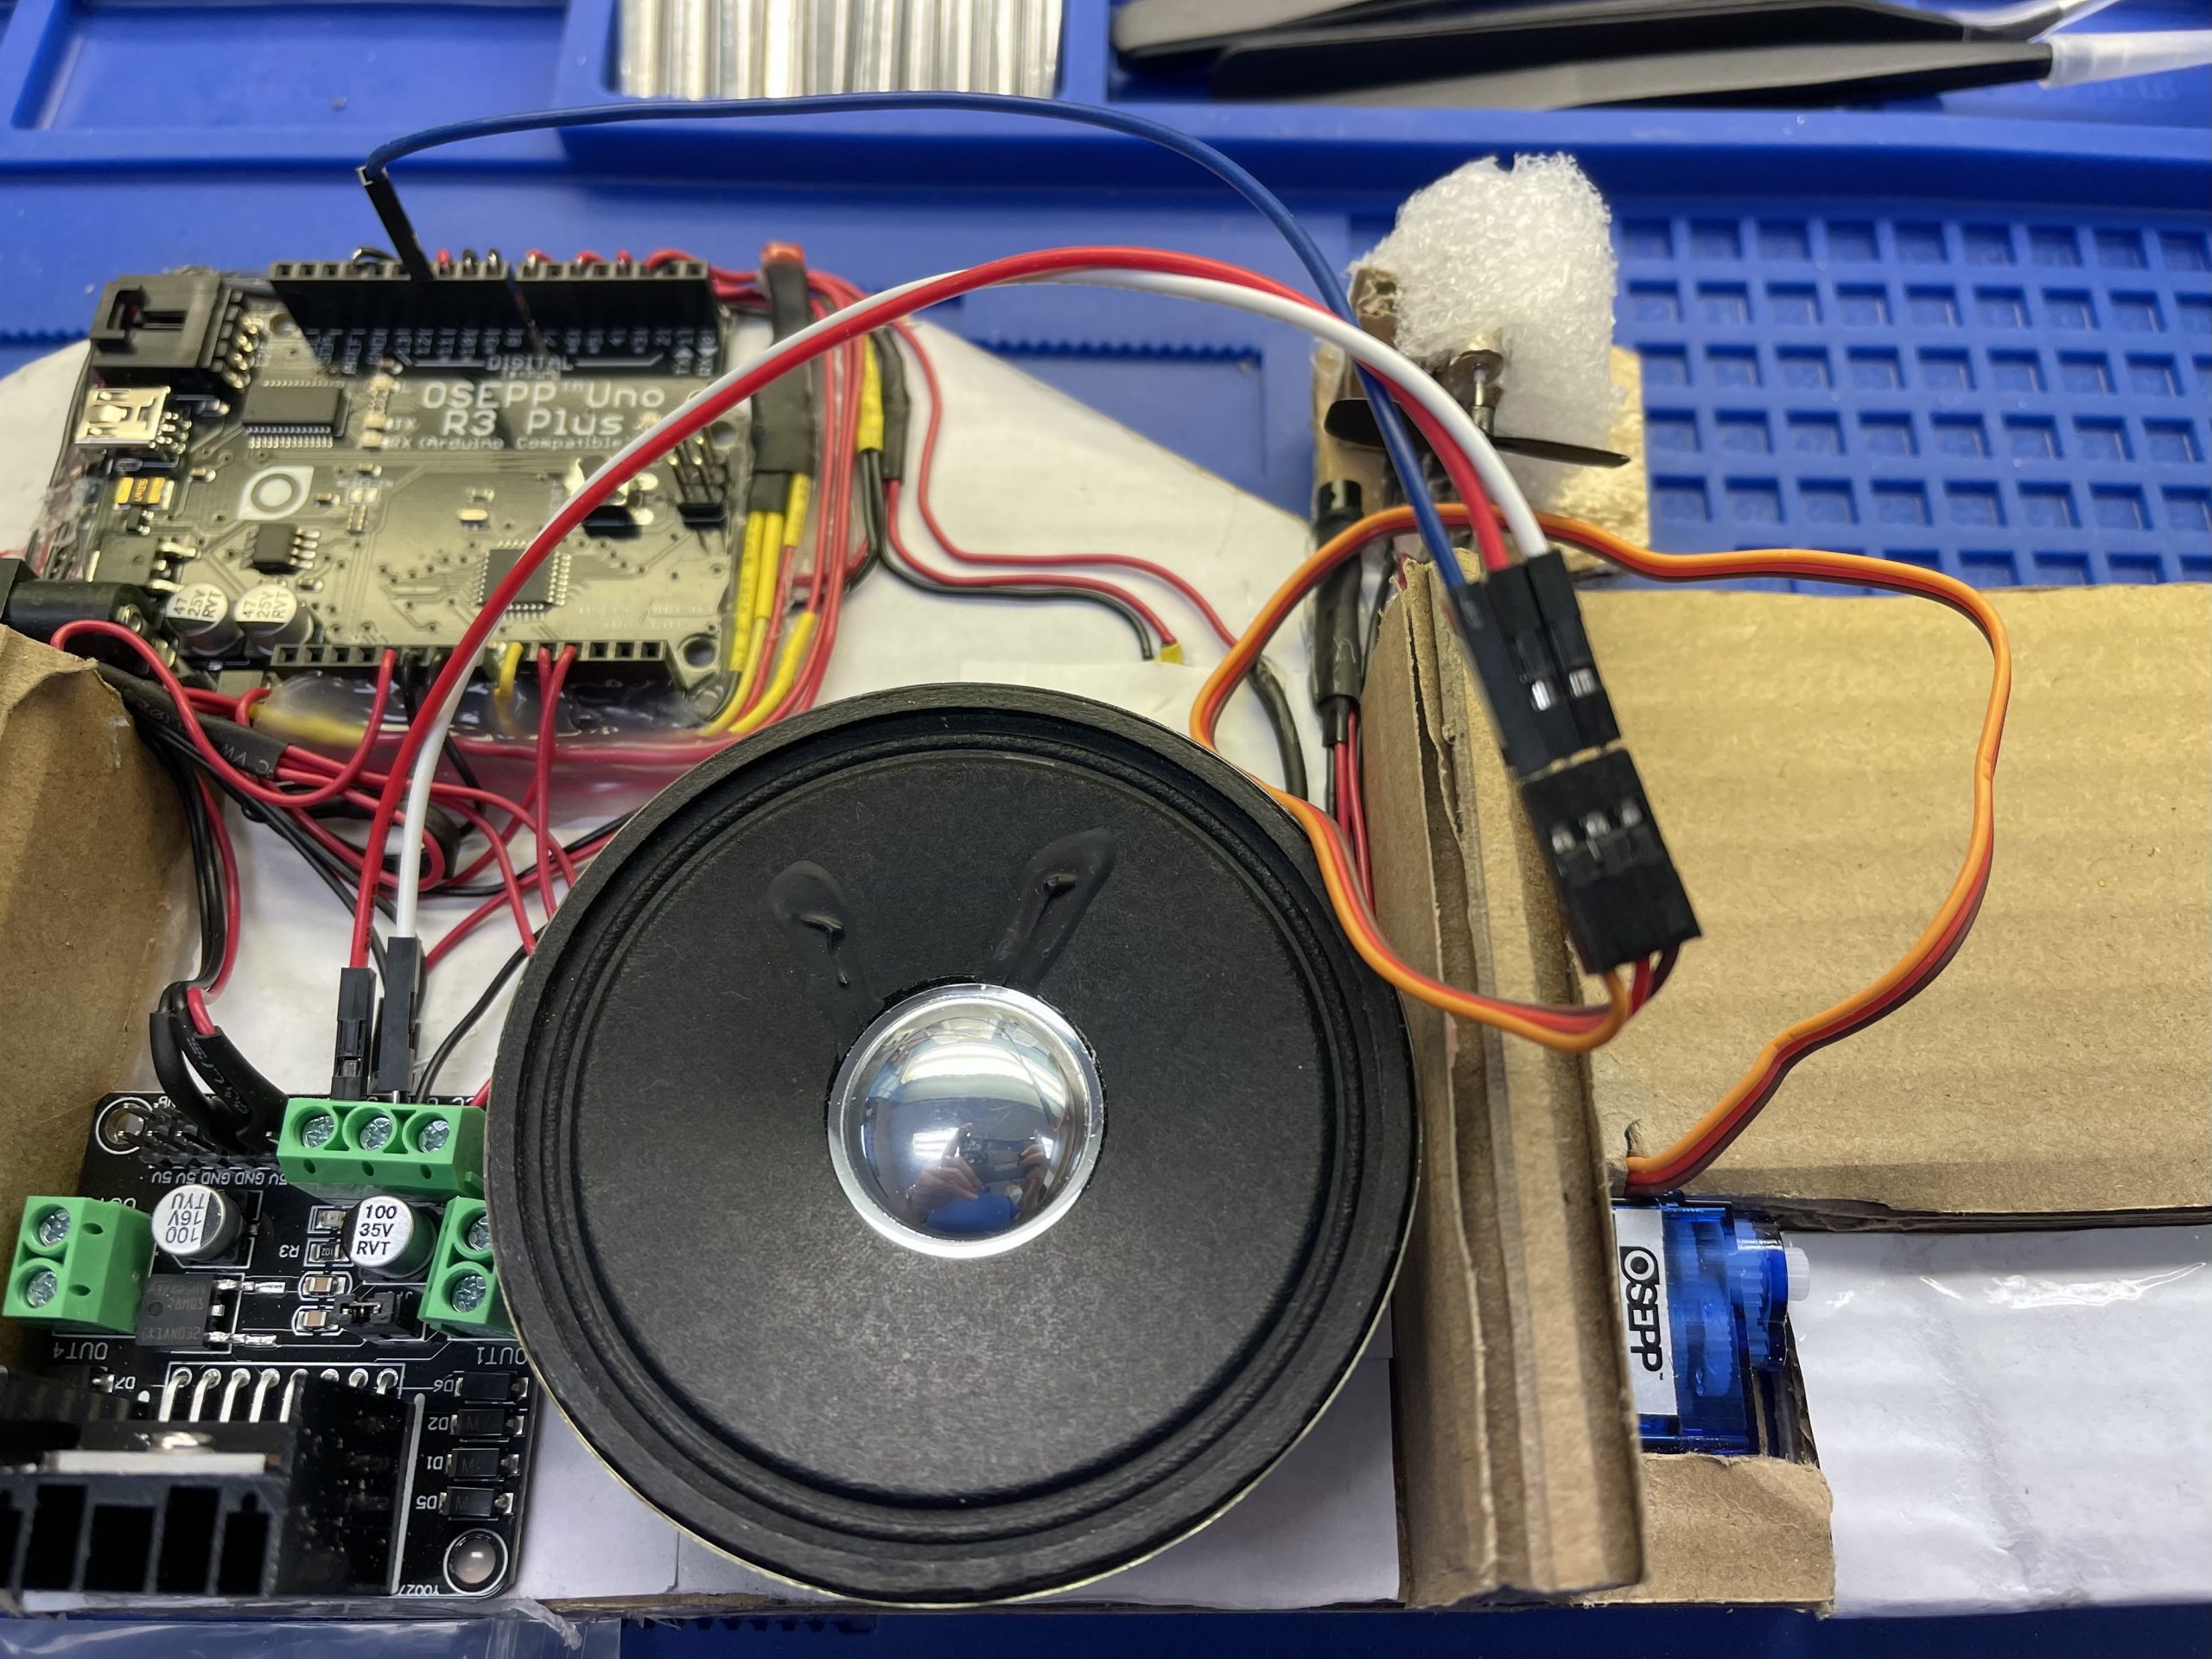
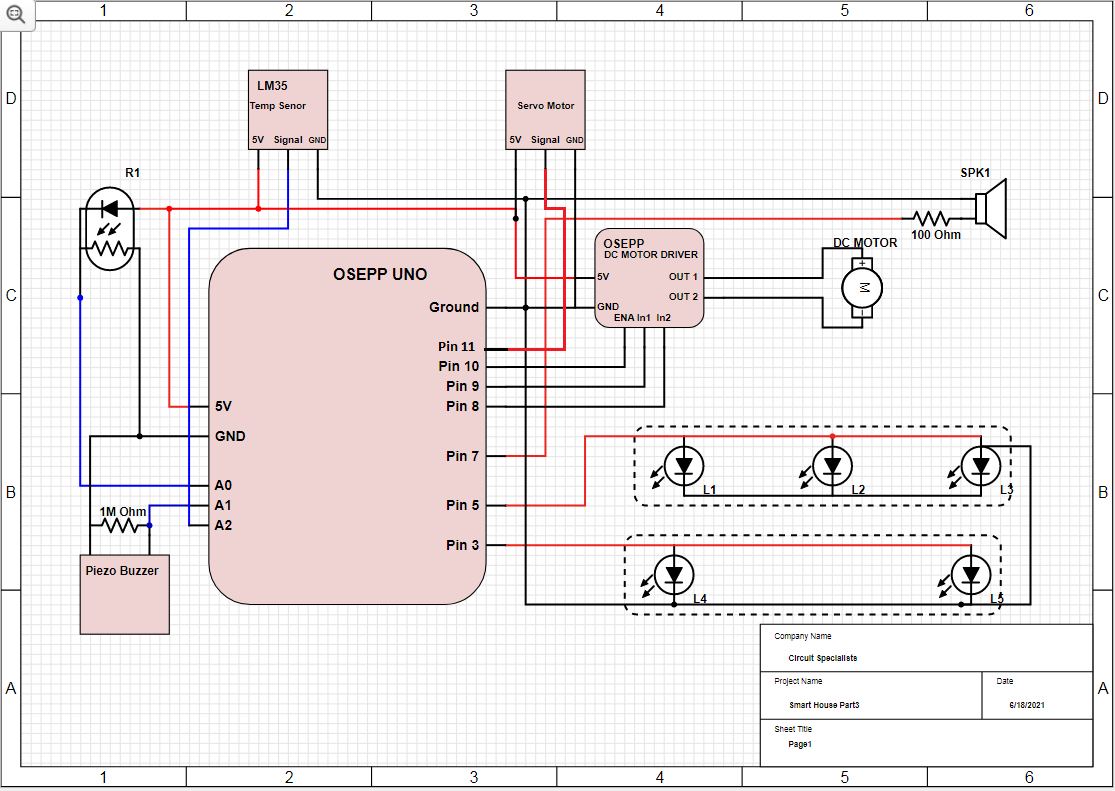
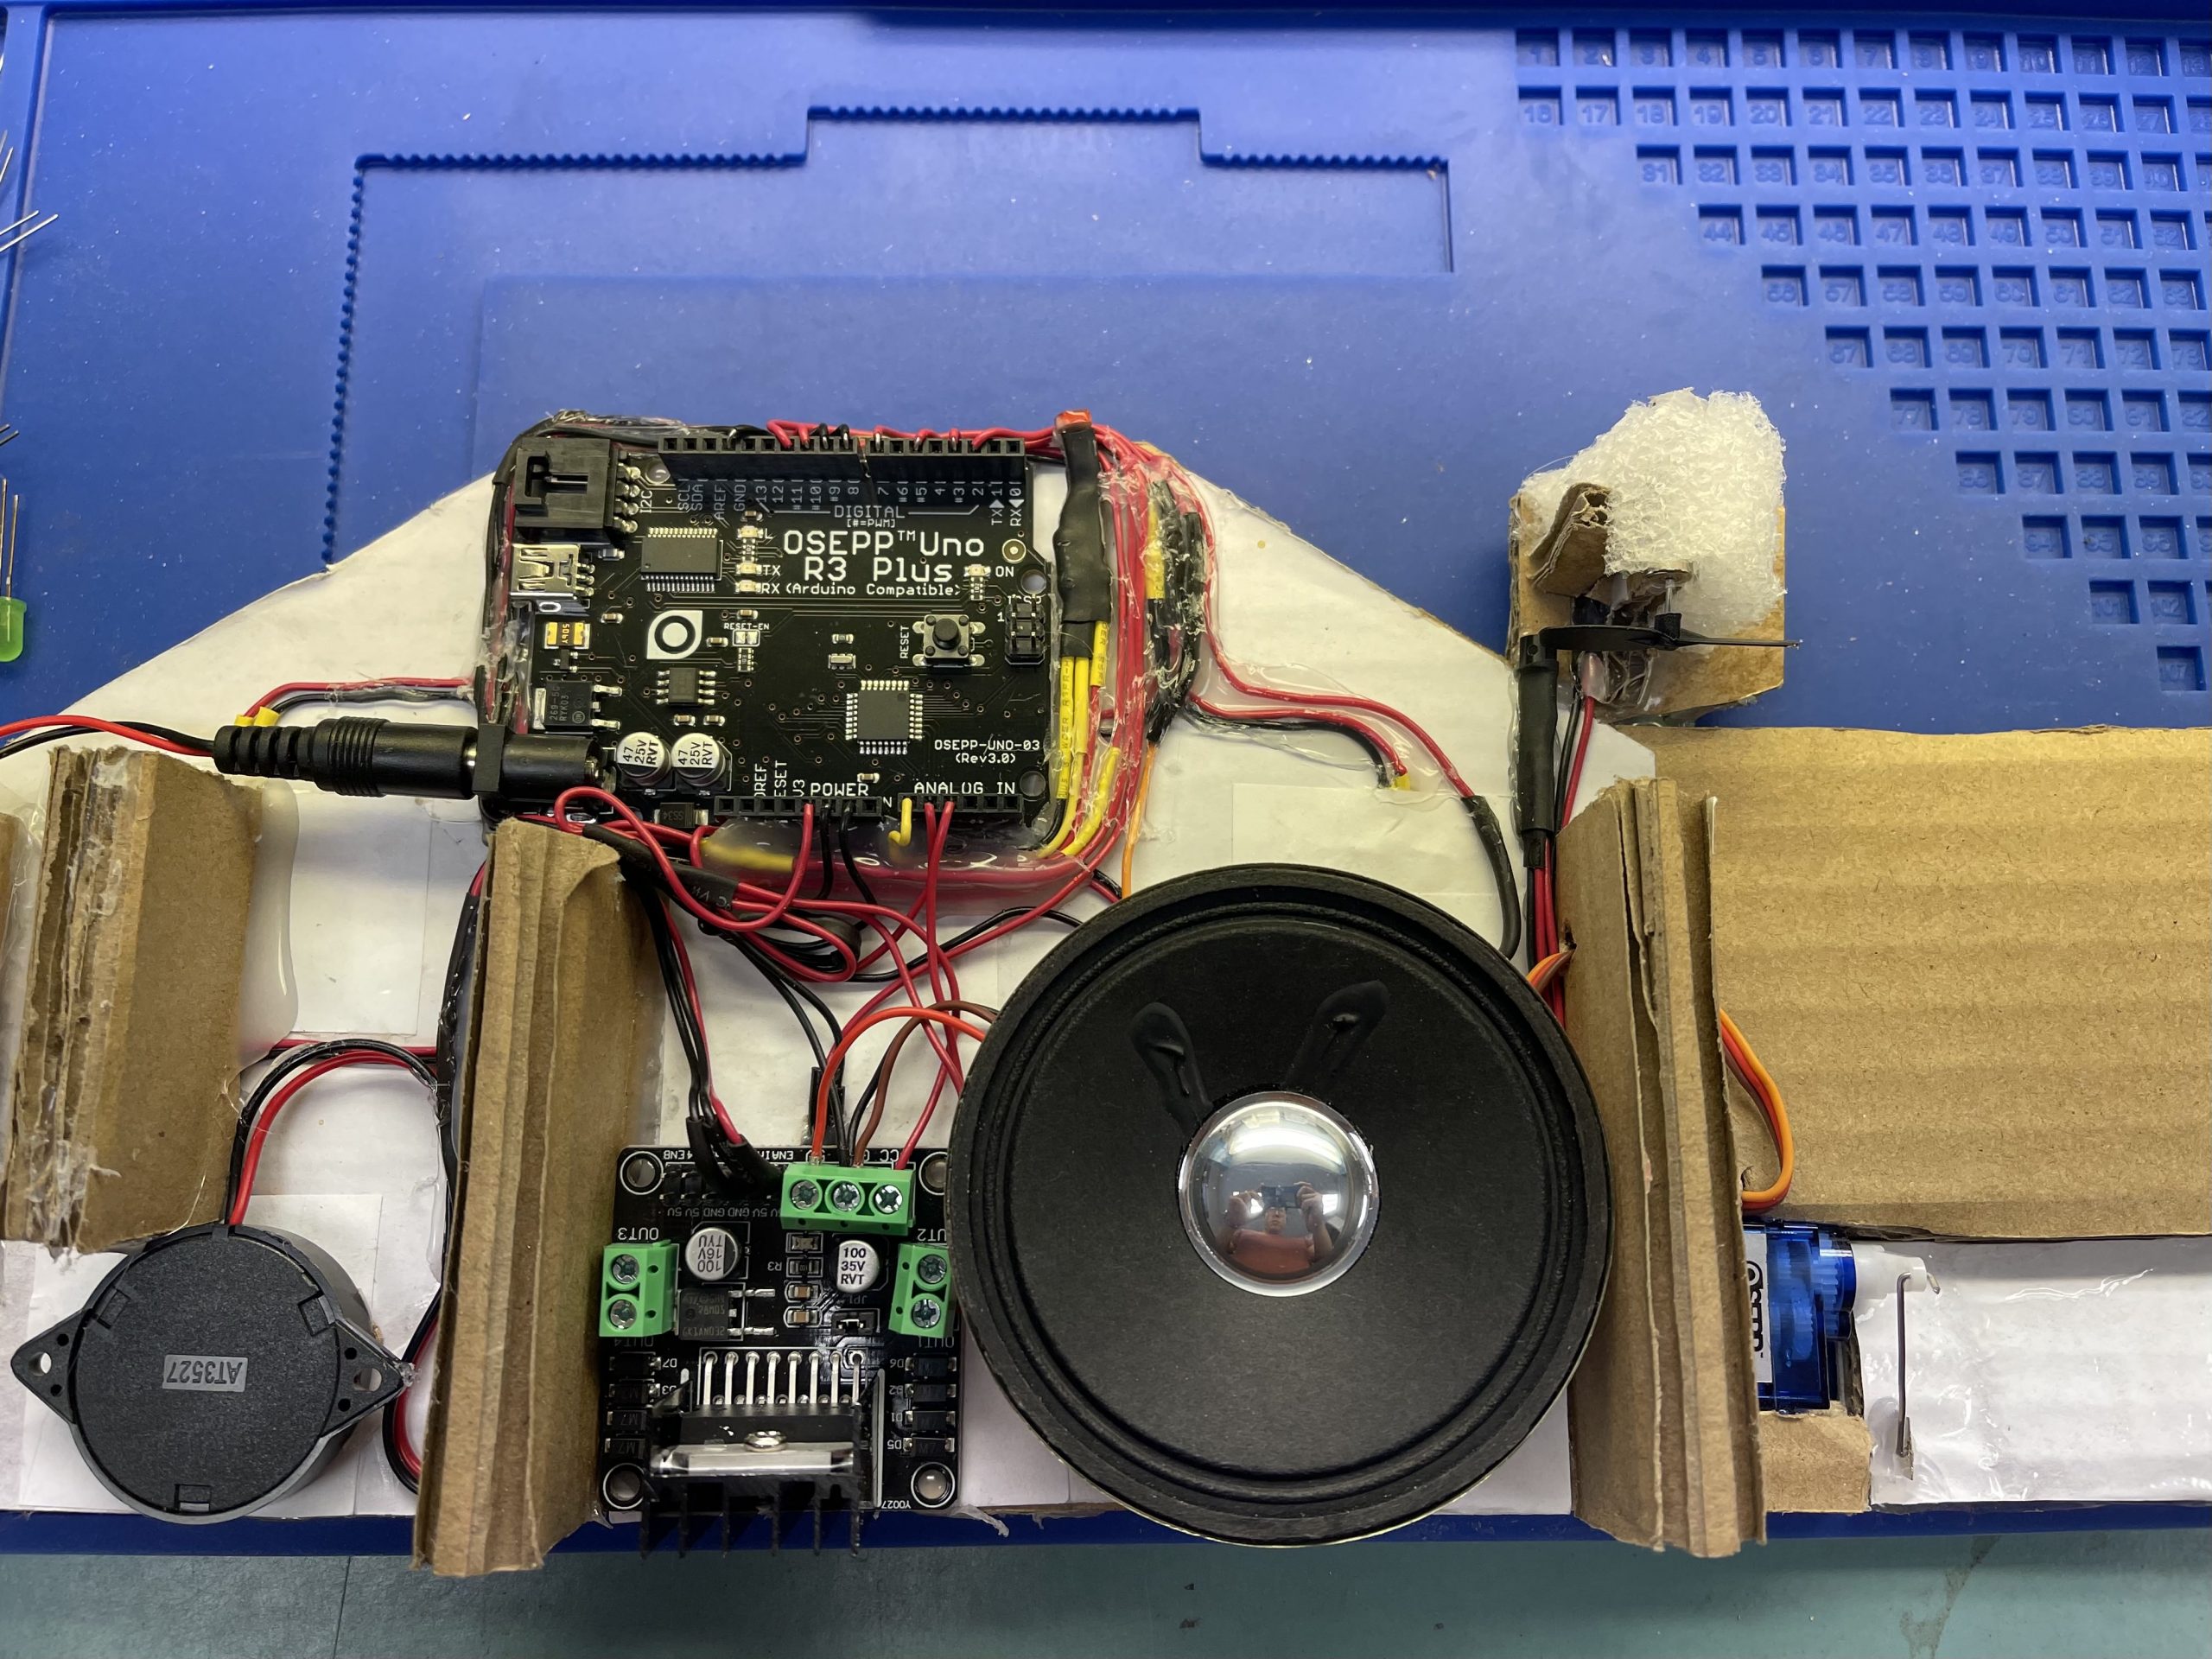
I will attach the schematic below for reference.
Make a linkage connection from the servo horn to the garage door and use tape as a hinge for the garage door. You can find more information about how to make a tape hinge here https://www.rcgroups.com/forums/showthread.php?2190562-Best-Hinge-Tape
This step is optional.
The back wall adds a complete look to the house and also supports the structure overall.
First, print out another house template, then cut it to shape.
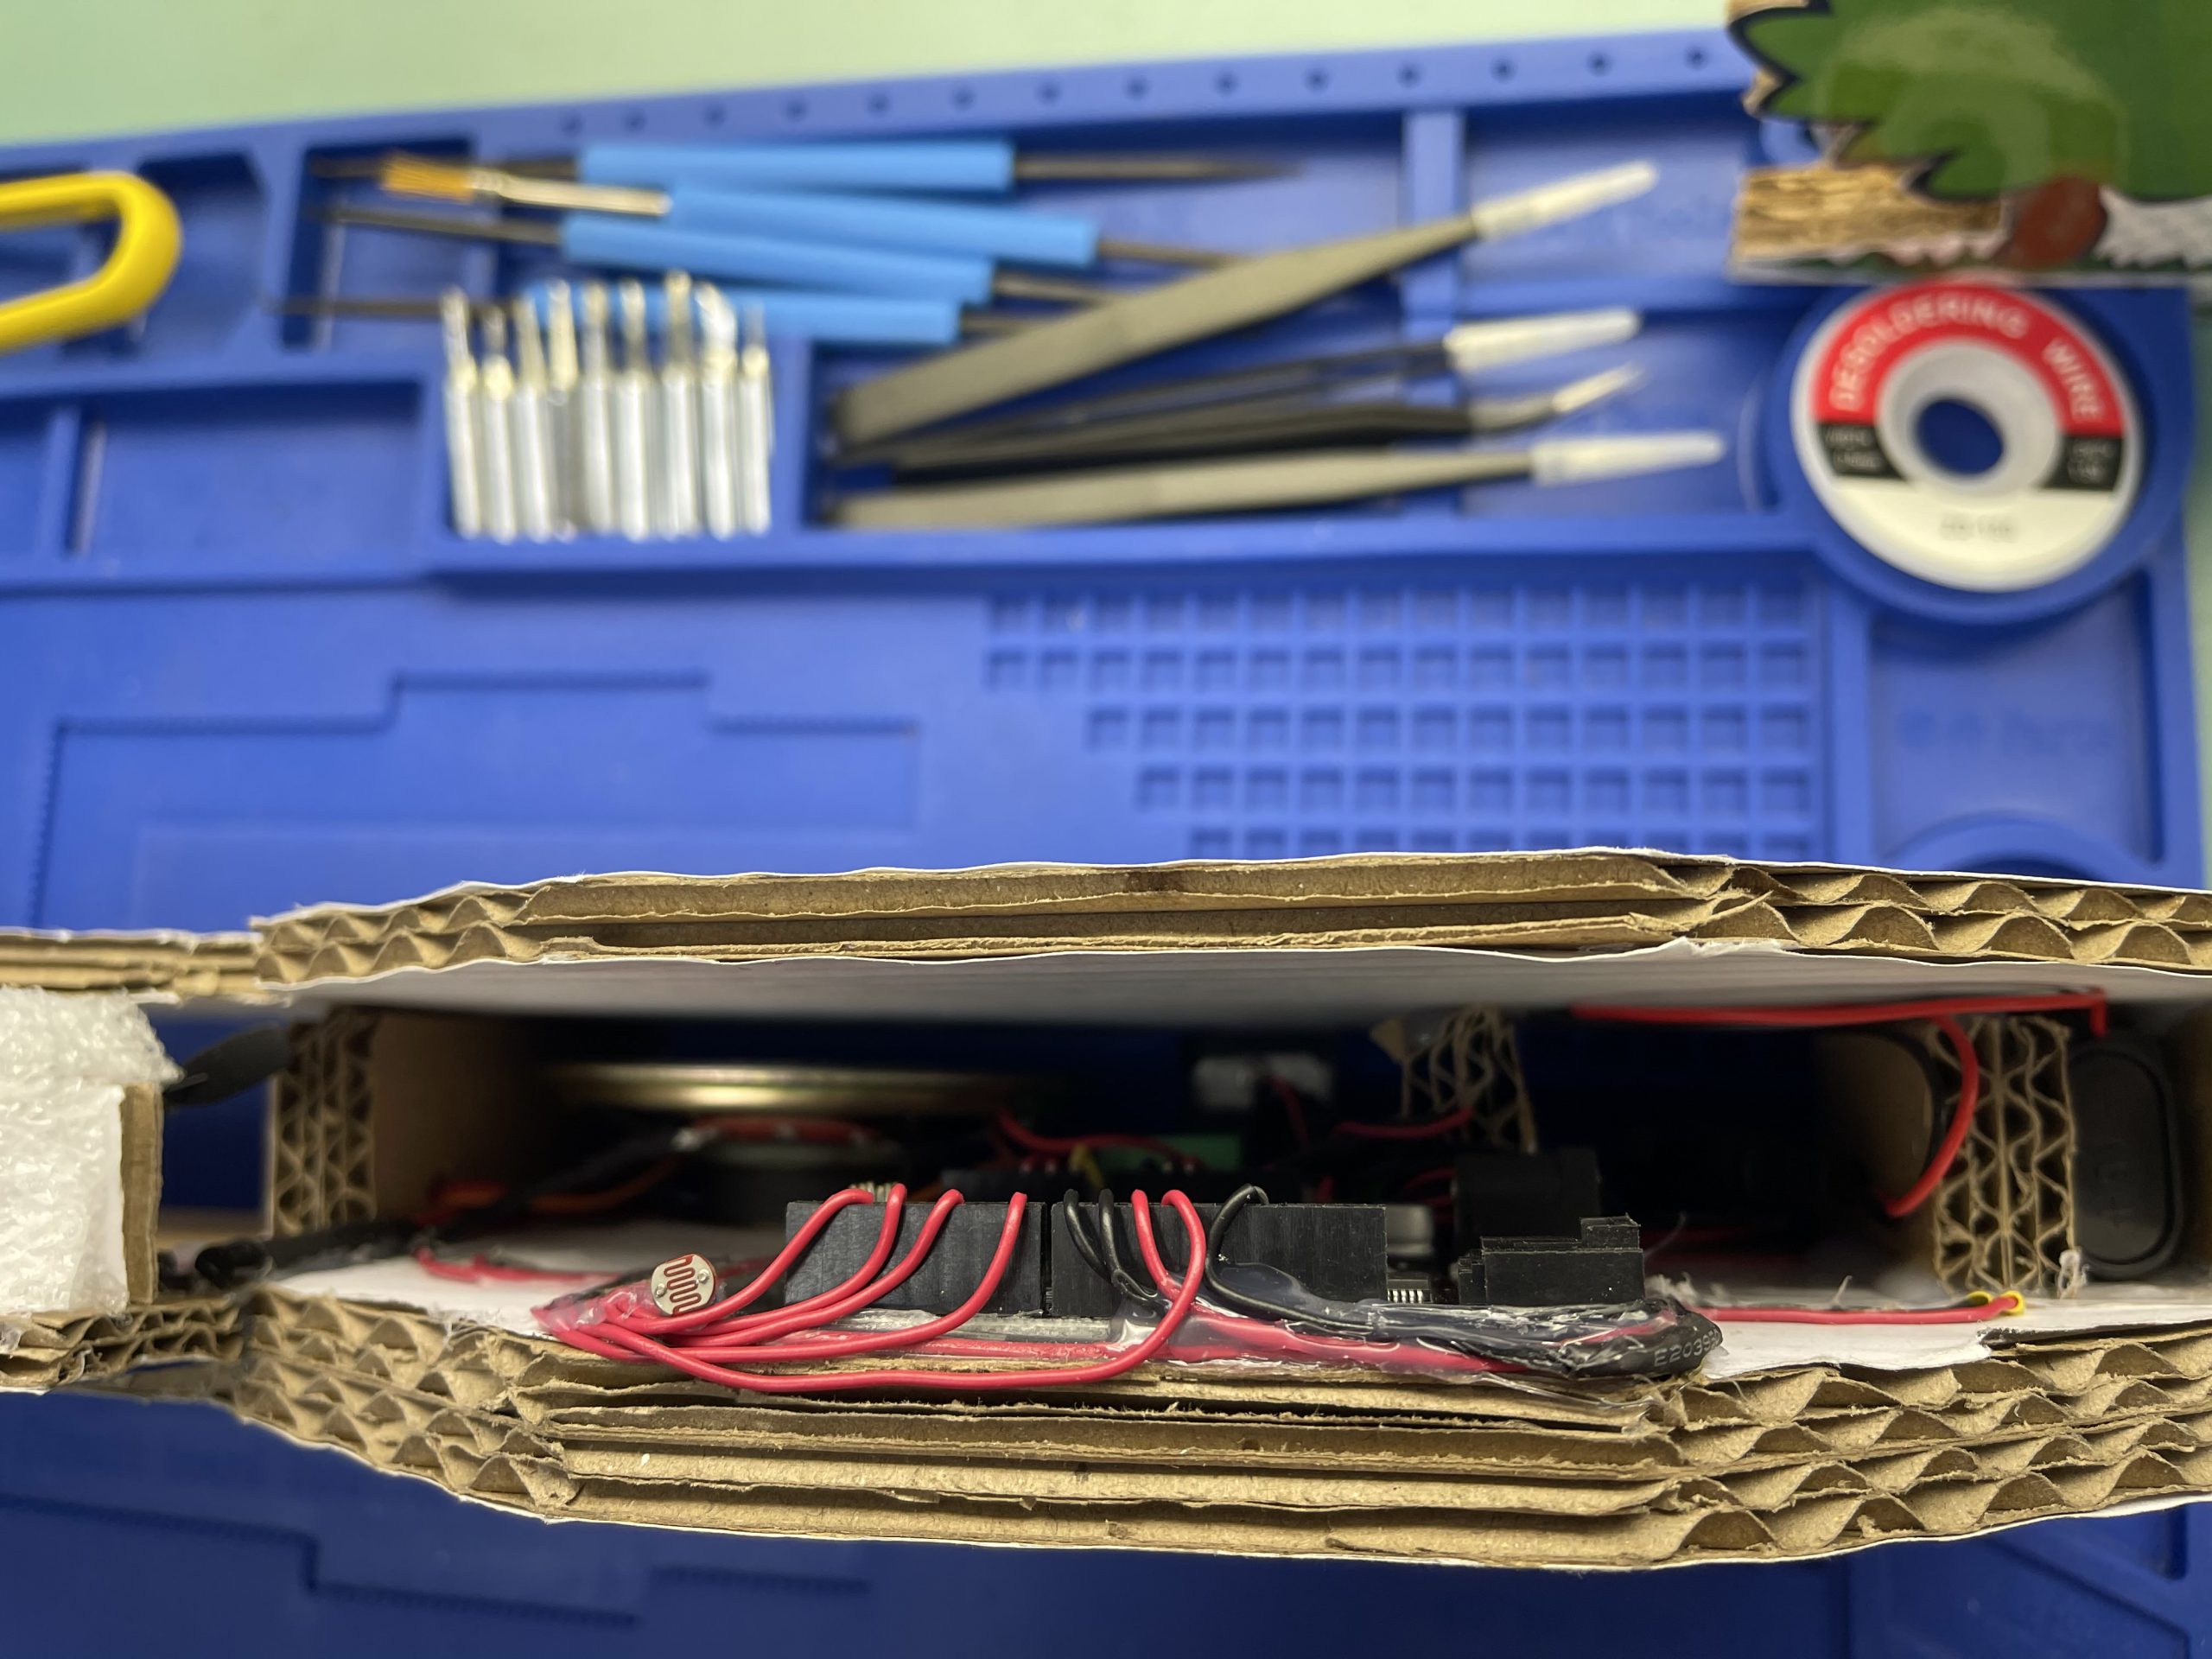
Then glue the back wall into the house after installing the garage door.
The Code
In the final chapter, we want to focus on the code that allows the house functions to integrate together. Furthermore, we will talk about elevating the project to the next level. When the Smart House is fully equipped with sensors and systems that provide comfort and convenience for the occupants, these systems need to work together harmonically by using the Smart House Controlling System (SHCS) to process the input sensors and making decisions using these inputs.
Let talk about what changed
I clean up the code since I know this would be the final chapter of this project. There might be changed in variable name but the mechanic of the code is the same. You can copy the complete code at the bottom of this section.
Add the servo library and name the servo motor
#include <Servo.h>
Servo GarageServo;
Make sure to attach the servo to the correct pin.
void setup()
{
    // set up serial at 9600 baud
    Serial.begin(9600);

    pinMode(First_Floor_LED, OUTPUT);
    pinMode(Second_Floor_LED, OUTPUT);
    pinMode(Front_Door_LED, OUTPUT);

    pinMode(IN1,OUTPUT);
    pinMode(IN2,OUTPUT);
    pinMode(ENA,OUTPUT);

  GarageServo.attach(11);
  GarageDoor(2);
  WelcomeSong();
}
Simple block code to control the Garage.
void GarageDoor(int GarageStage)
{

  int pos;
  if( GarageStage == 1)
  {
      GarageServo.write(180);

  }
  if( GarageStage == 2)
  {
     GarageServo.write(60);
  }

}
Add variables for the time stamp.
// convert the 10bit analog value to celcius
temperature = float(analogValue) / 1023;
tempunsigned long previousMillis = 0;        // will store last time LED was updated

// constants won't change:
const long interval = 50000;

const long Sound_interval = 50;
const long LightSensor_interval = 100;
const long Temperature_interval = 500;

unsigned long previous_Sound_interval = 0;
unsigned long previous_LightSensor_interval = 0;
unsigned long previous_Temperature_interval = 0;
The heart of the code.
The loop is now fairly simple and free of delay. Based on the time integral of each sensor, the control systems will work independently at the same time. This will help the Smart House Controlling System (SCS) receive the sensor data at different rates since each sensor gets its data at a different rate. For instance, the sound sensor would need to trigger less often due to the nature of the piezo sensor. With the time stamp system, the (SCS) can do multiple things at the same time such as managing security, AC system, Lighting System, and motion control.
void loop()
{
    unsigned long currentMillis = millis();

    int flag = 0;


     if (flag==1){Serial.println(" Smart House Statuse");}

     if (currentMillis - previousMillis >= LightSensor_interval) {previous_LightSensor_interval=currentMillis;LightSytem(flag);}
     if (currentMillis - previousMillis >= Sound_interval) {previous_Sound_interval=currentMillis;Alarm_System(flag);}
     if (currentMillis - previousMillis >= Temperature_interval) {previous_Temperature_interval=currentMillis;AC_Control(flag);}


     if (currentMillis - previousMillis >= interval)
     {
     previousMillis = currentMillis;

     if (Garage_Stage == LOW)
     {
      Garage_Stage = HIGH;
      GarageDoor(1);
     }
     else
     {
      Garage_Stage = LOW;
      GarageDoor(2);
     }
   }

}
Full Code
//Project: Smart House 06/18/2021

// include our list of note pitches

#include "pitches.h"
#include <Servo.h>

Servo GarageServo;

int Front_Door_LED = 2 ;
int First_Floor_LED = 3;
int Second_Floor_LED = 5;

int IN1=8;
int IN2=9;
int ENA=10;

// the photocell voltage divider pin
int photocellPin = A0;
int piezoPin = A1;
int lm35Pin = A2;

// the pin the speaker is attached to
int speakerPin = 7;


const int sensorMin = 0;
// sensor maximum, discovered through experiment
const int sensorMax = 800;
const int threshold = 8;

// the notes in our melody and their duration in fractions of a second
// e.g. quarter note = 4, eighth note = 8, etc.
const int melody1[][2] =
{
    {NOTE_C4, 4},
    {NOTE_G3, 8},
    {NOTE_G3, 8},
    {NOTE_A3, 4},
    {NOTE_G3, 4},
    {NOTE_BLANK, 4},
    {NOTE_B3, 4},
    {NOTE_C4, 4}
};


      int analogValue;
      float temperature;

      int Garage_Stage = LOW;

void setup()
{
    // set up serial at 9600 baud
    Serial.begin(9600);

    pinMode(First_Floor_LED, OUTPUT);
    pinMode(Second_Floor_LED, OUTPUT);
    pinMode(Front_Door_LED, OUTPUT);

    pinMode(IN1,OUTPUT);
    pinMode(IN2,OUTPUT);
    pinMode(ENA,OUTPUT);

  GarageServo.attach(11);
  GarageDoor(2);
  WelcomeSong();
}

unsigned long previousMillis = 0;        // will store last time LED was updated

// constants won't change:
const long interval = 50000;

const long Sound_interval = 50;
const long LightSensor_interval = 100;
const long Temperature_interval = 500;

unsigned long previous_Sound_interval = 0;
unsigned long previous_LightSensor_interval = 0;
unsigned long previous_Temperature_interval = 0;


void loop()
{
    unsigned long currentMillis = millis();

    int flag = 0;


     if (flag==1){Serial.println(" Smart House Statuse");}

     if (currentMillis - previousMillis >= LightSensor_interval) {previous_LightSensor_interval=currentMillis;LightSytem(flag);}
     if (currentMillis - previousMillis >= Sound_interval) {previous_Sound_interval=currentMillis;Alarm_System(flag);}
     if (currentMillis - previousMillis >= Temperature_interval) {previous_Temperature_interval=currentMillis;AC_Control(flag);}


     if (currentMillis - previousMillis >= interval)
     {
     previousMillis = currentMillis;

     if (Garage_Stage == LOW)
     {
      Garage_Stage = HIGH;
      GarageDoor(1);
     }
     else
     {
      Garage_Stage = LOW;
      GarageDoor(2);
     }
   }

}

void GarageDoor(int GarageStage)
{

  int pos;
  if( GarageStage == 1)
  {
      GarageServo.write(180);              // tell servo to go to position in variable 'pos'

  }
  if( GarageStage == 2)
  {
     GarageServo.write(60);              // tell servo to go to position in variable 'pos'
  }

}

void AC_Control(int flag)
{
  Read_Temp(flag);
   if (temperature >28)
     {
     AC_Motor(100);
     }
     if(temperature <=28)
     {
      AC_Motor(0);
     }
}
void AC_Motor(int speedR)
{
 analogWrite(ENA, speedR);// motor speed
 digitalWrite(IN2,LOW);// rotate forward
 digitalWrite(IN1,HIGH);
}
void Read_Temp(int flag)
{
      analogValue = analogRead(lm35Pin);

    // convert the 10bit analog value to celcius
    temperature = float(analogValue) / 1023;
    temperature = temperature * 500;

    // print the temperature over serial
    if(flag ==1)
    {Serial.print("Temp: ");Serial.print(temperature);Serial.println("C");}
}
void Alarm_System(int flag)
{
   int NoiseLevel;
    // read the sensor and store it in the variable sensorReading:
    NoiseLevel= analogRead(piezoPin);delay(100);
    if(flag==1)
    {Serial.print ("NoiseLevel: ");Serial.println(NoiseLevel);}

    // if the sensor reading is greater than the threshold:
    if (NoiseLevel > threshold)
    {
        for(int i = 0; i<10; i++)
        {
        alarm_sound();
        LightControl(0,0);
        delay(10);
        }
    }
    // delay to avoid overloading the serial port buffer
}
void alarm_sound()
{
         // figure out the number of notes in our melody
    int numberOfNotes = sizeof(melody1) / sizeof(melody1[0]);
    // iterate over the notes of the melody
    for (int thisNote = 0; thisNote < numberOfNotes; thisNote++)
    {
        // grab our note and note duration from our array
        int thisNoteTone = melody1[thisNote][0];
        int thisNoteDuration = melody1[thisNote][1];
        int noteDurationMS = 100 / thisNoteDuration;
        // play the note
        tone(speakerPin, thisNoteTone, noteDurationMS);
        delay(noteDurationMS * 1.30);
    }
}

int WelcomeSong()
{
    int numberOfNotes = sizeof(melody1) / sizeof(melody1[0]);
    for (int thisNote = 0; thisNote < numberOfNotes; thisNote++)
    {
        int thisNoteTone = melody1[thisNote][0];
        int thisNoteDuration = melody1[thisNote][1];
        int noteDurationMS = 1000 / thisNoteDuration;
        // play the note
        tone(speakerPin, thisNoteTone, noteDurationMS);
        delay(noteDurationMS * 1.30);
    }
}

void LightSytem(int flag)
{
 int Brightness;

    Brightness = analogRead(photocellPin);
    if(flag==1)
    {Serial.print("Brightness:  ");Serial.println(Brightness);}

    LightControl(Brightness, flag);

    delay(25);
}

void LightControl(int LightLevel, int flag)
{
  int Light = map(LightLevel,0,1020,250,0);
  if(flag==1)
  {Serial.print("Light level: ");Serial.println(Light);}

    analogWrite(First_Floor_LED, Light);
    analogWrite(Second_Floor_LED,Light);
    analogWrite(Front_Door_LED,Light);

}
Conclusion
The Smart House project has come to an end with LED light system, Security System, AC control system, and Motion control system all integrate with the Smart House Controlling System (SHCS). In every project, it is important to ask what next, with the Smart House project this is just the beginning. The Smart House now is full of potential to do so much more. For instance, the SHCS can receive all the sensor data then compare them before reacting to the input. One of the cases would be the light level and the temperature inputs, where the SHCH can make a decision on how to run the AC system. Furthermore, the SHCH can go wireless and control smart devices via Bluetooth or WIFI. The video below will demonstrate how all the systems work together.