GETTING STARTED WITH AN LED MATRIX TUTORIAL
Now that we’ve covered “How to Build Your Own 8×8 LED Matrix” and learned how to program a matrix using the OSEPP Uno arduino device; we’re going to take a step in the other direction and learn a little bit about the “off the shelf” class of LED Matrices.
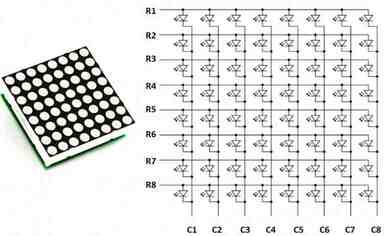
Today we’ll be using the KWN-30881CVB 1.2″ 8X8 Red LED Matrix. This matrix is Common-Row Cathode arrangement, but the pins do NOT correspond in a very straight forward manner. 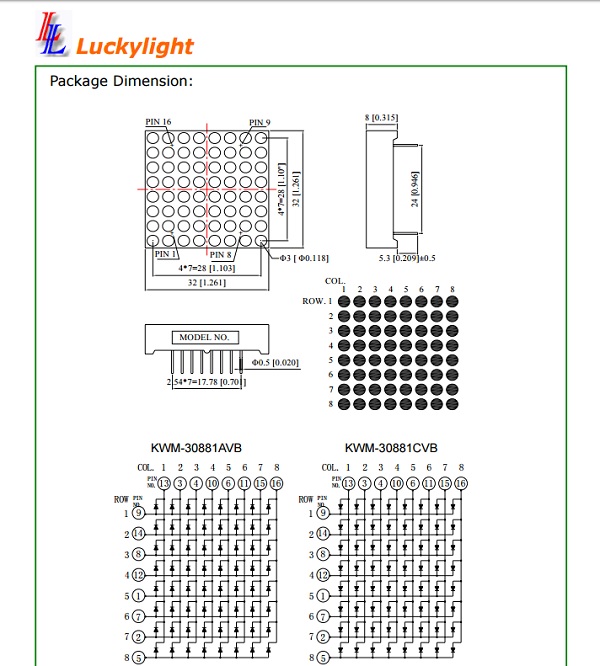
Looking at the diagram, we see that the rows correspond to the under-side pins: 9, 14, 8, 12, 1, 7, 2, and 5. The columns correspond to pins: 13, 3, 4, 10, 6, 11, 15, and 16.
What does this mean?
When we look at this, we start to understand that in order to illuminate a particular LED in the matrix, we must send power to the correct column, and ground to the proper row. But, how do we know which pin is which??
Fortunately for this LED matrix, Luckylight was kind enough to let us know which side is the front of the unit (based on the location of the model number).
But what if I need to find which matrix pin is #1?
You can do a quick test!
If you take a look at the wiring diagram for the CVB model, you will see that pins 1 and 16 lead to bulb (5,8) or row 5, column 8.
Almost all matrices will have the first and last pins in the corners of the matrix, so we can use this knowledge to find our pin 1, by attempting to light up bulb (5,8).
Because there is only 4 possible options for pins #1 and #16, it shouldn’t take us more than a few attempts to light up bulb (5,8).
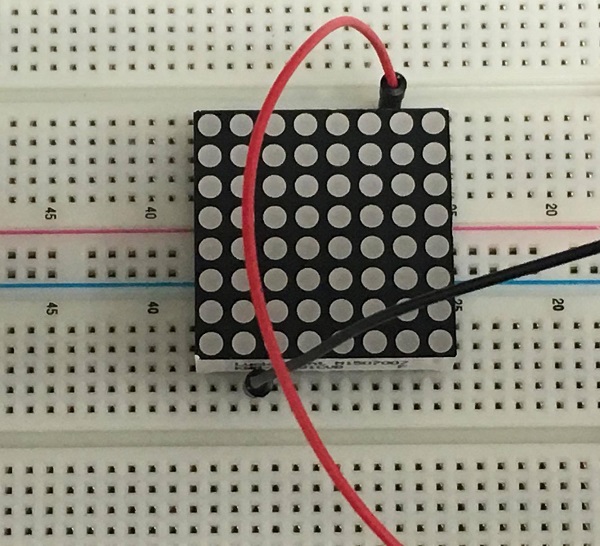
We’ll be using a small adjustable power supply and a couple resistors mounted to the WB-108 breadboard for this test. (do not forget the resistors!)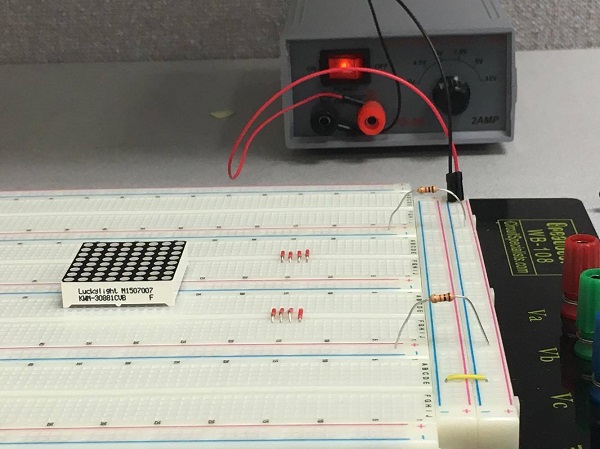 Based on the schematics, this should be the “front” side of the matrix.
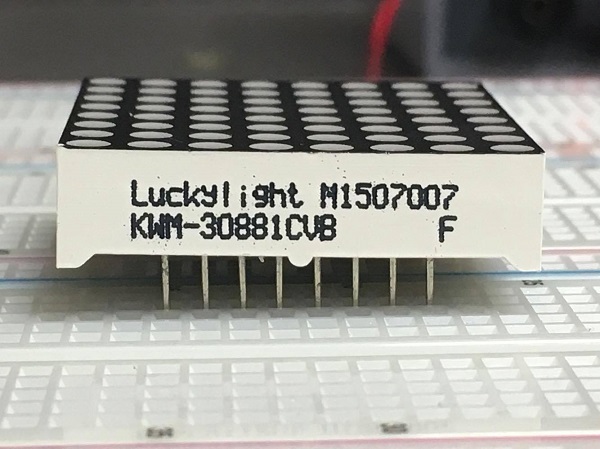
Keeping the direction constant, we will now begin sending power and ground through the pins closest to the sides of the matrix, until we find which combination illuminates light (5,8)…
 Not quite…
 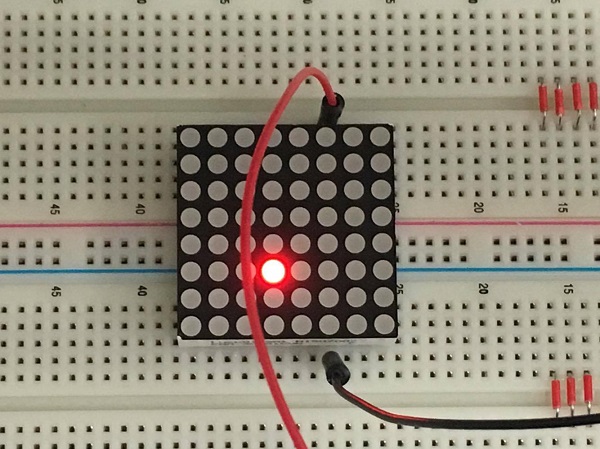 Almost…
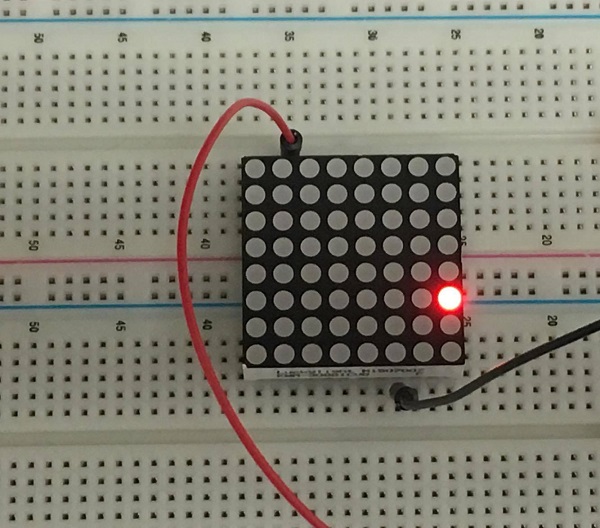 There it is!
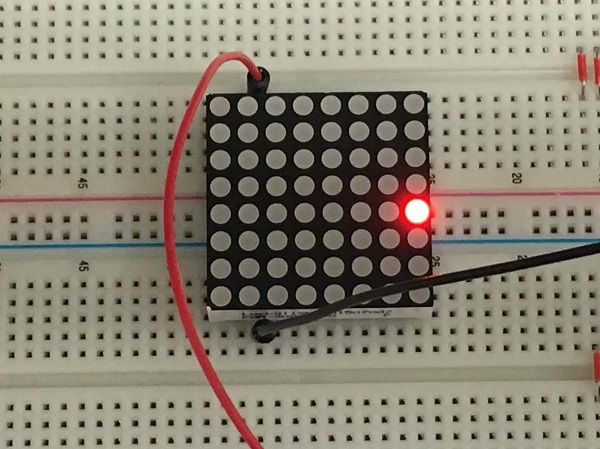
With the LED in Row 5, Column 8 illuminated, we can now safely assume that the pin connected to black lead (ground) is Pin #1, and the pin connected to the red lead (power) is Pin #16.
You may be wondering why they’re on the same side of the board…
As it turns out, most matrices order their pins in a clockwise motion (with pins facing up, starting at #1).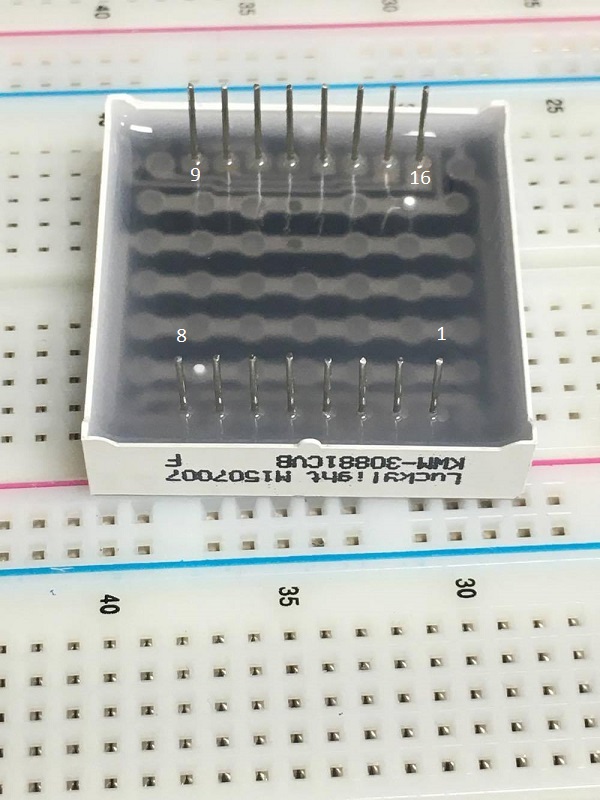 This is important to note, as well as it’s important to mark your pins #1 and #16 for reference while programming.
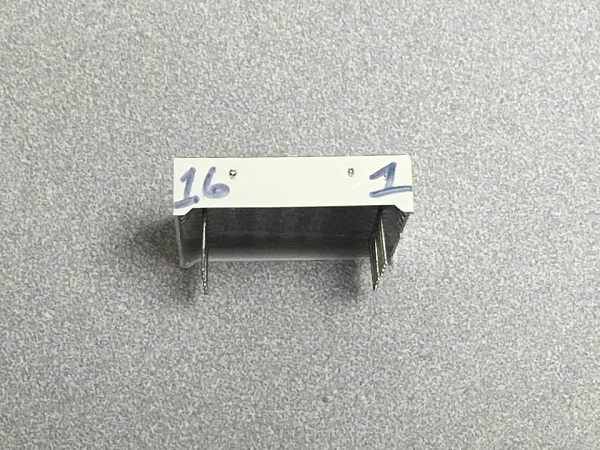
Now that we understand the way the pins work, we can begin programming the matrix to create displays!
Make sure you subscribe to our facebook, twitter, and newsletter to keep yourself updated! We will be launching new blogs, reviews, and tutorials each week!