How To Replace TDGC2-2D Brushes
Introduction
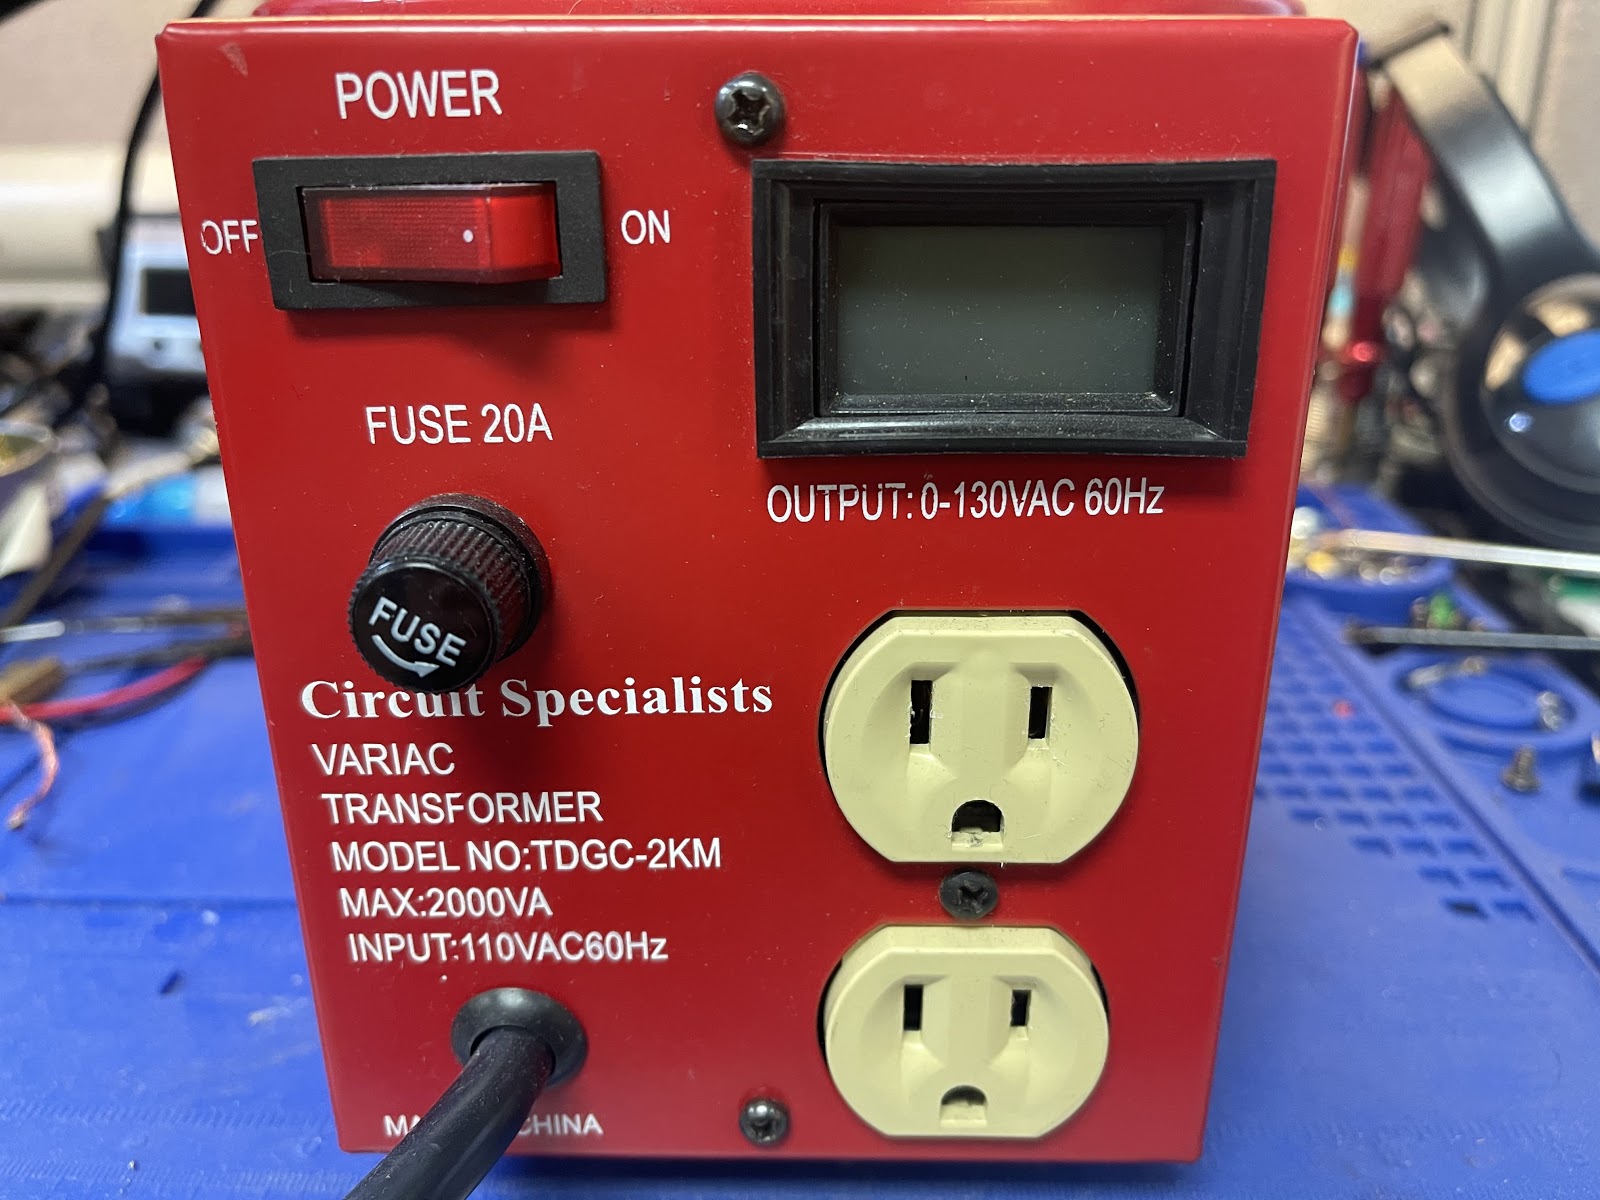
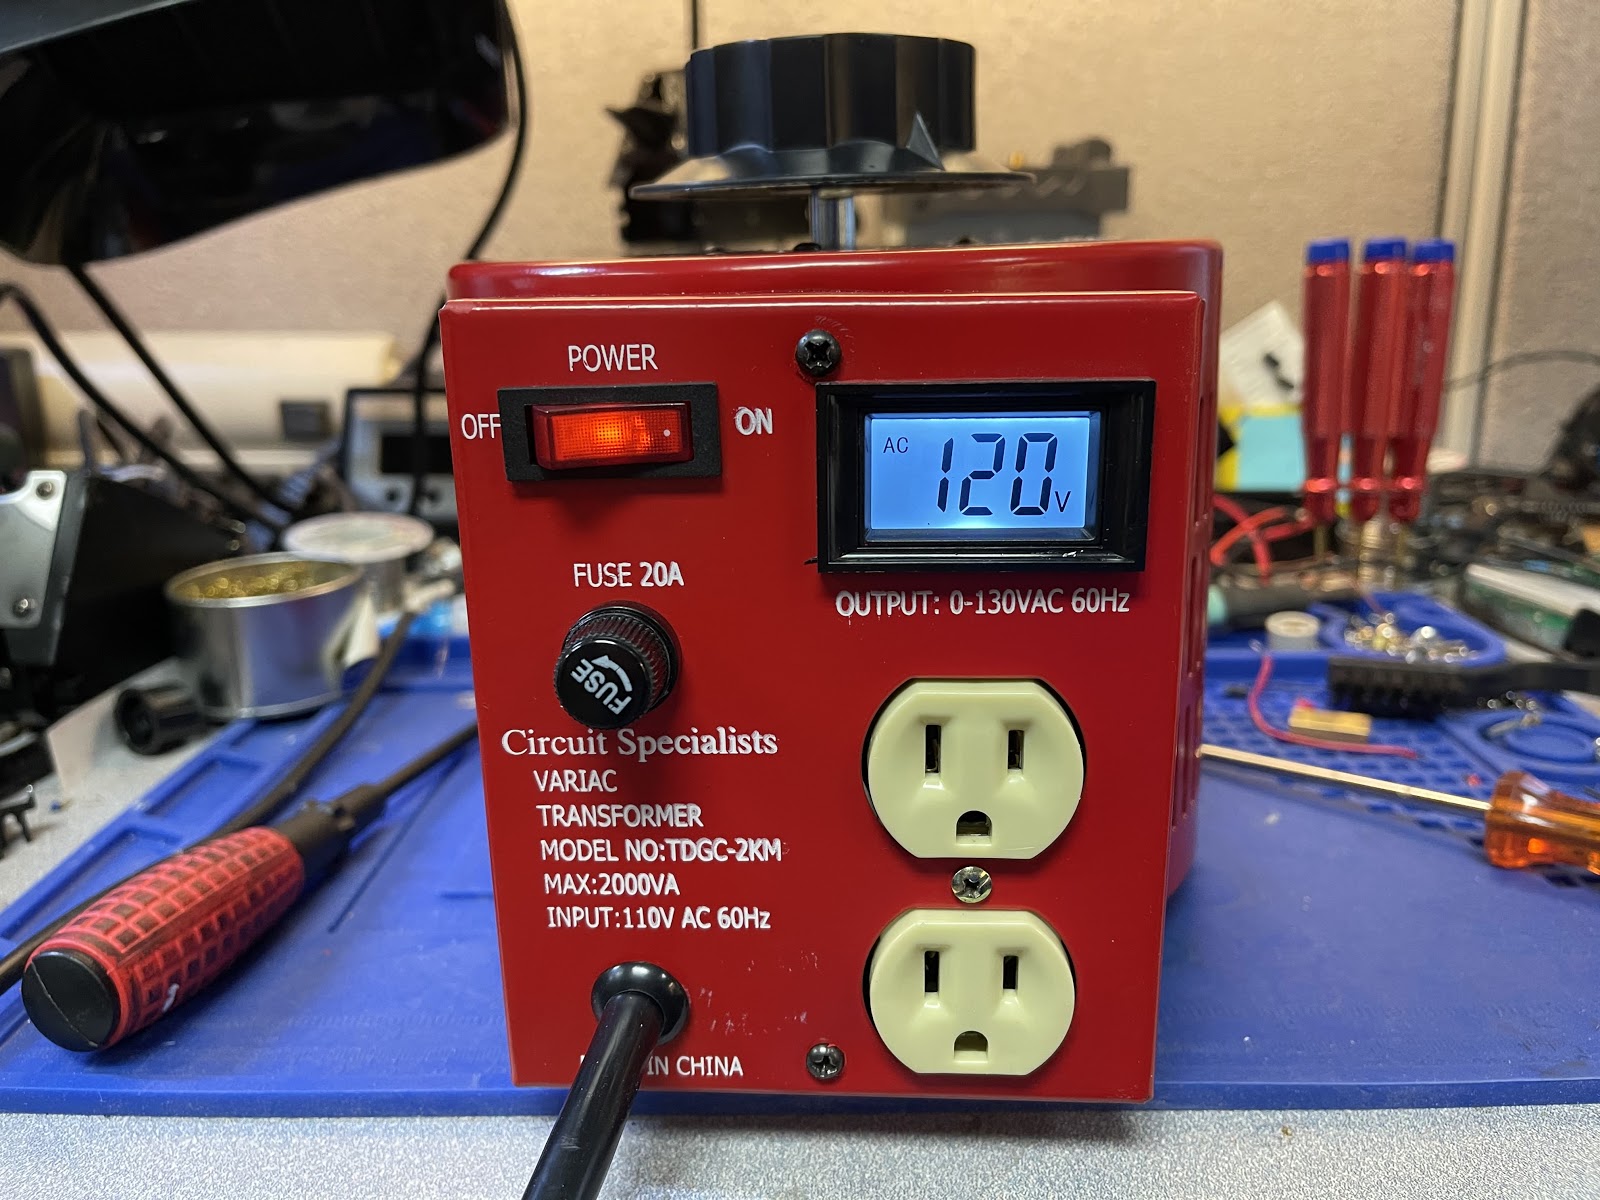
The Variable AC Transformer, TDGC2-2D, is one of our most popular items. Customers ask how often they should replace the brush that makes contact with the coil. The answer depends on how frequently the customer turns the knob. For that reason, we are providing our customers with a maintenance instruction manual for the TDGC-2D.
Symptom
What would happen if the brushes are worn out too much? The first thing you would notice is periodic zero voltage followed by flicking back and forth, you can test it using a multimeter. This is due to the brushes disconnecting from the coil surface. If this condition continues, it could cause a spark and/or further damage to the coil.
Caution: You are about to work with an AC power source and it could be lethal if handled wrong. Please perform with absolute care and make sure everything is unplugged before removing the enclosure.
Part list:
Screwdrivers set or a standard and flat head screwdriver.
Digital Multimeter
Before the repair process! Making sure the unit is unplugged and discharged.
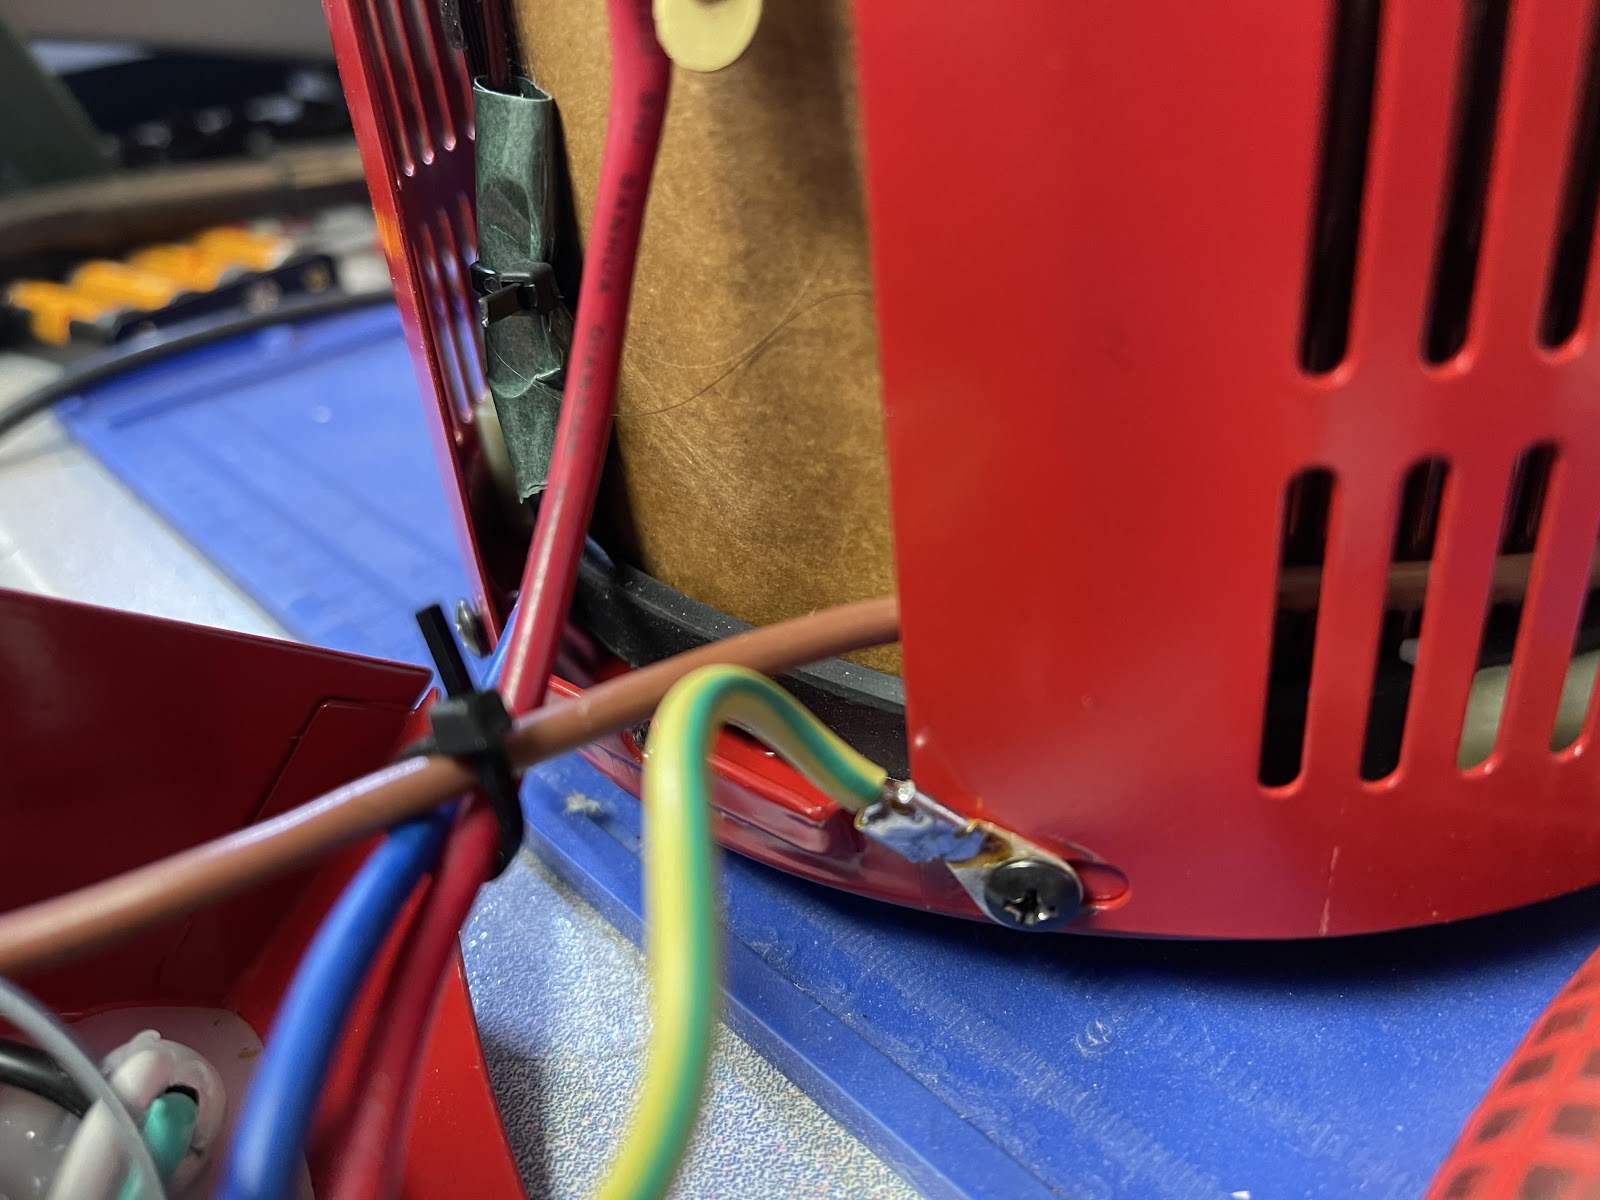
First, remove the front panel screws.
After removing the front panel, slowly pull it forward to expose the ground wire.

After removing the ground connection, remove the rest of the screws around the enclosure.
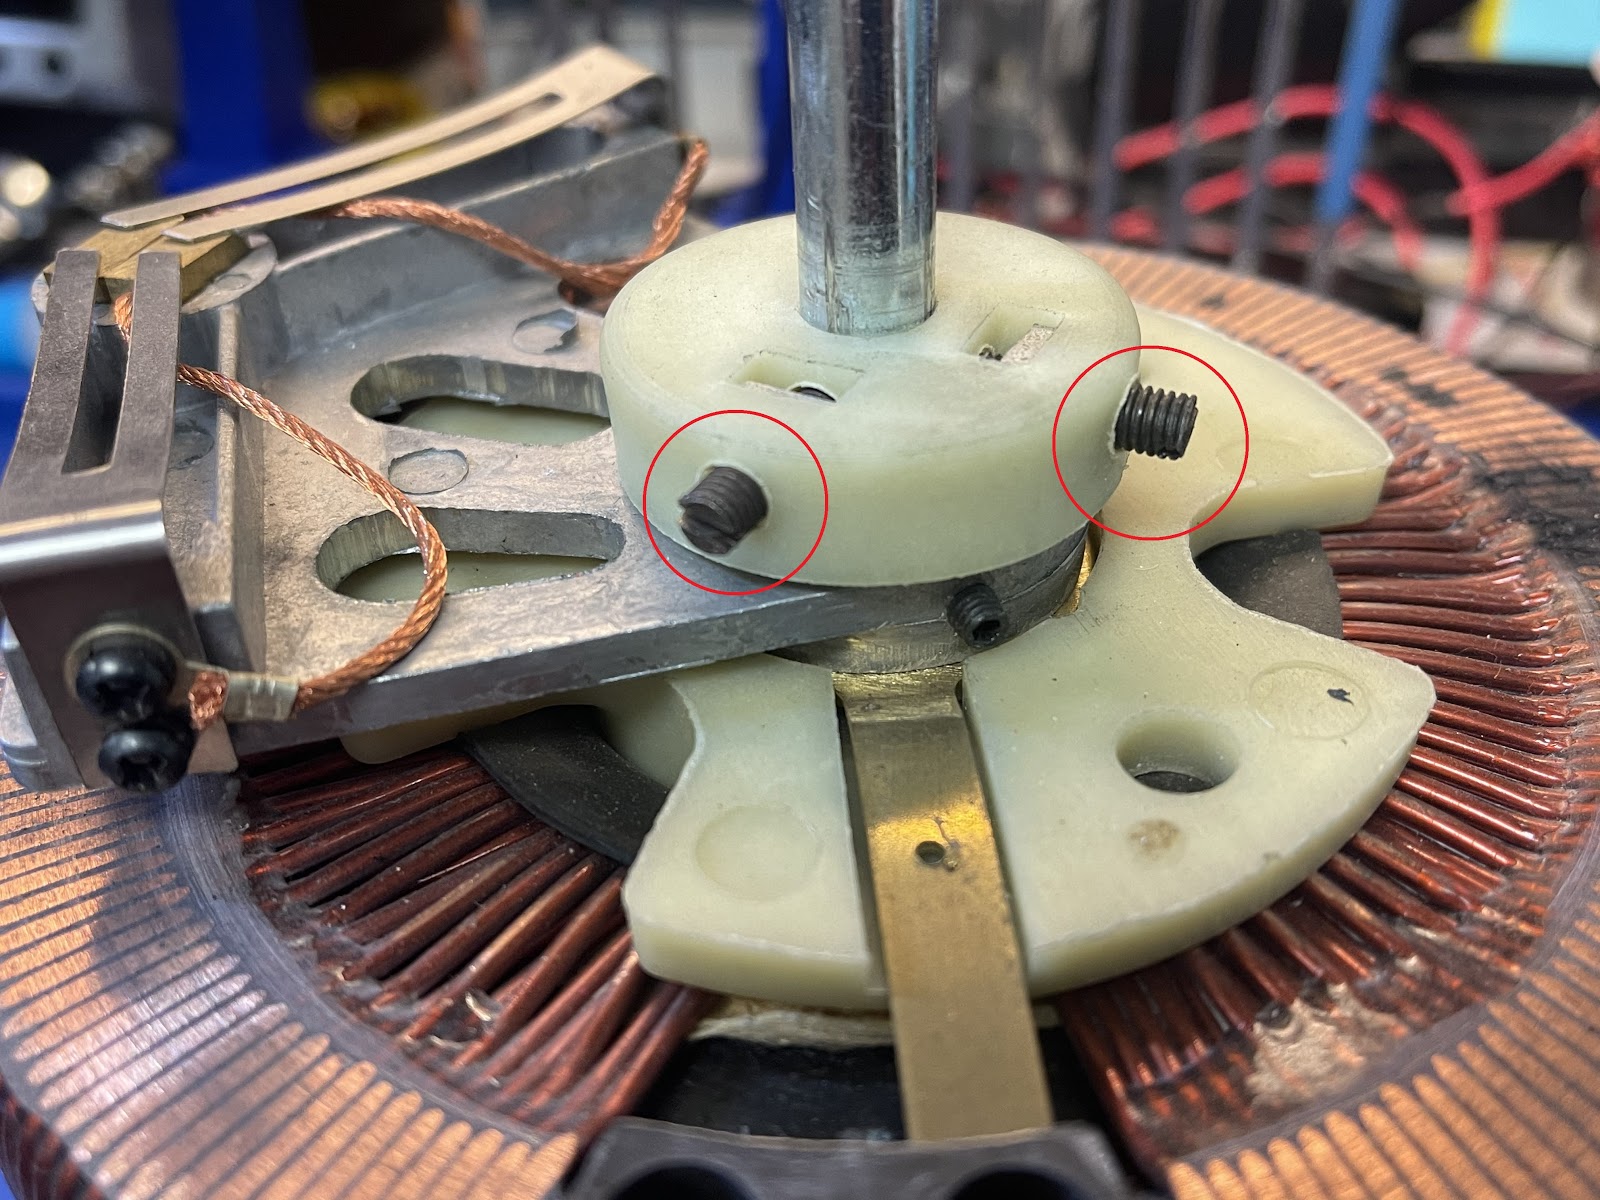
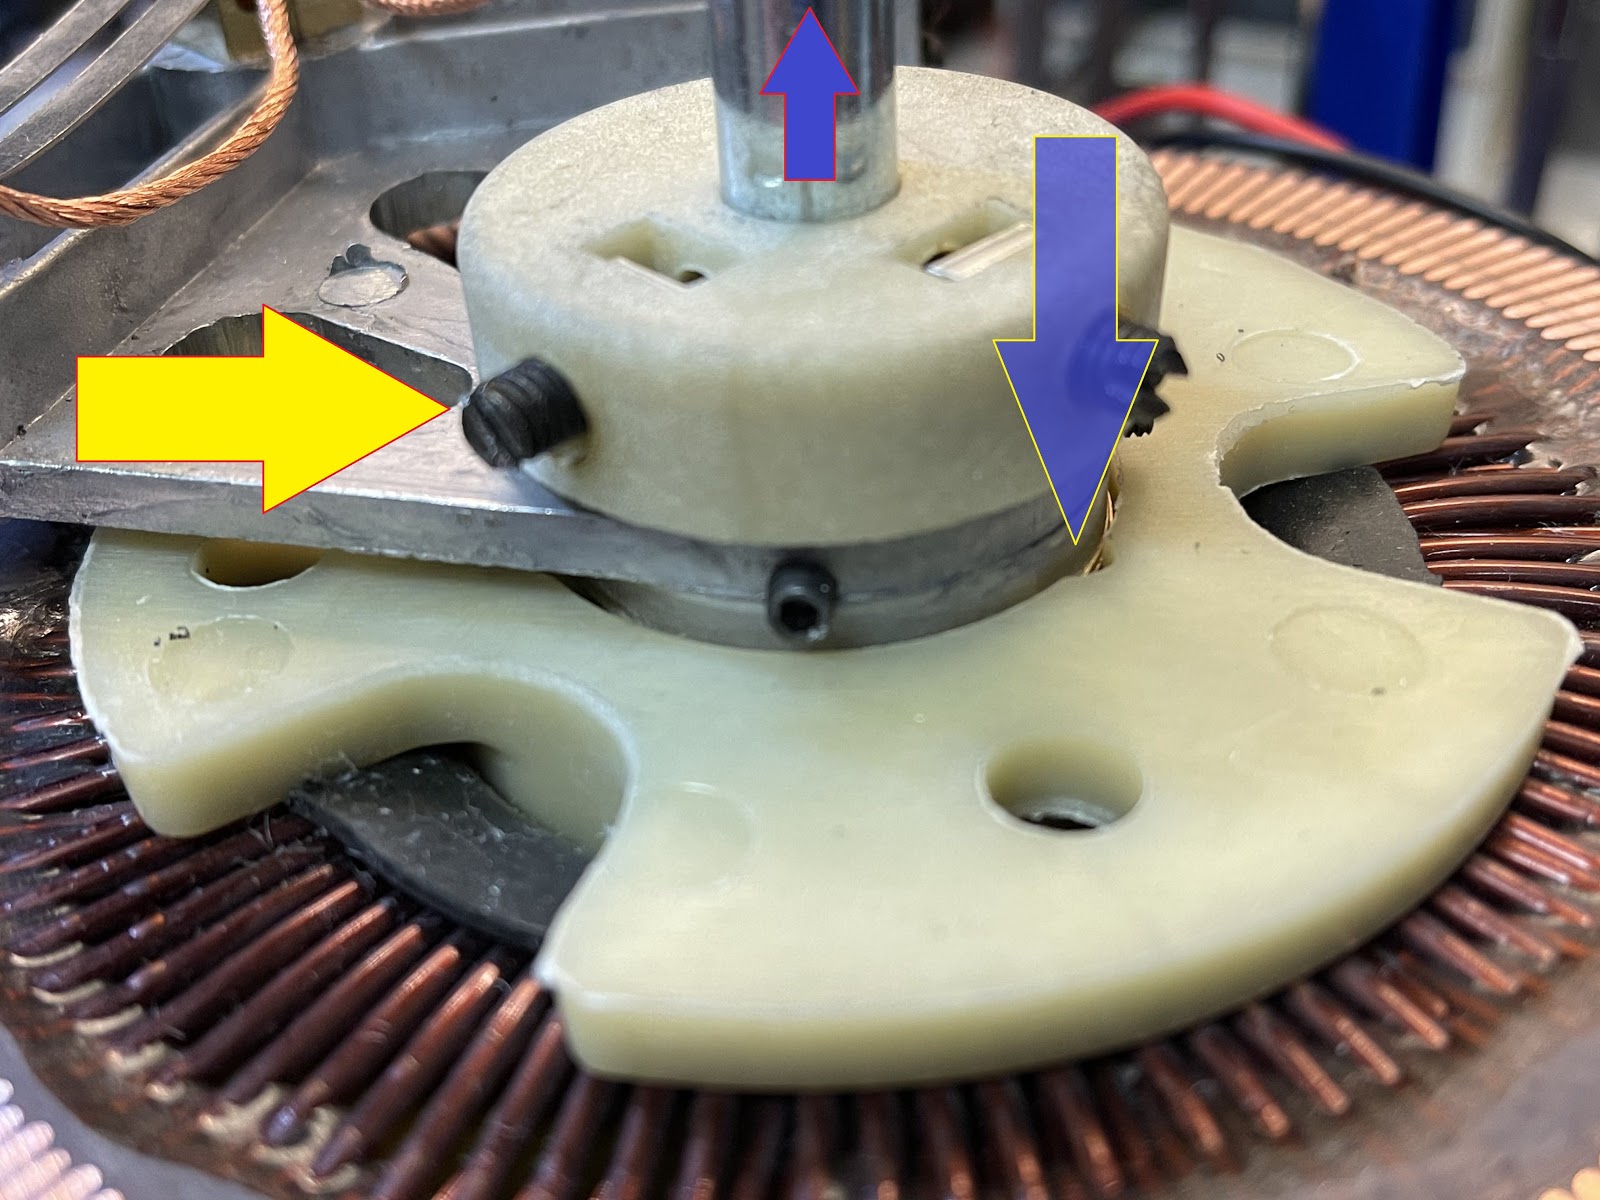
Before you can lift the enclosure off, remove the knob by loosening the 2 screws on the side of the knob.

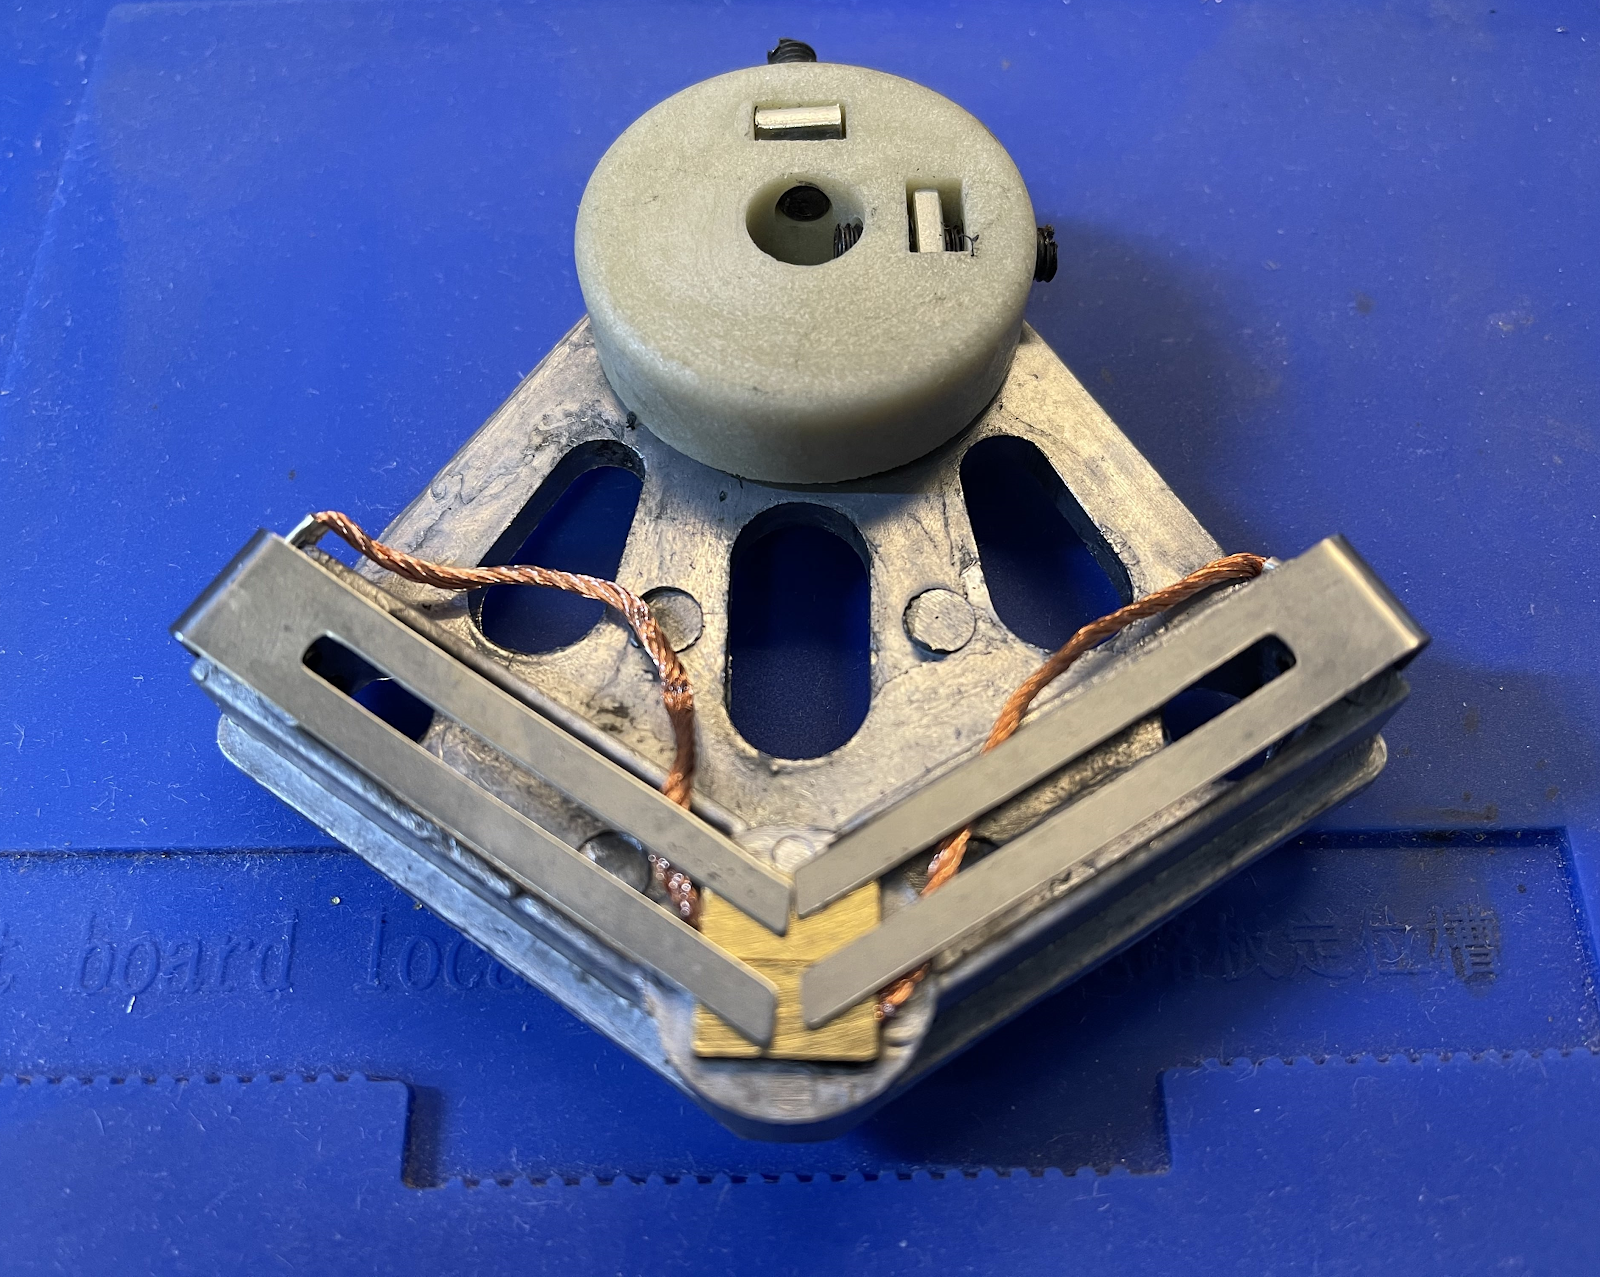
You should be able to remove the brush’s assembly by loosening the 2 screws on the brush disk.
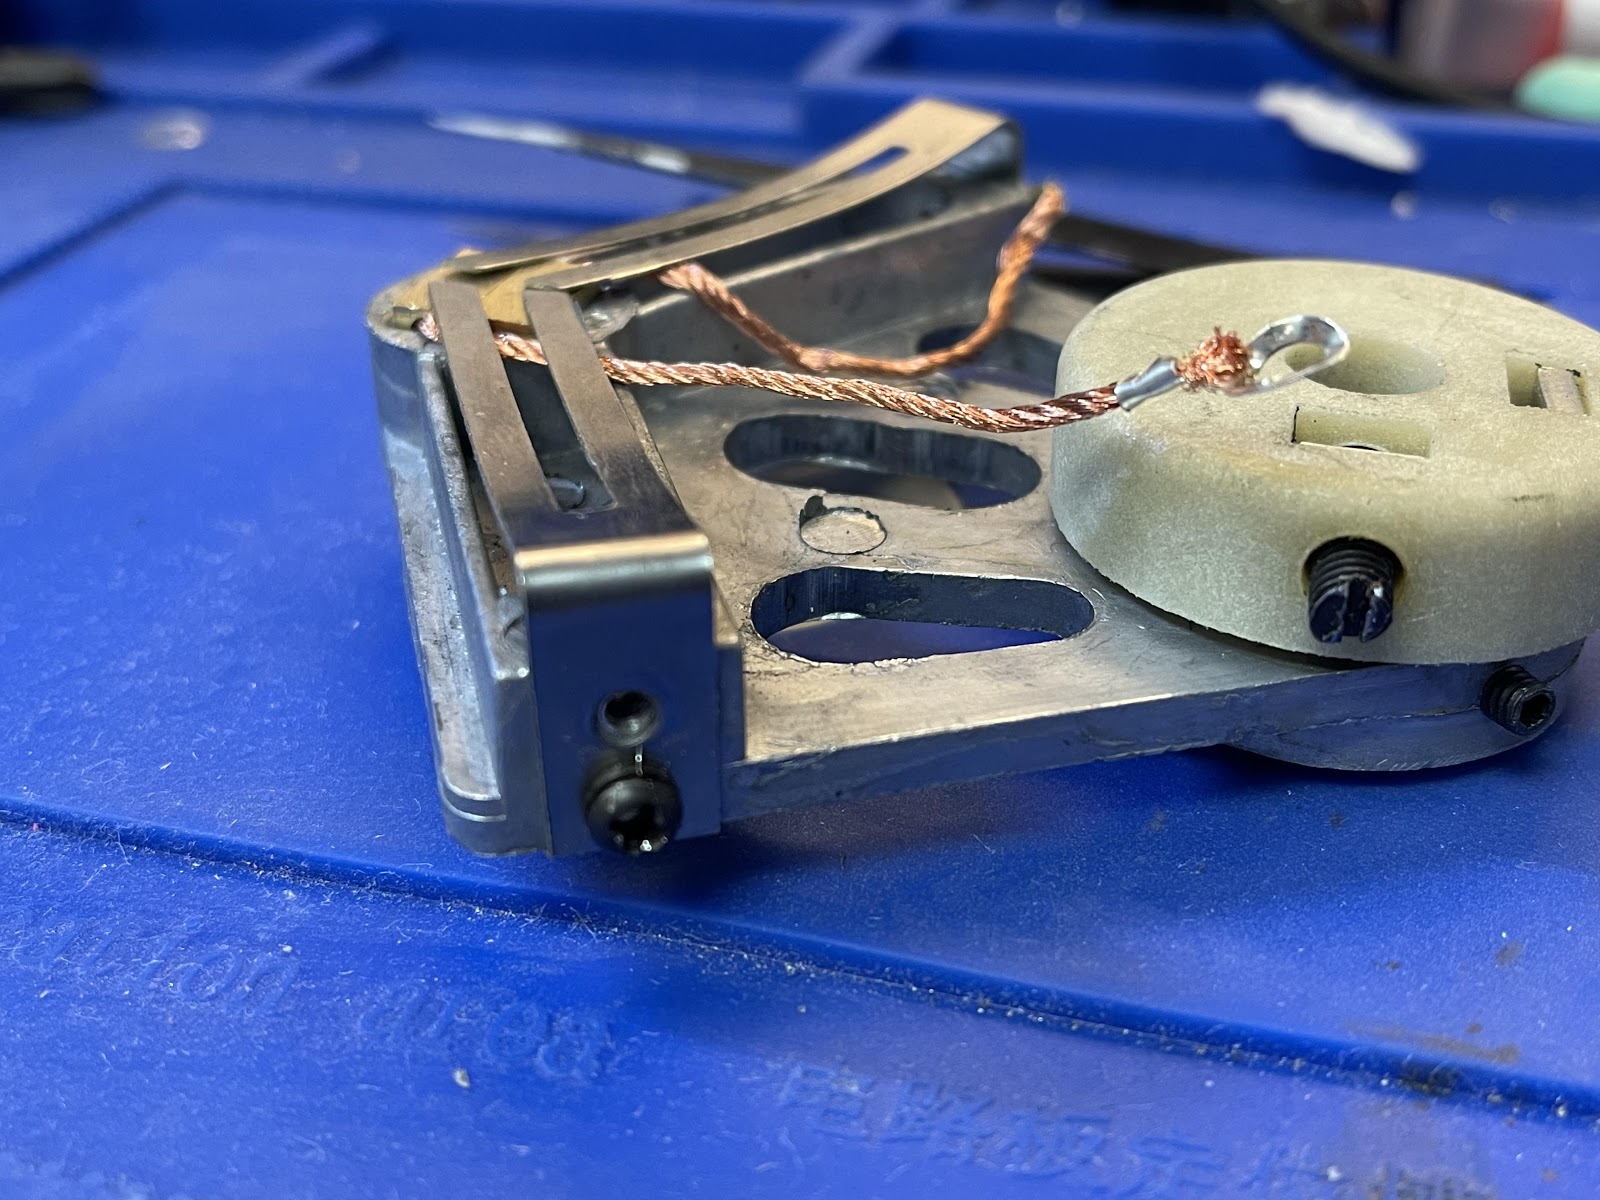
Now you can lift the brush’s assembly off the variac and put it on the side.

Remove the screws on the side of the brush’s assembly.
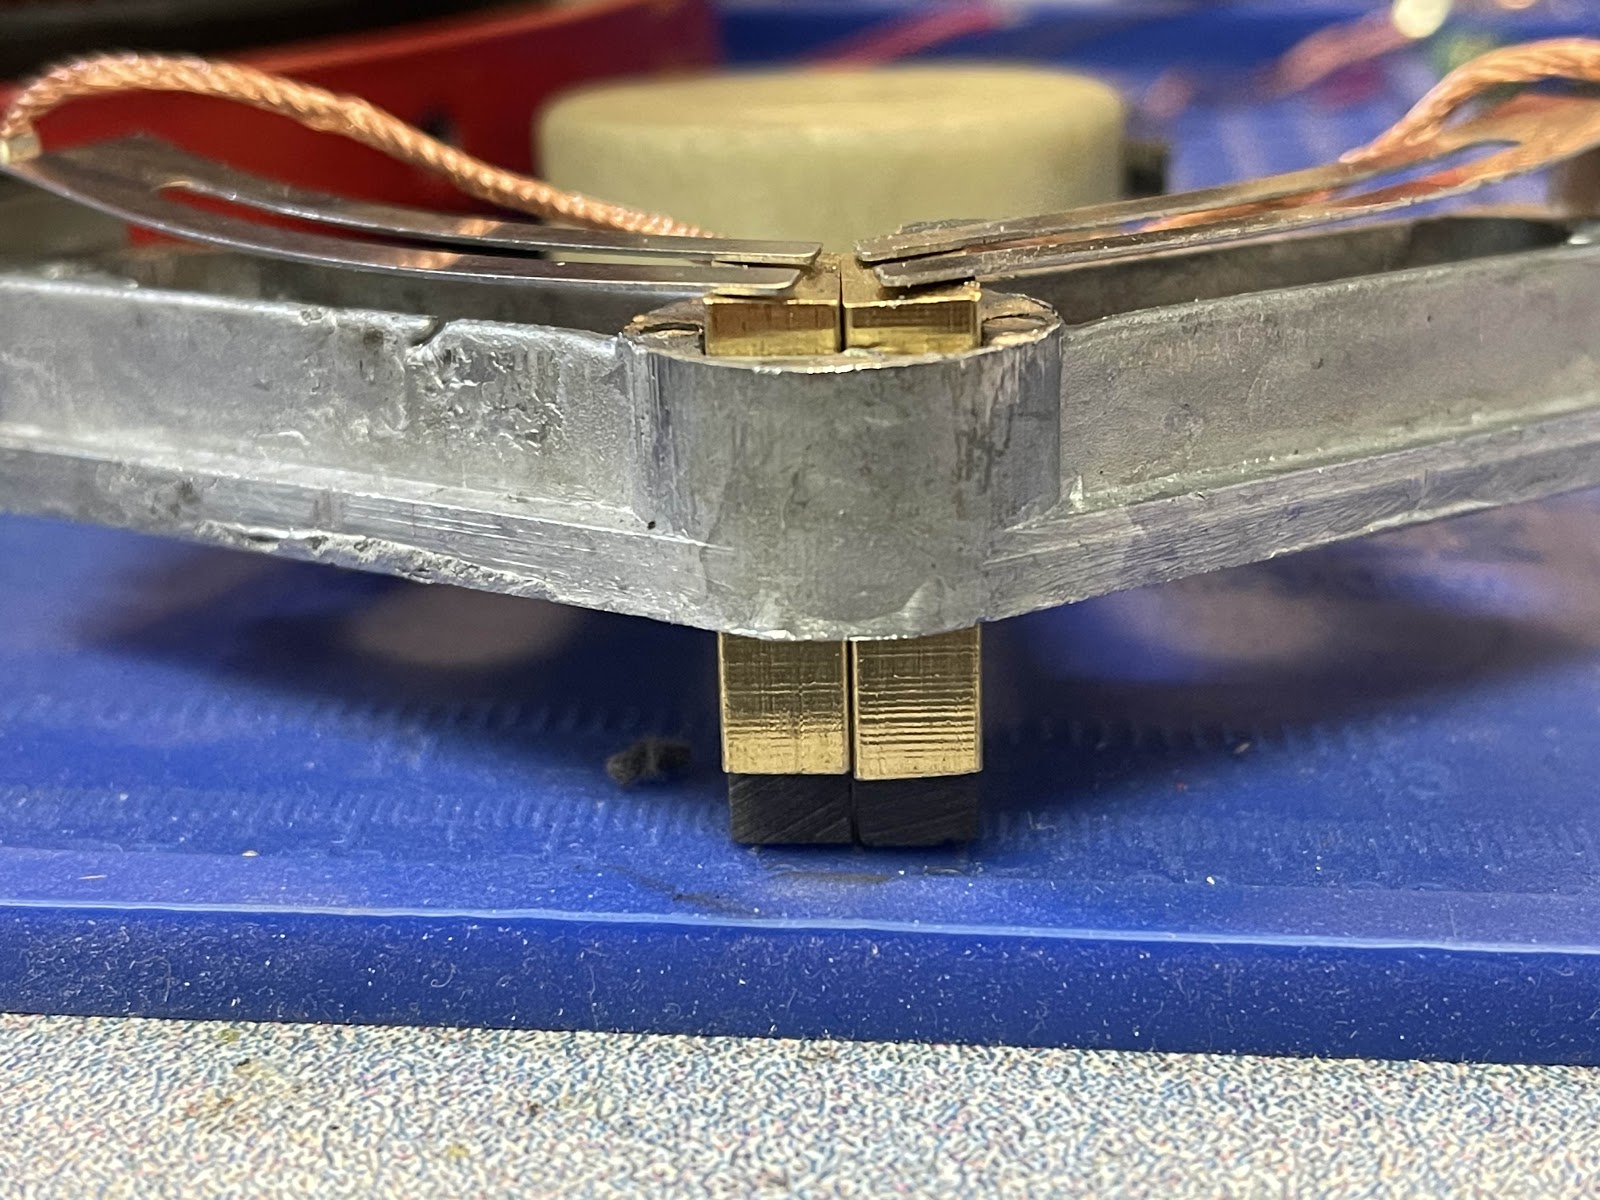
Push the brushes upward to remove them.
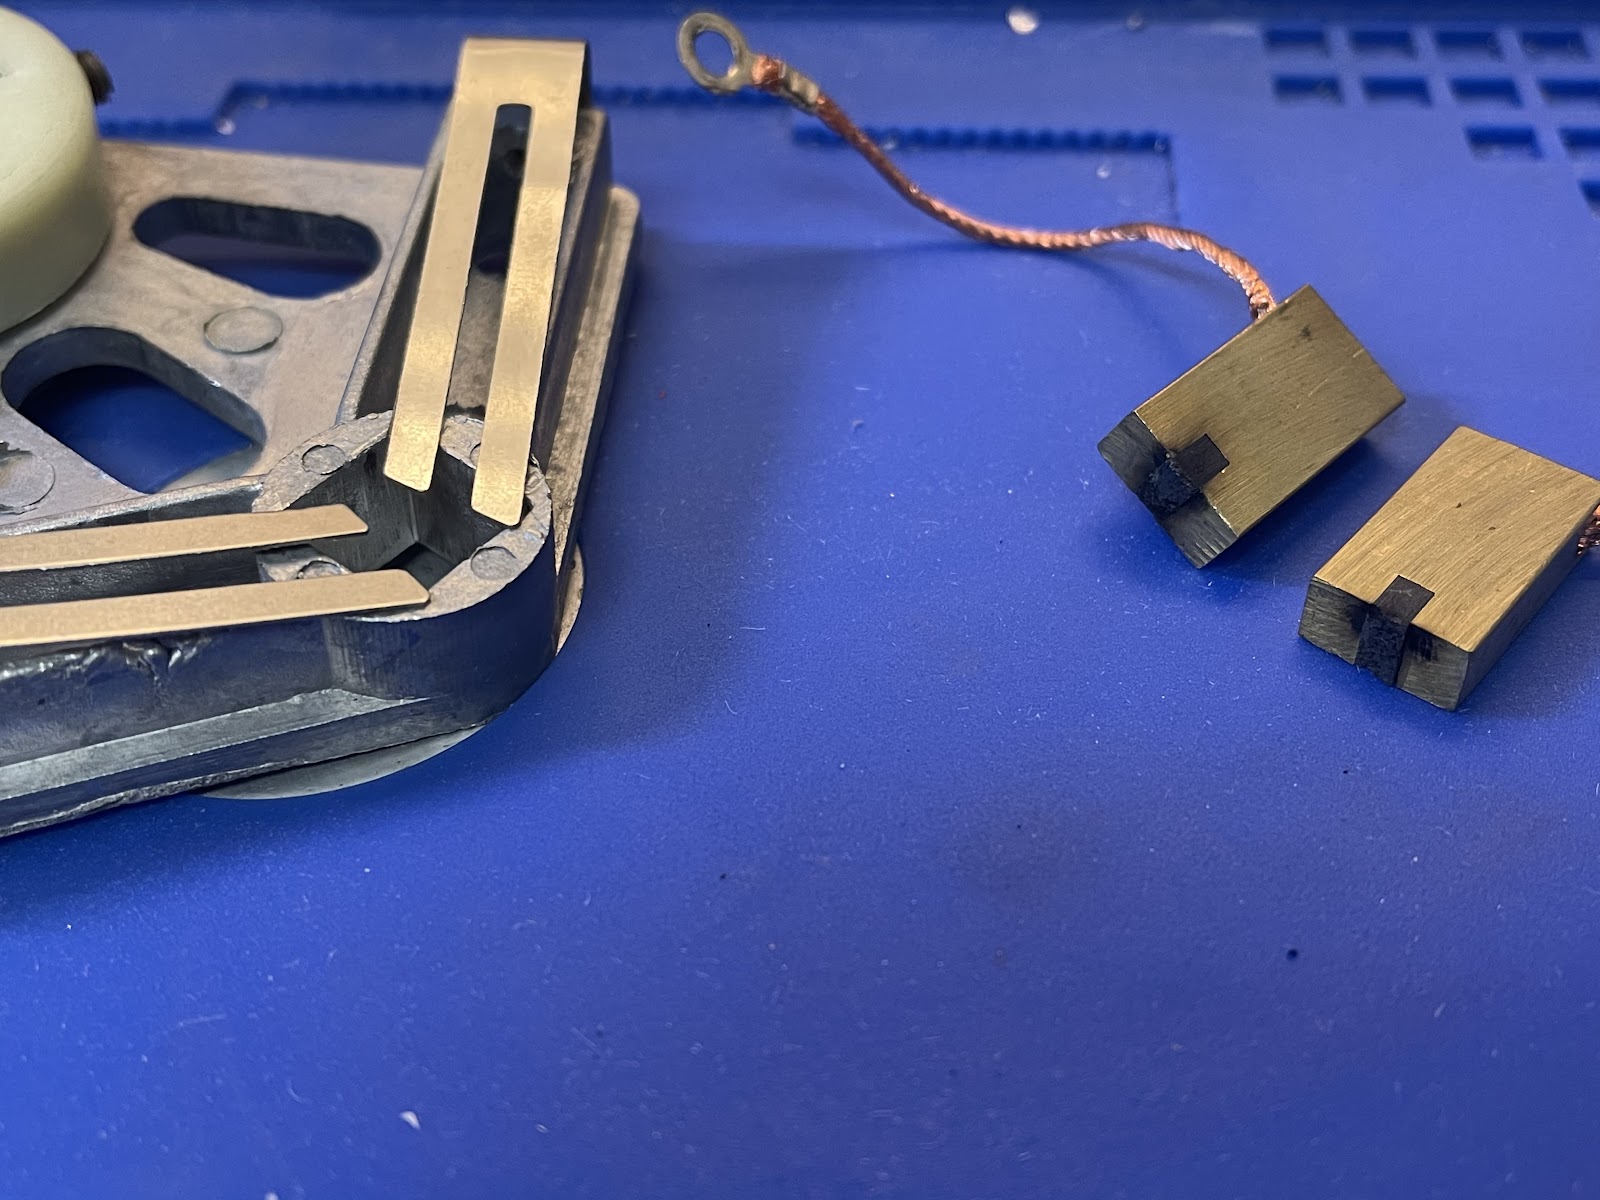
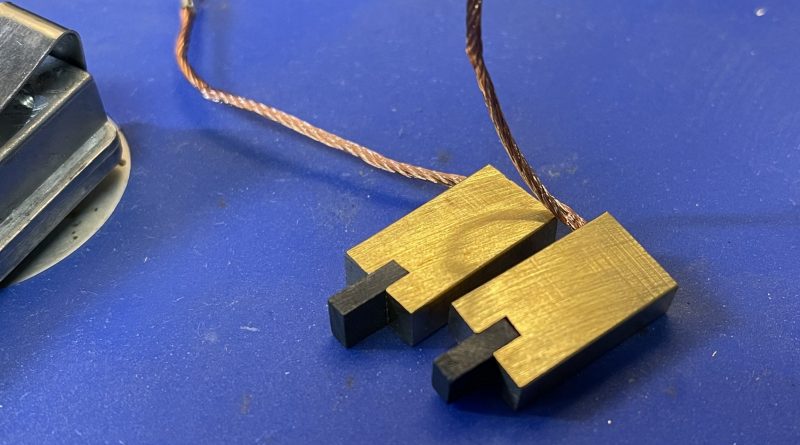
Just for reference, the difference between a good brush (below) and a bad brush.
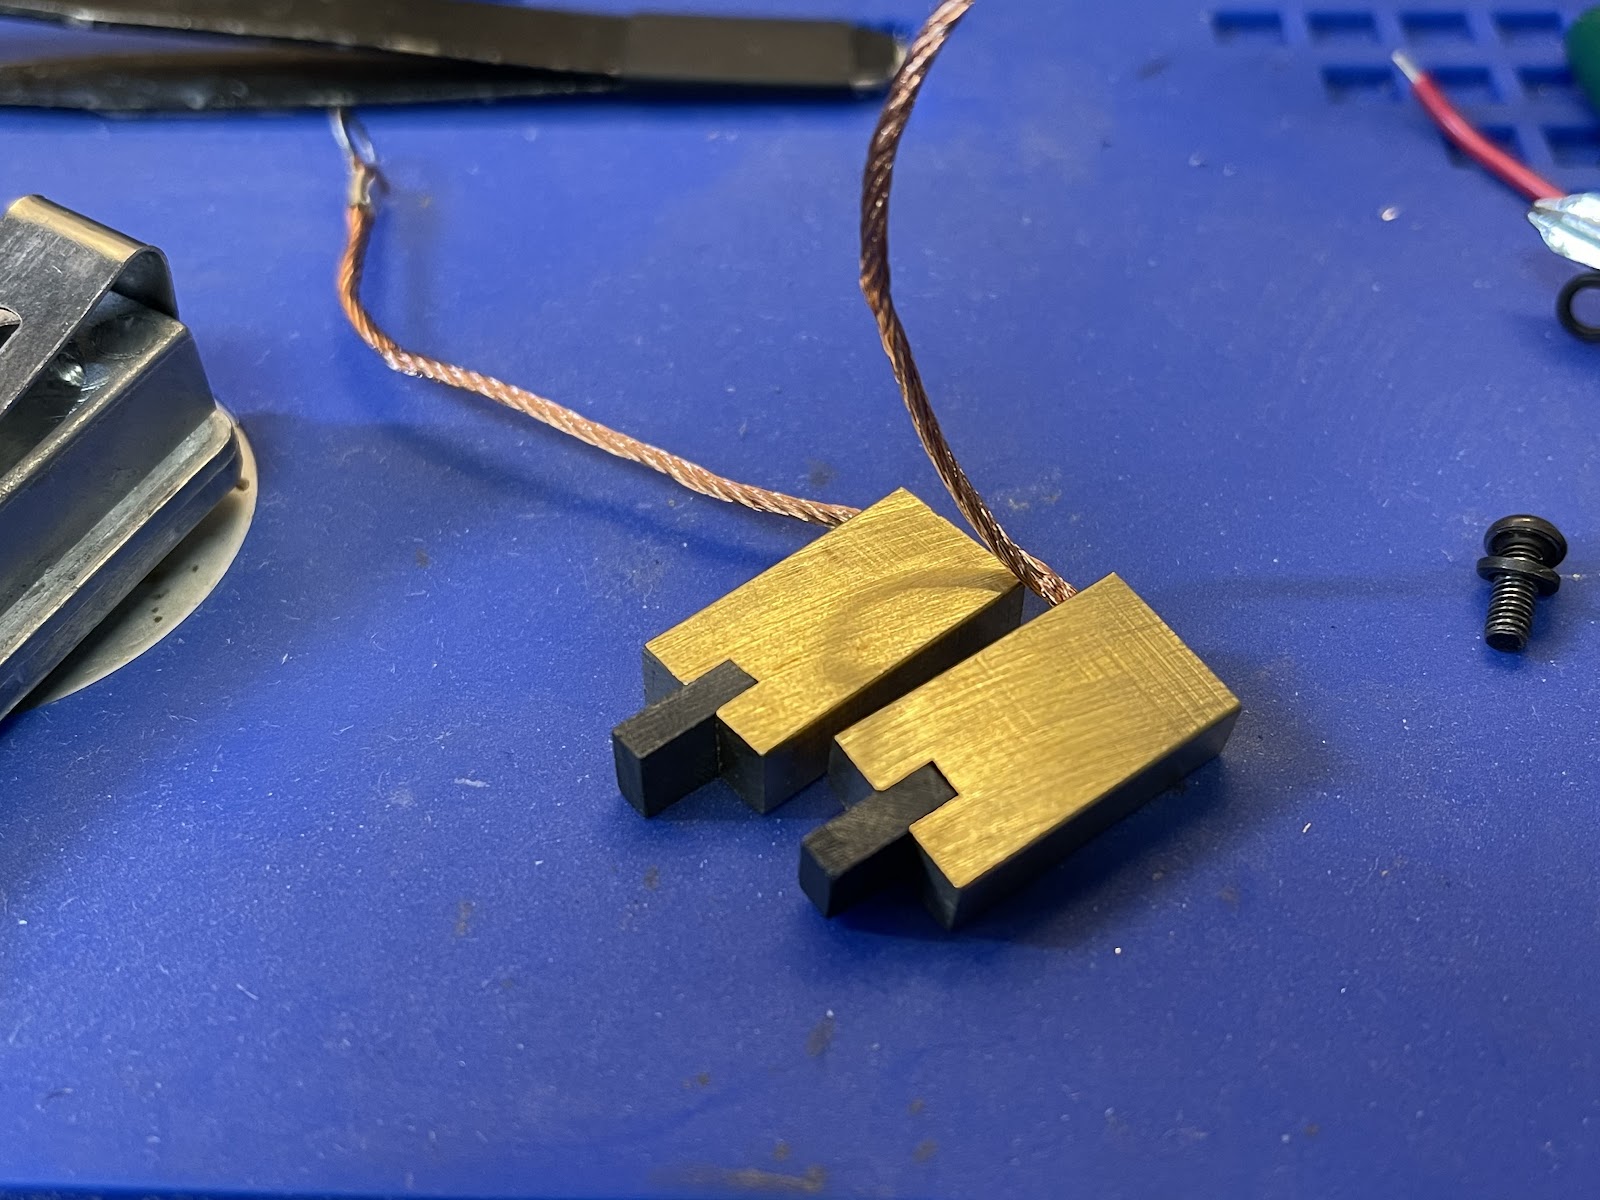
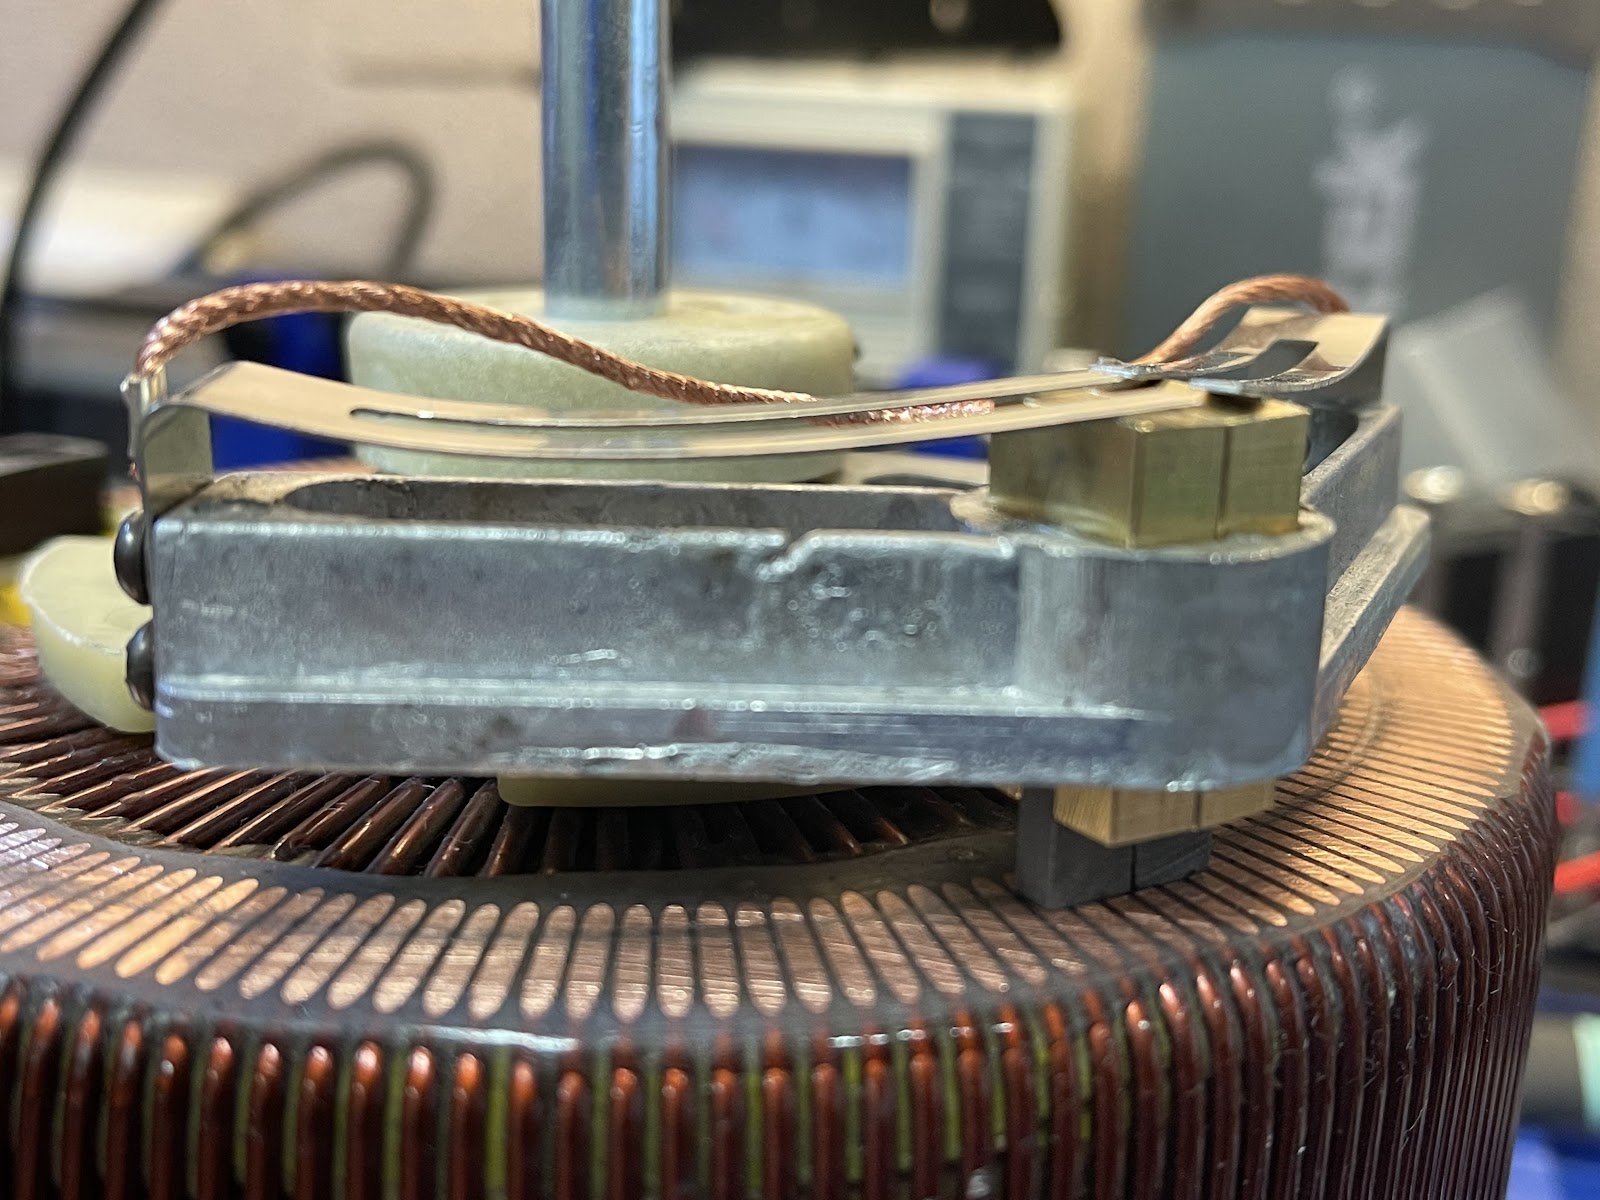
Finally, to reinstall the brushes, pull the springs upward and slide the brush down the slot.
I found that if you flip the brush around, it makes better contact with the coil.
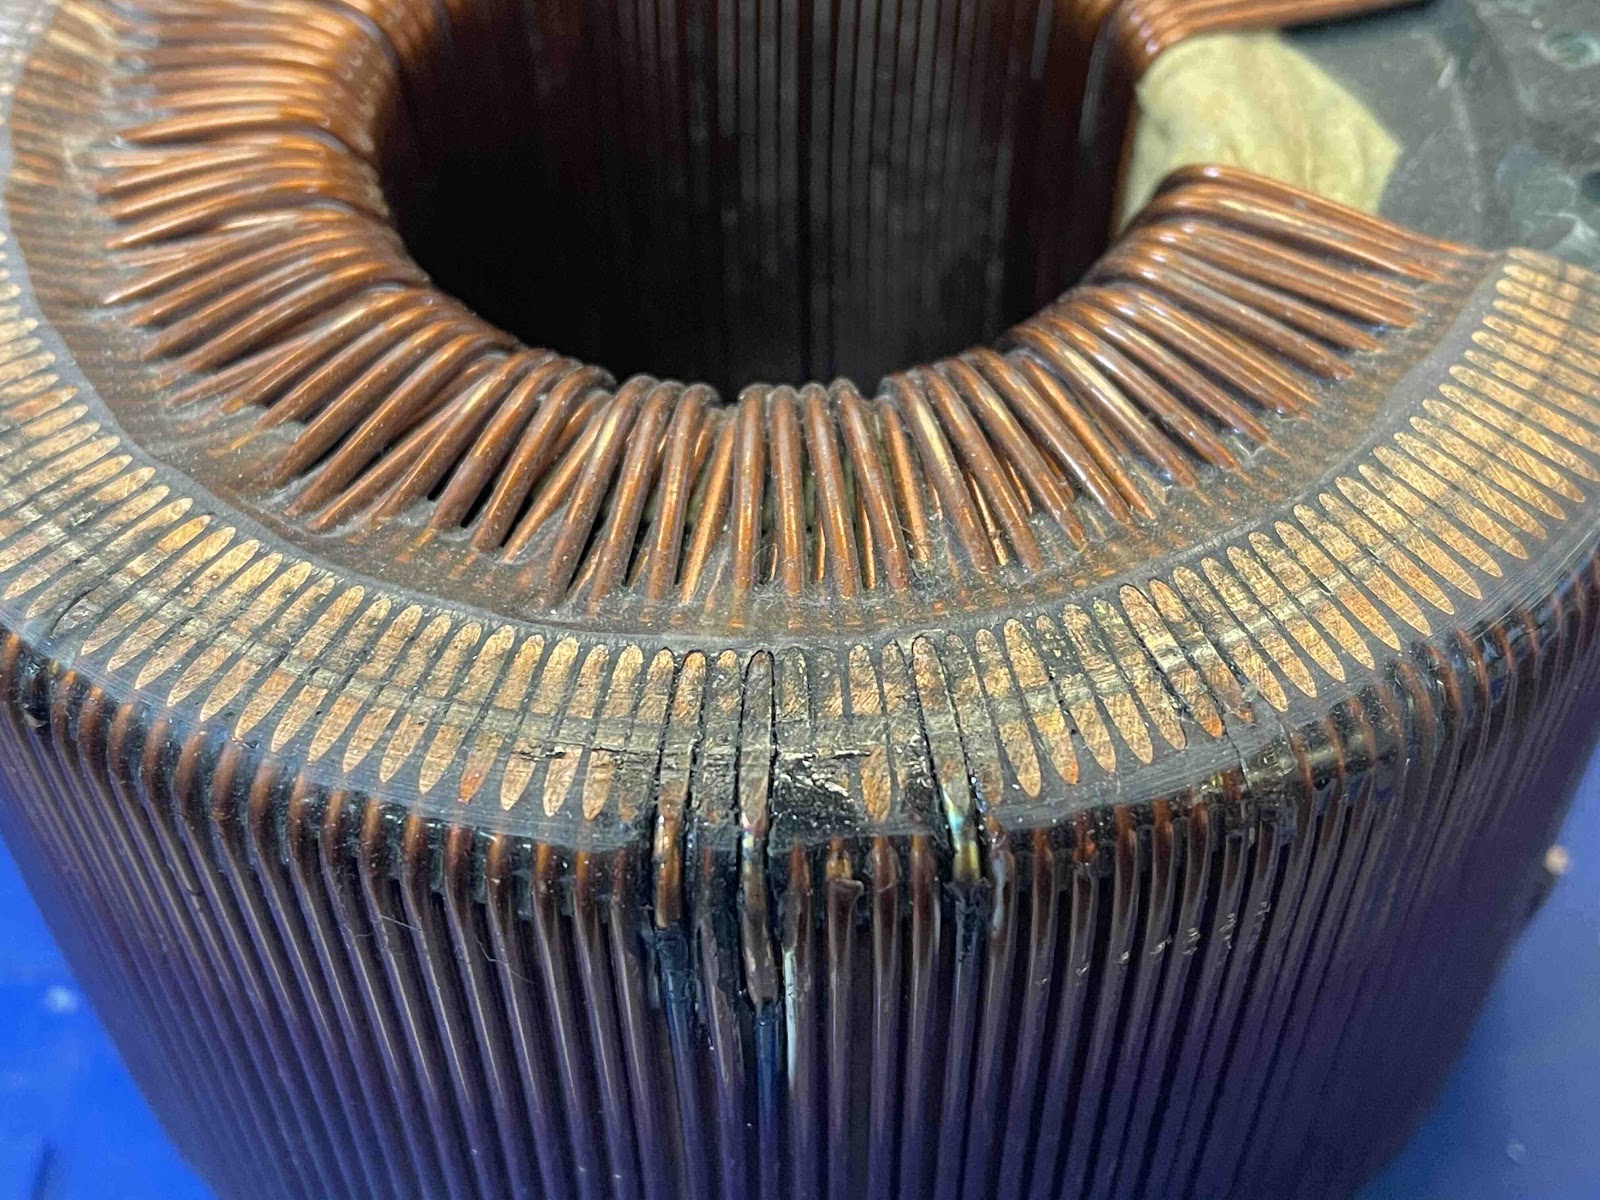
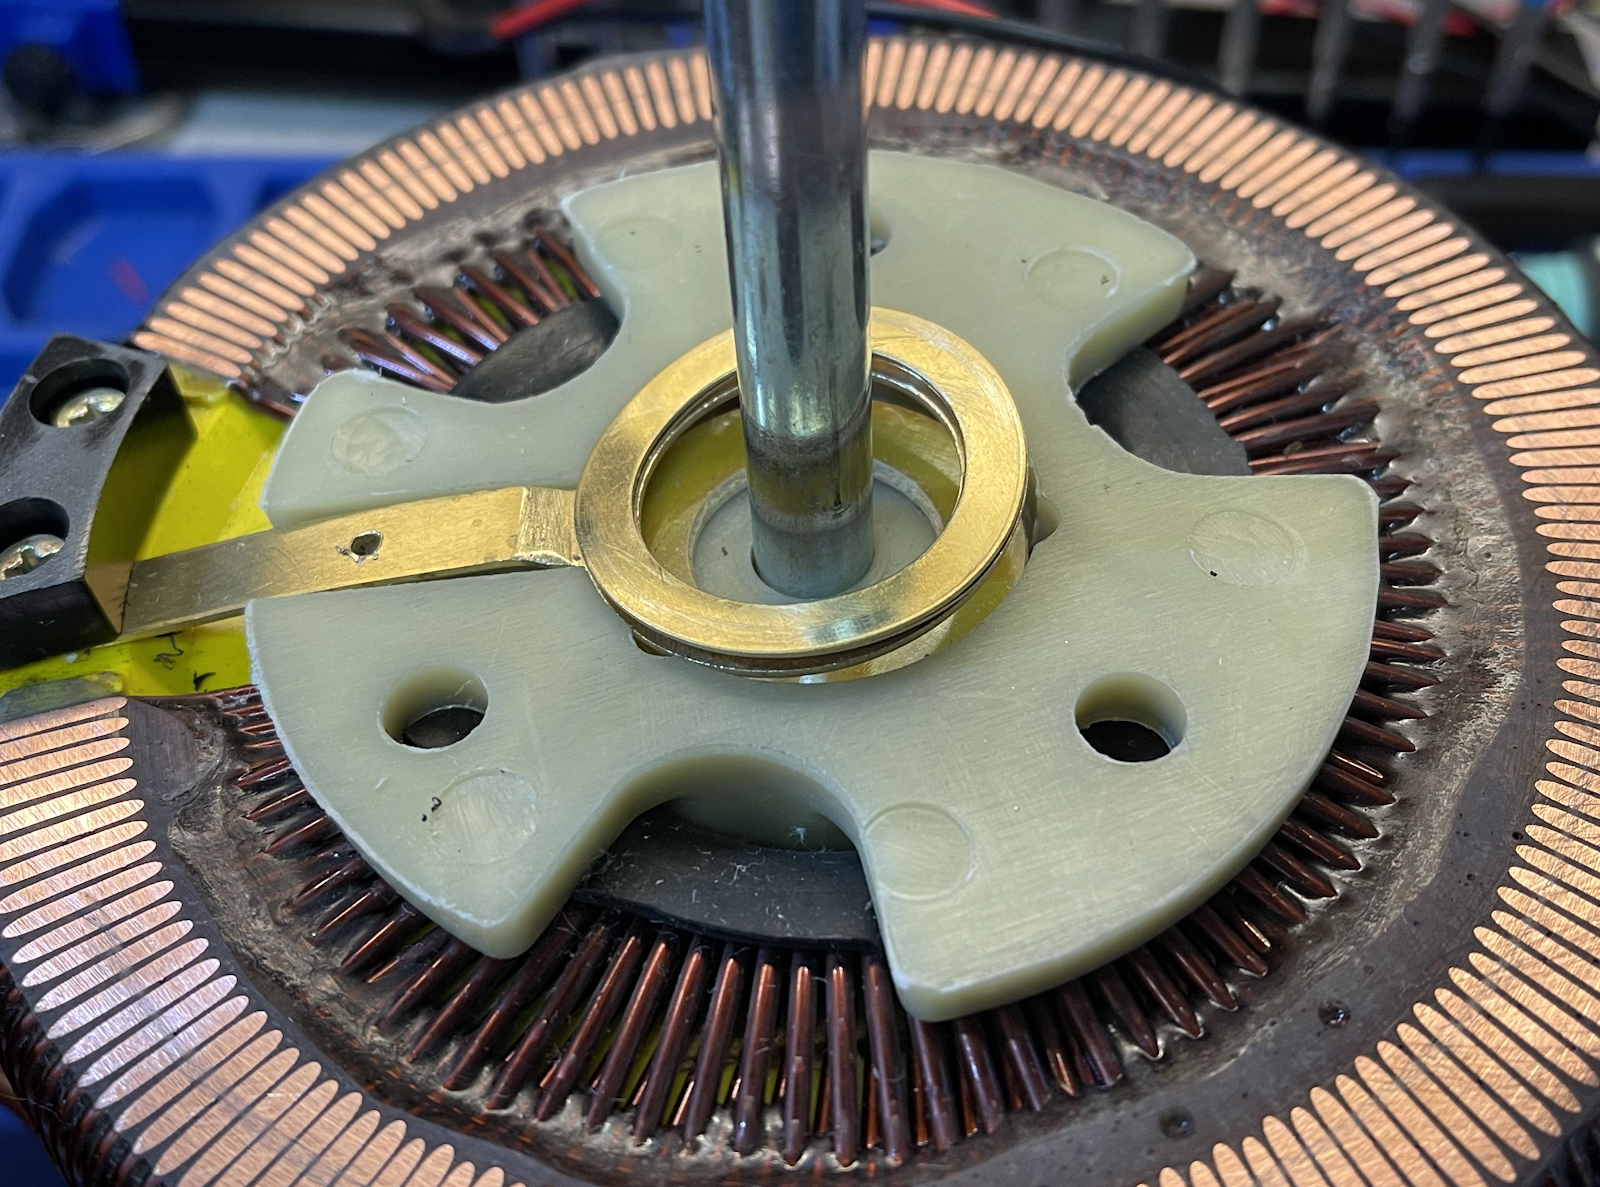
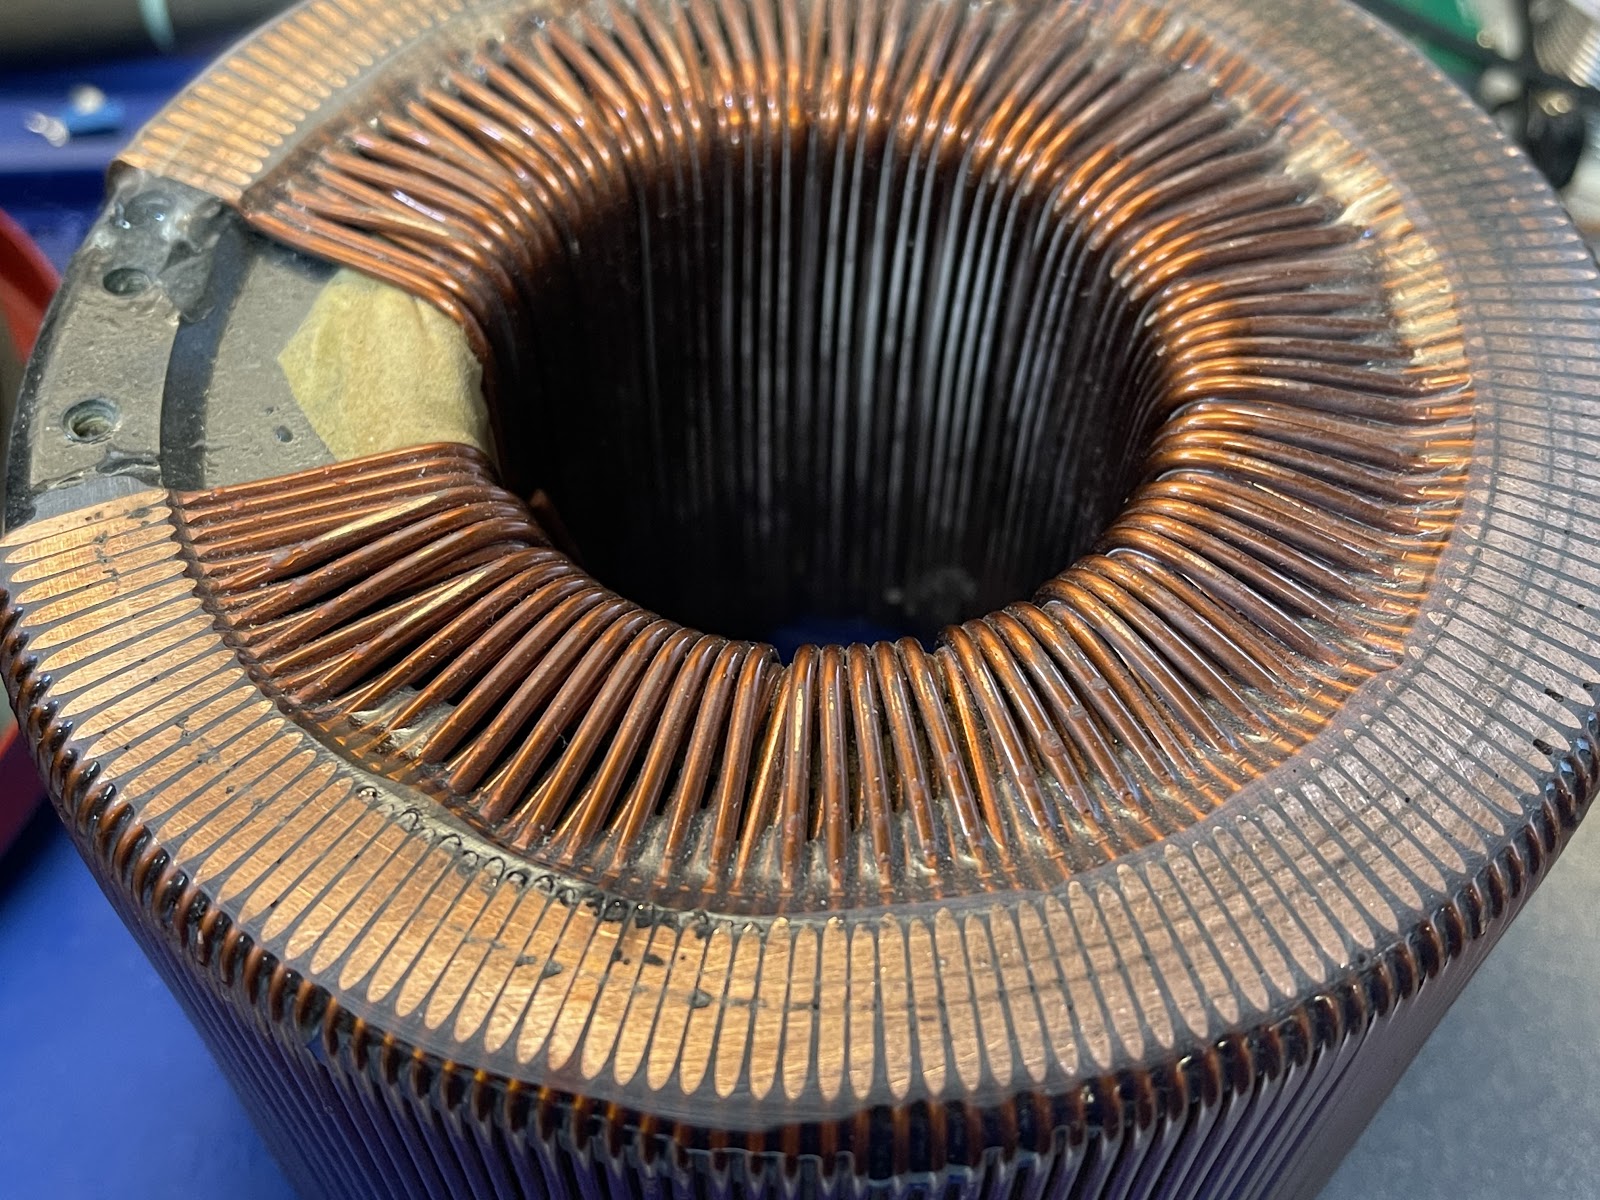
Before reinstalling the brush’s assembly, make sure all the contact rings are lined up and clean the coil surface.
For reference, the difference between a clean coil and a dirty coil (below).
When installing the brush’s assembly, make sure the assembly is pushing down on the contact rings.

Brush’s Assembly Installation
This next step is very important as it will determine how hard the brush is pushed down onto the coil.
If the brush is pushing down on the coil too much, it could wear out faster. However, if the contact between the brushes and the coil is too loose the unit will not operate as intended.
As you apply downforce on the brush’s assembly, make sure the assembly pushes down on the contact rings. At the same time, pull upward on the axle before tightening the side screws on the brush’s assembly.
It must remain tight while turning the knob slowly to feel the resistance. The resistance can be decreased by moving the axle down a little bit and then retightening the side screws. Repeat the steps to make sure the brushes make good contact with the coil.
Now the unit is ready to assemble. Reinstall the ground screw to the unit housing than the rest of the screws.
Finally, reinstall the front screws without over-tightening them. Now the unit is ready to be turned on for testing.
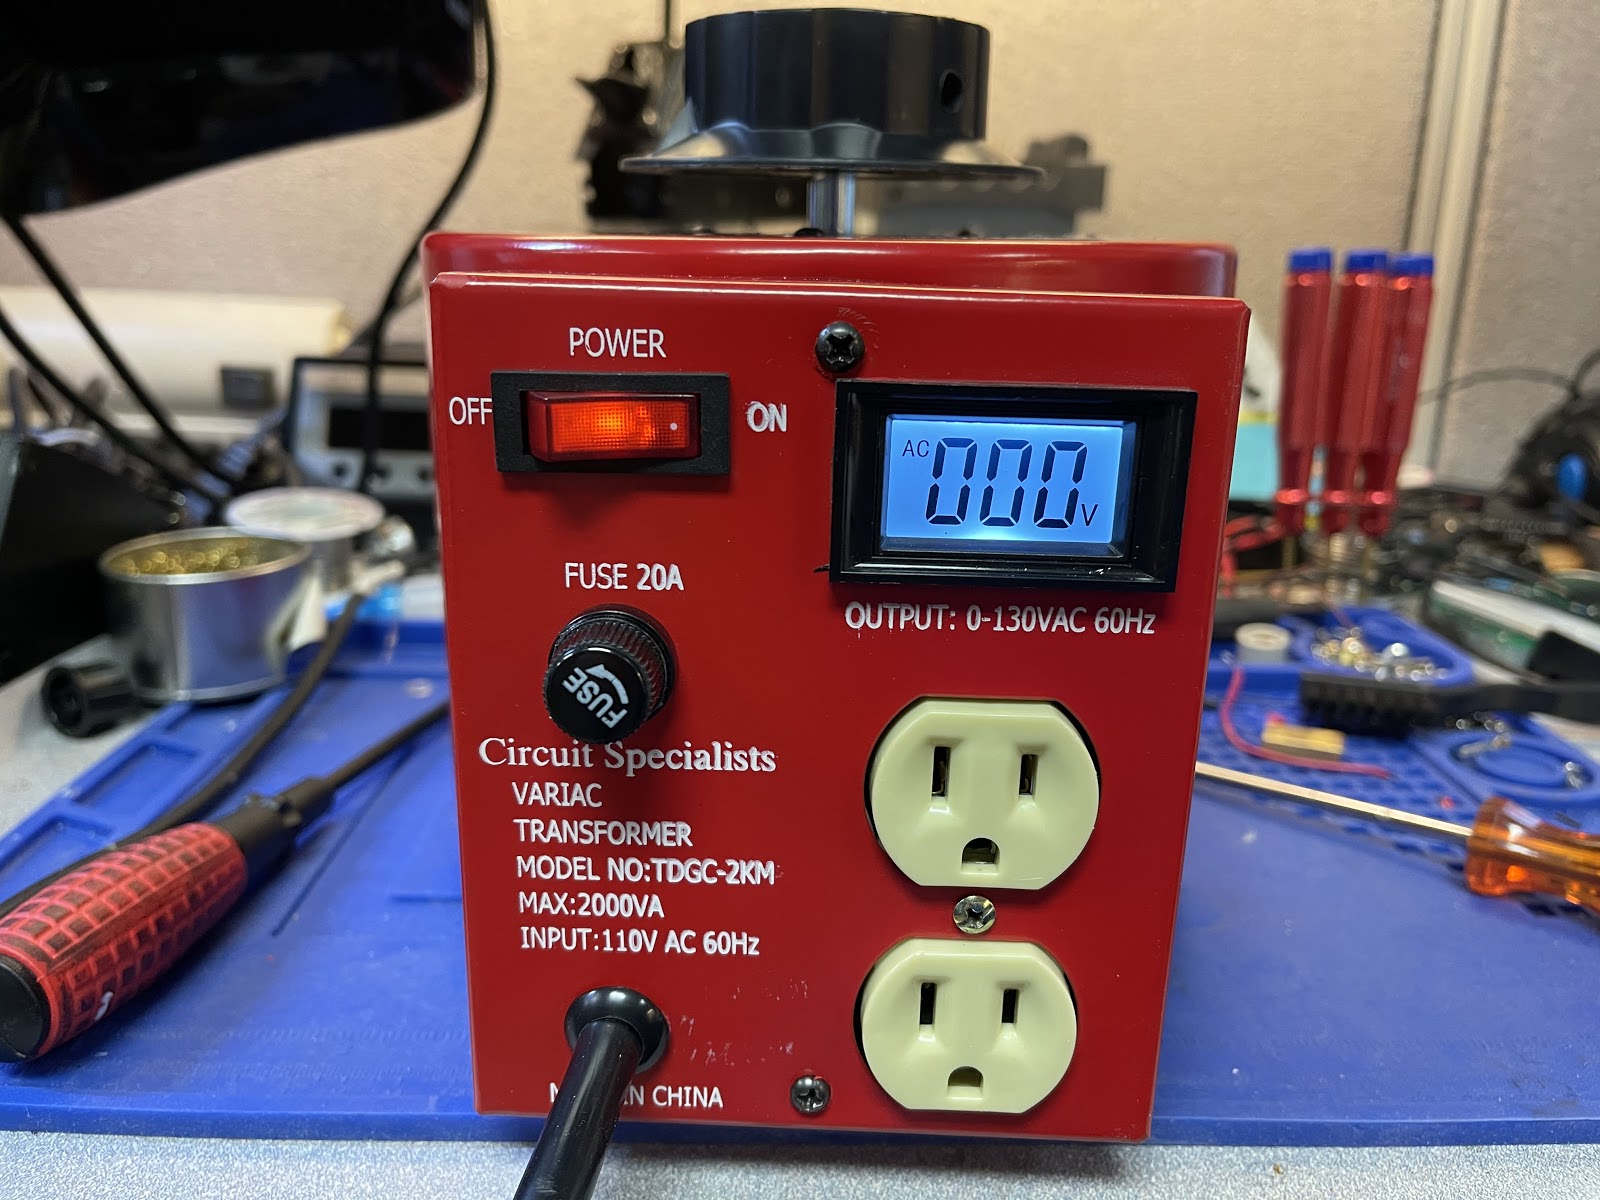
Make sure the TDGC2-2D can operate at the full range from 0VAC to 120VAC. You can also use a budget multimeter to measure the output voltage compared with the display panel.
Conclusion
In general, the TDGC2-2D should be serviced every six months if there is minimum knob movement. During service, technicians should take a visual inspection of the brush’s condition. Furthermore, clean the surface of the coil and make sure there is no debris on the coil surface.
If the knob turns more frequently, the unit should be serviced every 2 to 3 months to make sure the condition of the brush is operating properly. Lack of doing so could result in undesired effects.