
Breadboards


Filters
Filters


Solderless breadboards make prototyping simple. Breadboards enable you to connect electronic components in thousands of ways to produce working circuits without soldering or damaging your circuit board — and you don't need additional tools.
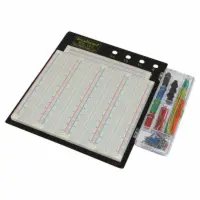
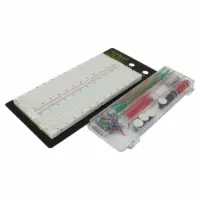
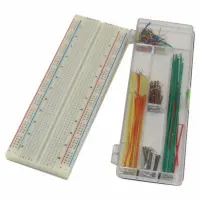
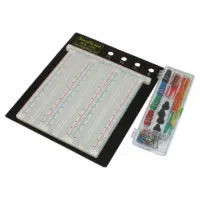
Our durable breadboards feature nickel-plated clips designed to withstand five thousand insertion cycles and come with an ample supply of jumper wires. Most models have heavy-duty aluminum backing and voltage and grounding posts. Ideal for educational electronics environments and prototype development
What is a Breadboard?
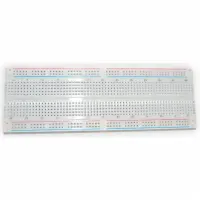
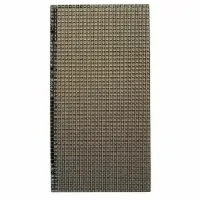
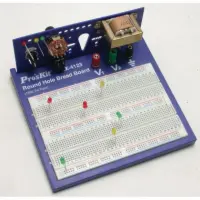
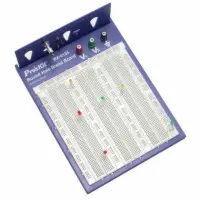
Breadboards are a type of electronic prototyping board (or protoboard) that is used to build circuits without having to solder the electronic components together. The boards feature rows of holes, called contact points or tie-points, in which wires can be inserted to connect the different electrical components.
Many of these tie-points are organized into rows of 5 contact points. These individual rows of 5 contact points are connected by a single metal strip within the plastic housing. Altogether, these rows of connected contact points are called terminal strips.
To the side of these connected rows or terminal strips are vertical columns of holes that are labeled - or + and are usually set apart by a blue and red line. These are called bus rails or power rails (or distribution strips) because, when connected, the bus rail supply power to the components in the rows of terminal strips beside it.
Large breadboards often offer multiple sets of terminals and bus rails that are disconnected so you can prototype different circuits and projects on the same board.
What is a Breadboard Used For?
Breadboards are often used by engineers and hobbyists to build prototypes of their inventions or experiment with new circuit designs. Breadboards are also frequently used in education to teach students about circuits and electronics. These beginner breadboard electronics projects usually involve lighting an LED or setting up a buzzer alarm.
Breadboards can be used semi-permanently or permanently for home projects, but printed circuit boards are going to be more stable and durable over time compared to their protoboard counterpart, the breadboard.
Types of Breadboards
Powered Breadboards vs. Standard Breadboards
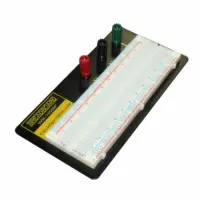
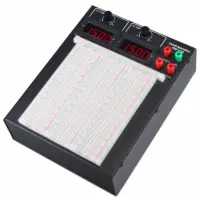
A powered breadboard, like our popular PBB-272C 15V powered breadboard kit, has a built-in power supply that provides electricity to all the components on the board.Powered breadboards might have some additional functionality, like variable power, an LCD display, and negative voltage capabilities.
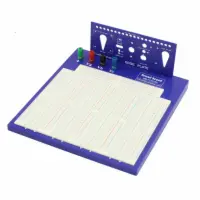
Non-powered breadboards are more common. These breadboards require an outside power supply to be hooked up to the power rails.
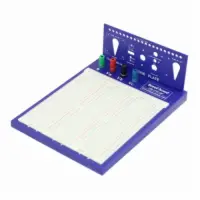
Both powered and unpowered breadboards can come with built-in binding posts, which make it easier to hook up external power to the breadboard by offering built-in jacks.
Common Breadboard Sizes
Breadboards come in a variety of sizes. The size of the breadboard might be written out by dimensions, although you can usually tell the relative size of a breadboard based on the number of tie-points. The following are the most common breadboard sizes:
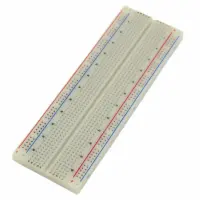
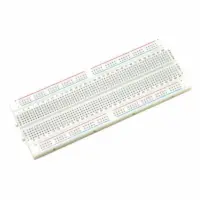
Large Breadboards have 830 or more tie-points and often offer multiple sets of power rails and terminal strips. Large breadboards are ideal for housing multiple, disparate projects on one board—or having one large project across multiple panels! Extra large breadboards with 3220 tie-points are sometimes multiple breadboards mounted on one single metal plate.
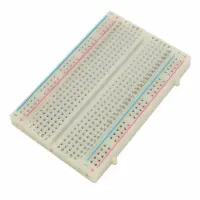
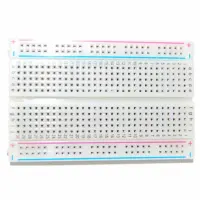
Mid-Size or Half-Size Breadboards have about 400 tie-points, almost half the contact points of large breadboards of 830 points. These are ideal for small projects and can be more convenient for prototyping when it comes to portability and prototyping smaller circuits.
Mini Breadboards (also “Tiny Breadboards” or “Small Breadboards”) are—you guessed it—tiny breadboards with around 170 tie-points. Mini breadboards don’t typically come with power rails. Mini breadboards can provide mini circuits that are then jumpered over or connected to larger breadboards.
You might also come across extra tiny breadboards or breadboard bits that might have only 16 contact points and no power rails! These extra small breadboards, along with breadboard minis, might be used to create unique electronic jewelry.
How to Choose a Breadboard
On the outset, most breadboards look the same: a white plastic body (although some are transparent) with labeled rows and power rails.
Some breadboards, like those with built-in power supply or binding posts, have a more obvious edge over the average breadboard because of their convenience. However, there are a few ways you can assess the quality of a standard breadboard.
✔️Pay Attention to the Tie-Points
At the start of your search, the number of tie-points is the most important breadboard spec to watch for. Consider the types of projects you want to use your breadboard for. Do you plan to test multiple circuits on one board? In that case, you’ll want a large breadboard. Mid-size breadboards are ideal for smaller prototypes, and both mid-size and mini breadboards can be great additions to existing breadboard projects that require a few more contact points to get the job done.
✔️Seek Out Quality Spring Contacts
It’s hard to overstate the value of effective tie-points, also called spring contacts. Spring contacts can be made of either stainless steel (or steel with nickel plating) or phosphor bronze (or any copper-based alloy) with nickel plating.
Copper-based phosphor bronze spring contacts are preferred over steel contacts. Copper-based spring contacts have fantastic long-term spring properties, are more conductive than steel spring contacts, and can withstand thousands of insertion cycles with no change in connection quality.
✔️Opt for Clear, Color-Coordinated Labeling
You also want the labels on your breadboard to be clear and easy to read, with power rails labeled - or + and columns labeled alphabetically. All of the labels should line up with the row or column it’s labeling, otherwise, it might be difficult to accurately track where you’ve placed your components. It’s also ideal for columns labeled by letters at the top of the board to match the labels on the bottom.
✔️Pay Attention to the Wire Size
You could have the best quality spring contacts and metal strips, but if you’re using the wrong size or type of jumper wire, you’re bound to have connectivity issues. 22 AWG wire is a standard size for breadboards, and solid wire is preferable over stranded.
Other Breadboard Features and Considerations
While not the most essential aspects of a breadboard, the following features can also ensure you’re getting the most for your money.
✔️Snap-On Capabilities
Breadboards often come with plastic connecting knobs on the sides and tops of the plastic body so you can effectively “snap-on” and combine other breadboards together. If you already own a few breadboards, try to order breadboards that have compatible “snapping” capabilities.
✔️Binding Posts
Binding posts are a nice bonus feature that makes it easy to connect your breadboard to outside power. Banana jack binding posts are the easiest to use: just plug in your power and you’re ready to go!
✔️Built-in Power Supply
You can skip the hassle of hooking up a battery to your breadboard altogether and use a powered breadboard instead! Better yet, get a powered breadboard that allows you to adjust the voltage to the exact amount you need to run your project. Otherwise, you’ll need to be mindful of the batteries you use or the limits of your circuitry—too much power, and you could short-circuit. Plus, most powered breadboards come with an LCD display (no need for a multimeter to read voltage!) and banana jacks.
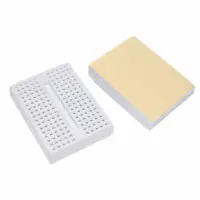
✔️Adhesive or Well-fitted Backing
Many breadboards come with an adhesive backing, allowing you to stick your breadboard wherever is most convenient for you. However, it’s good to purchase a breadboard (even an adhesive one) with a backplate included that can stick to the adhesive.
The metal plate should be well-fitted to the breadboard, otherwise the backplate might prevent you from using the “snap-on” features to combine breadboards.
✔️Uninterrupted Power Rails
Keep your eye out for power or bus rails that extend as one clean line from end to end. Sometimes power rails will have a gap in the connection at the middle of the breadboard, forcing you to use jumper wires if you want to access power on the end of the breadboard that’s not connected to a power source. While not a deal-breaker, interrupted power rails can be an annoying inconvenience.
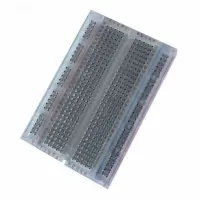
✔️Transparent Housing
While it has nothing to do with the overall functioning of the breadboard, transparent breadboards can be more aesthetically appealing, especially to a beginner who wants to see their circuits at work.